Most machine vision cameras supports external trigger signal to fire the frame acquisition, and you can set up that behavior using NI MAX or programmatically on LabVIEW .
Using NI MAX
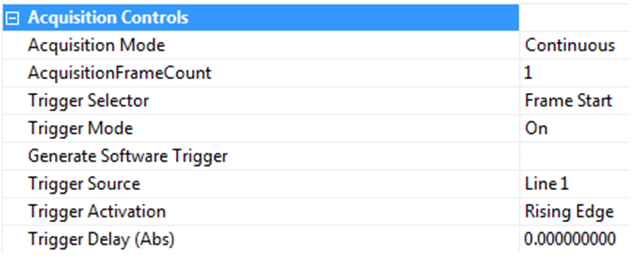
- Select the camera in Devices and Interfaces.

- Go to the tab Camera Attributes and look for the category Acquisition Control. For this procedure it will be used as example a Basler camera and attribute's names can differ from the images below.
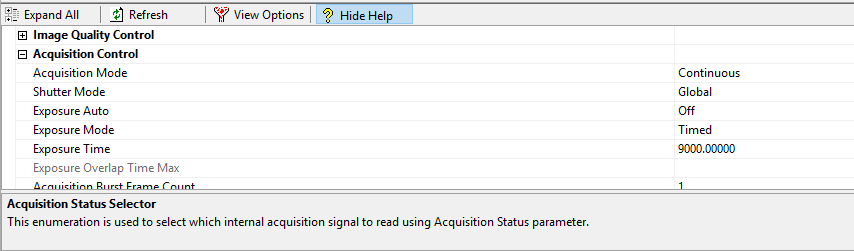
- To set up external triggering, you will typically need to configure the following for the camera:
- Trigger mode – turn triggering on.
- Trigger selector – configure the action executed when trigger is received. For some cameras, besides the option Frame Start, you can also set the Trigger Selector to start the acquisition of a sequence of images.
- Trigger source – select which camera I/O line is receiving the external trigger signal.
- Trigger activation – configure the camera to trigger either on the rising or falling edge of the external trigger signal.
Using NI LabVIEW
You can read and/or write on every camera properties available on NI MAX using NI IMAQdx driver.
- With a camera section opened, use NI IMAQdx property node to have read/write access to the properties.
- To write or read a attribute, you must select first the Active Attribute on property node and then write or read the value. The figure below shows an configuration example of the following attributes: Trigger Mode, Trigger Source, Trigger Selector and Trigger Activation.
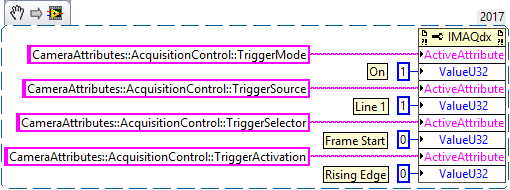
- The attribute values represent the index of the attribute value (starting at 0) you can see on NI MAX.
- It is important to notice that the attributes' names can differ for different camera models. To ensure you are using the right alias for the attribute, refer to this example which lists all the camera's attributes alias programmatically.
Additional Information
For a full example code on how to trigger a camera, refer to the LabVIEW example called Triggered Grab.
- Go to Help>>Find Example...
- Search for Trigger Grab.
- Open it and explore the code to have a starting point.
In case you want to validate the trigger first using software trigger, refer to
Generate IMAQdx Software Trigger in LabVIEW .