Installing Visual Studio Code
- Navigate to the Visual Studio Code Installation Page.
- Download the IDE installer for Windows.
- Run the setup.exe.
- Follow the onscreen prompts to install.
- Once finished, launch Visual Studio Code.
Installing Extensions
- In Visual Studio Code, open the Extensions pane by clicking the extension's icon on the left of the IDE.

- Search and install the C/C++ Extension Pack.

Installing the C/C++ Cross Compile Toolchains
- Navigate to the GNU C & C++ Compile Tools x64 and download the Windows toolchains for x64. The toolchain is a compressed collection of the required files rather than an installer.
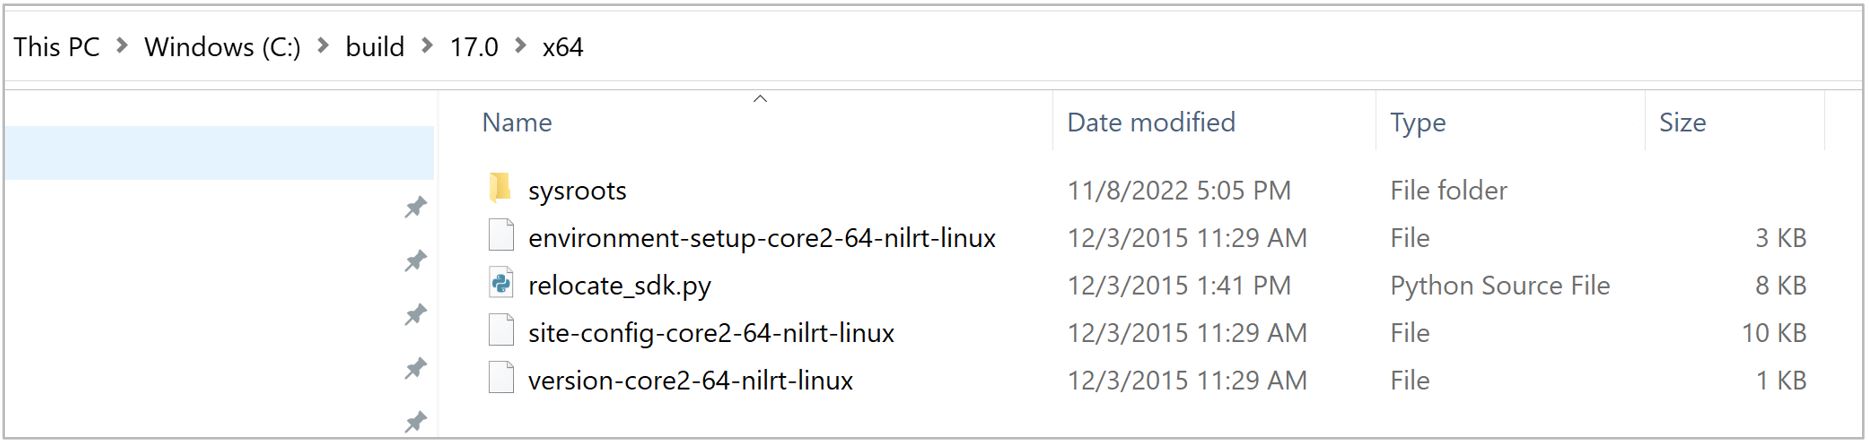
- Extract and copy the contents of the toolchain to C:\build\<toolchain version>\x64\. The resulting file structure should look as follows:
MobaXterm
MobaXterm will be used as a sFTP client to transfer files to and from a NI Linux Real-Time system as needed. Remote host : IP address of Linux RT. Specify username : user name of Linux RT.

CMake
CMake is a tool that generates the files needed for build tools such as Make or Ninja. NI recommends adding CMake to the system PATH during installation for ease of use:

Ninja
Ninja is a small build system and one of the tools CMake can generate build files for. Since installing Ninja is a bit more involved than simply running a Windows installer, follow the below steps to ensure it’s configured correctly.
- Download the Ninja binary files for Windows.
- Extract and copy Ninja.exe to a suitable location (e.g., C:\Program Files\Ninja\).

- The executable can be added to the system PATH for easier use. Press Start+R to open the Run window, then type in sysdm.cpl and hit OK. This will launch the System Properties window.
- In the System Properties window, navigate to the Advanced page and select Environment Variables… to open the Environment Variables window.
-
In the System variables section of the Environment Variables window, navigate to and select Path then click Edit…
-
In the Edit environment variable window, click New to add a new path.
-
Enter the path to the directory containing the ninja binary(e.g., C:\Program Files\Ninja\). Click OK.
- Click OK twice more to exit the System Properties window.
- Confirm that Ninja is now accessible in a new command prompt by running ninja --version.

Configuring Visual Studio Code
- Launch Visual Studio Code.
- Select Open Folder... from the landing page or File>>Open Folder...
- Navigate to and select the folder created previously to open it in Visual Studio Code.
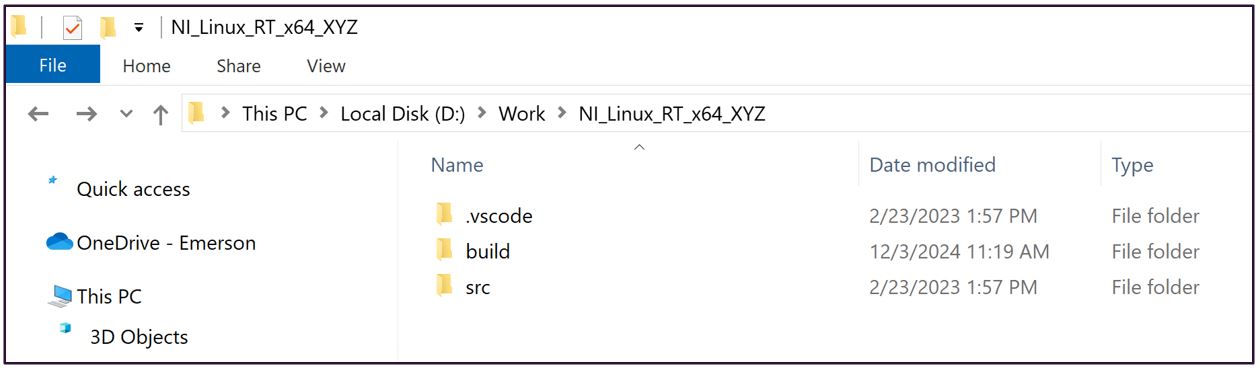
- Confirm that the directory structure looks as follows:
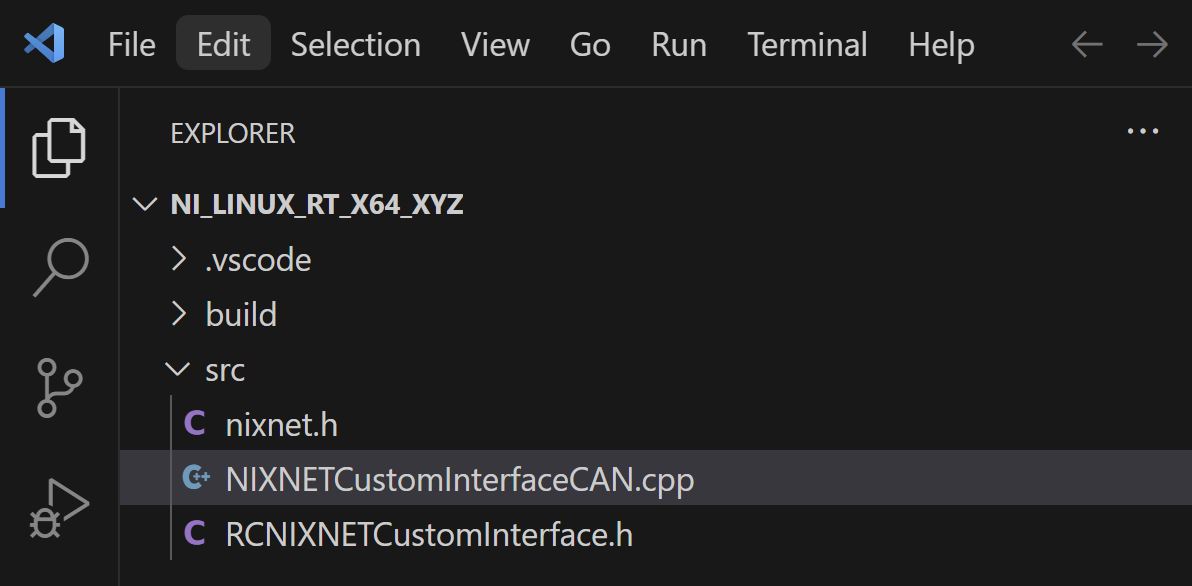
- Click the *.cpp file in the folder of src and modify the code in int CAN_Transmit(nxFrameCANFD_t *nxFrame){}.
- Open the command palette via Ctrl+Shift+P or View>>Command Palette...
- Search for and select Tasks: Run Task in the command Palette. This will pull up a list of the custom tasks available in the project.

-
From the list, select CMake Generate Build Files.

-
Confirm that the task runs and completes successfully in the Terminal window. There should be several new files in the project’s build/ directory, including a new bin/ directory for the build output.
-
Open the Command Palette and select Tasks: Run Task again.
- Select Ninja.
-
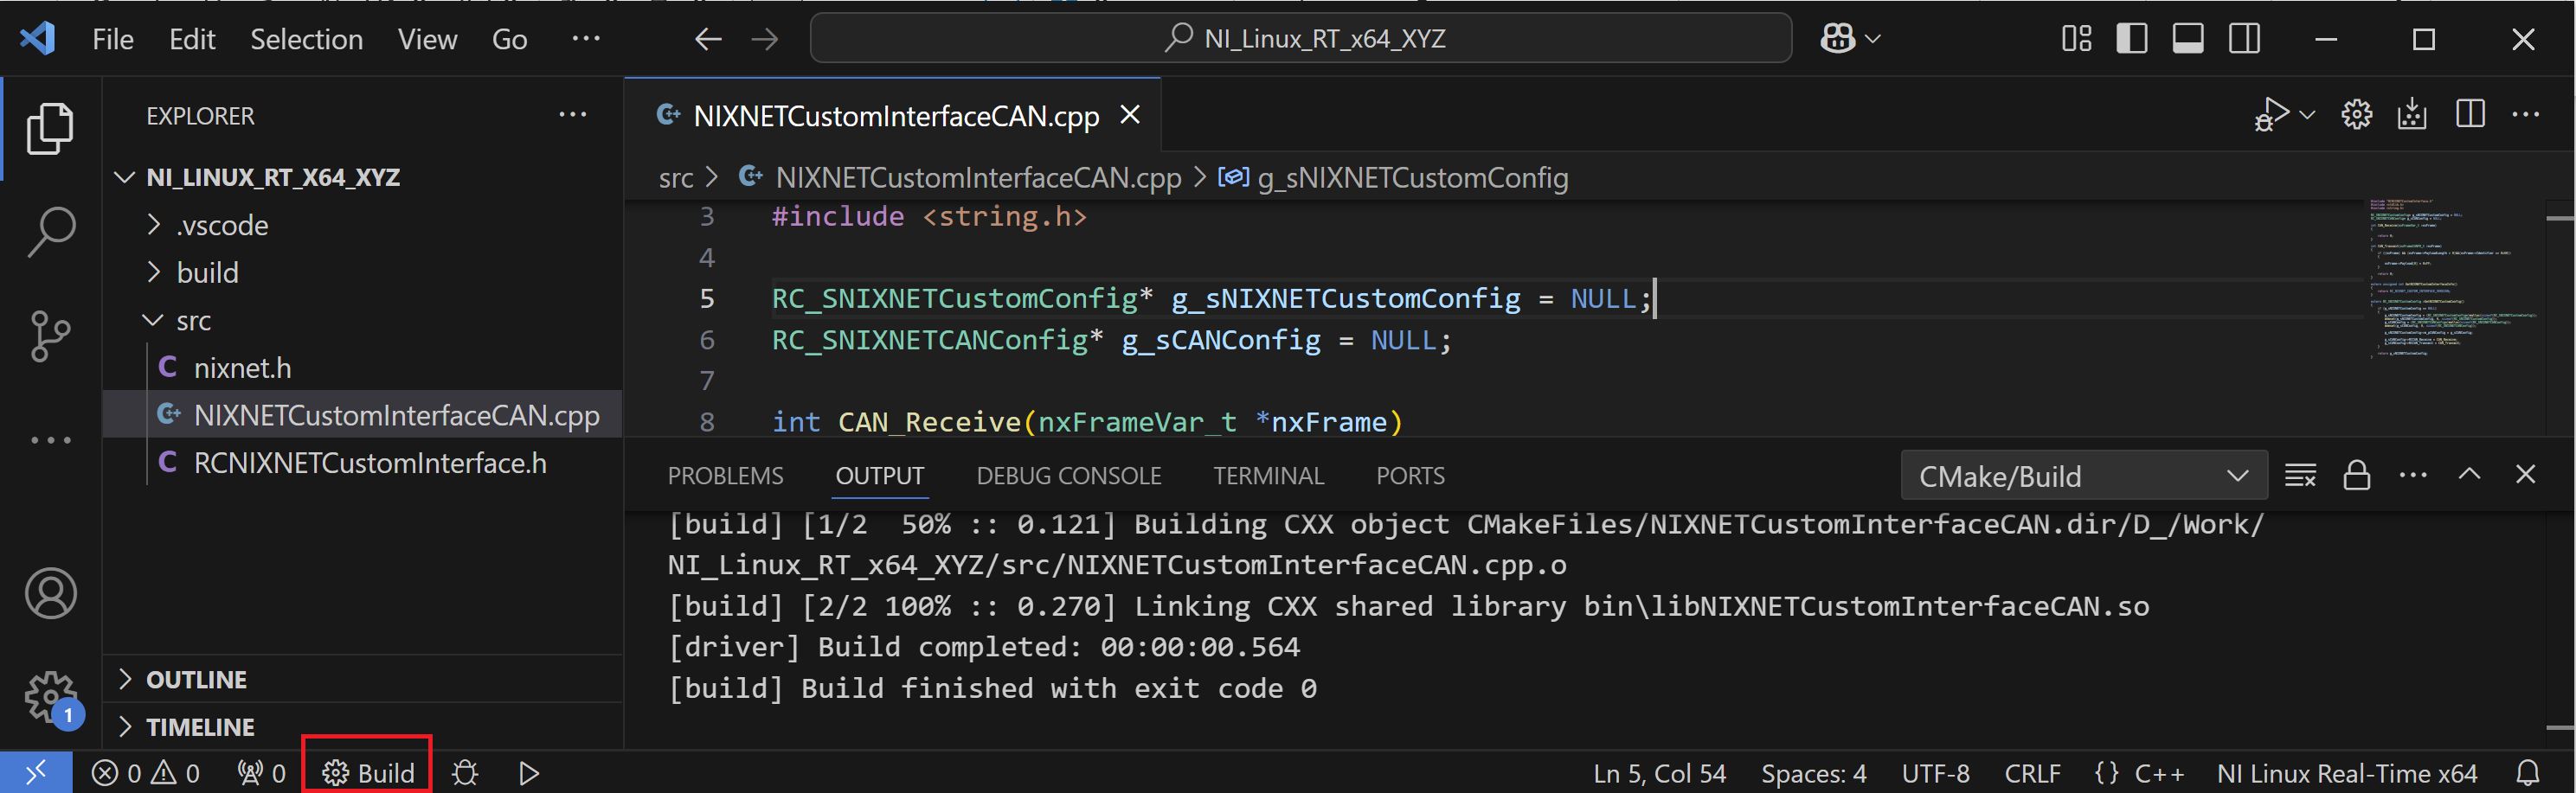
Confirm that the build task runs successfully and that there is now a *.so binary in the <project folder>/build/bin directory.

After the compile toolchain is created, just click Build to generate the so file.