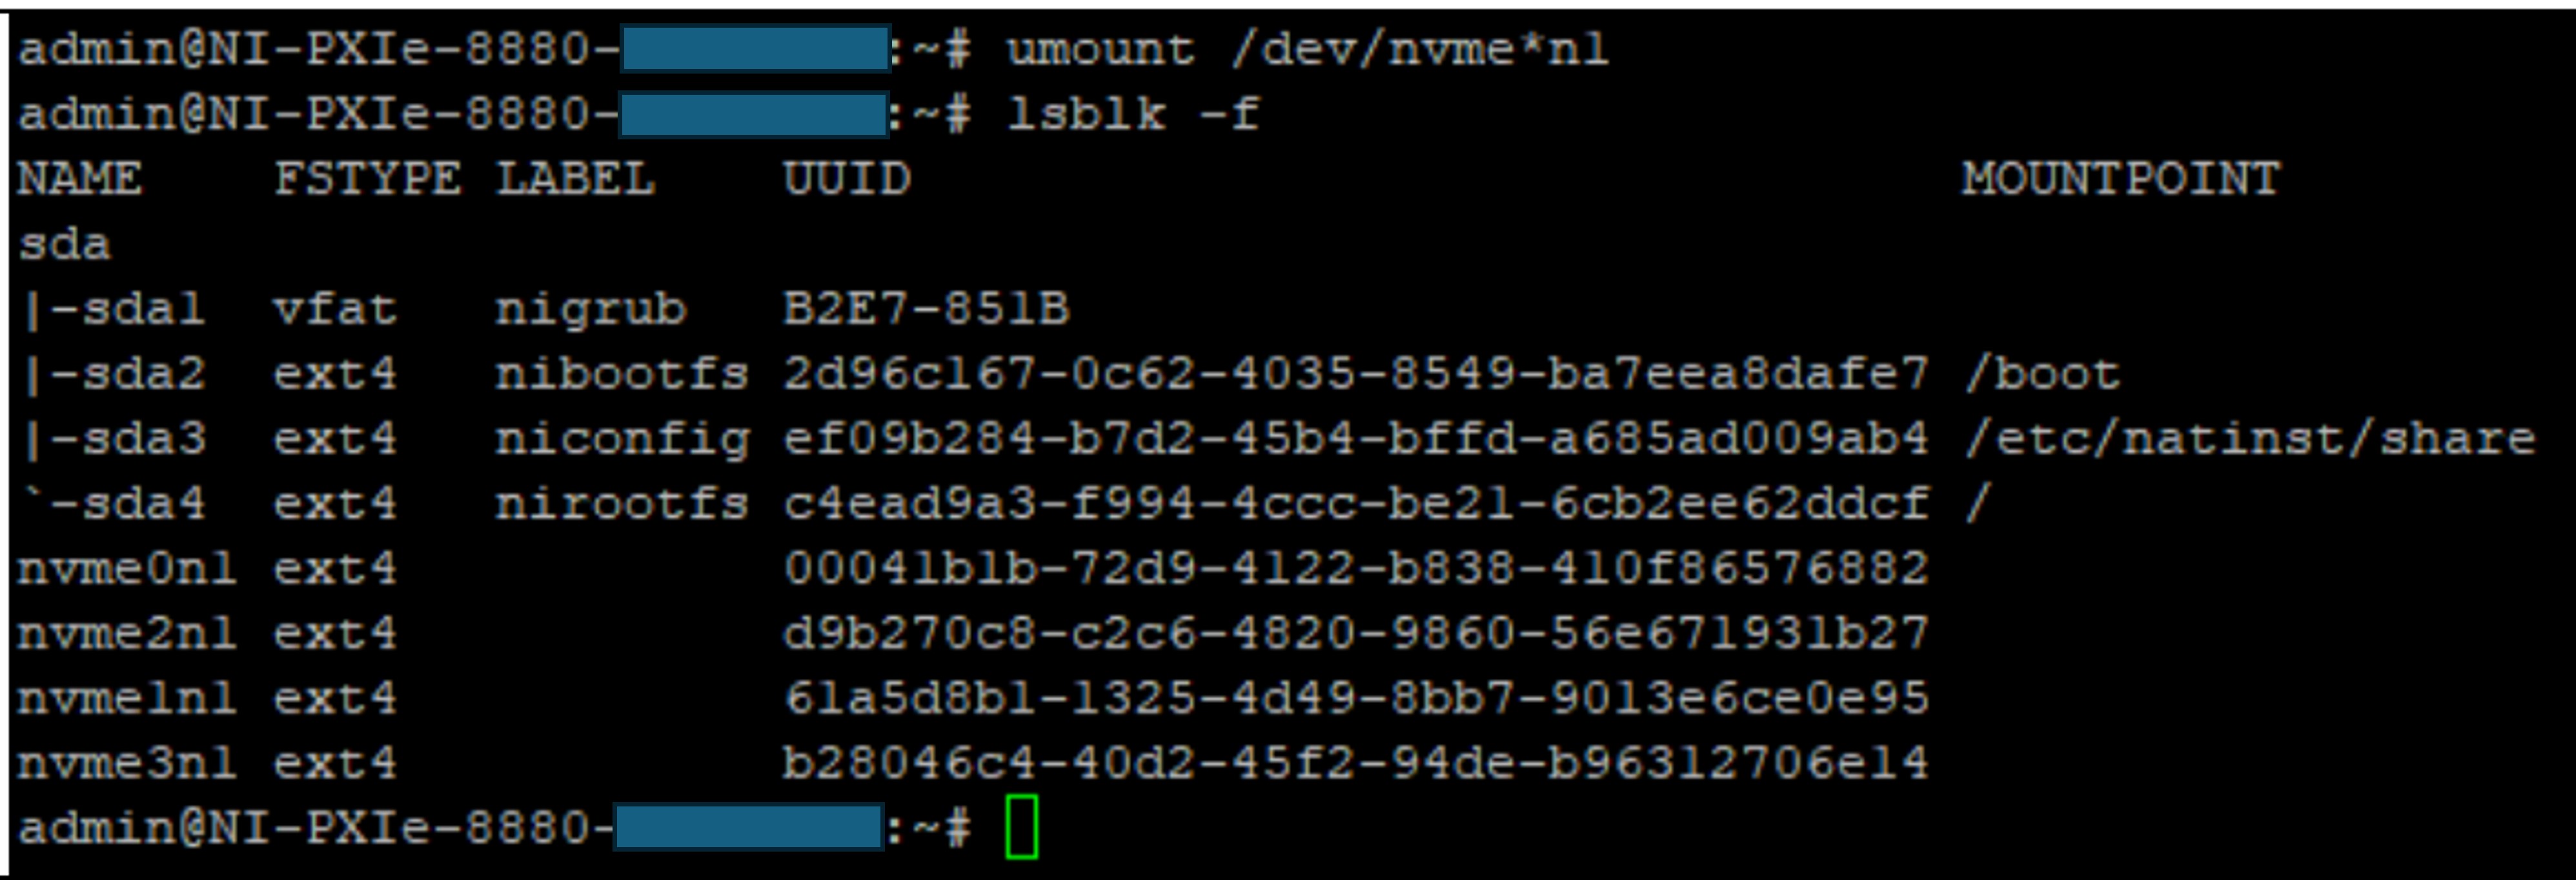
1.Execute lsblk -f command to identify the SSDs. The available drives in the system will be listed as below image where nvme0n1~nvme3n1 is the NVMe M.2 drives connected to PXIe-8267.

2.Execute umount /dev/nvme*n1 command to unmount them.

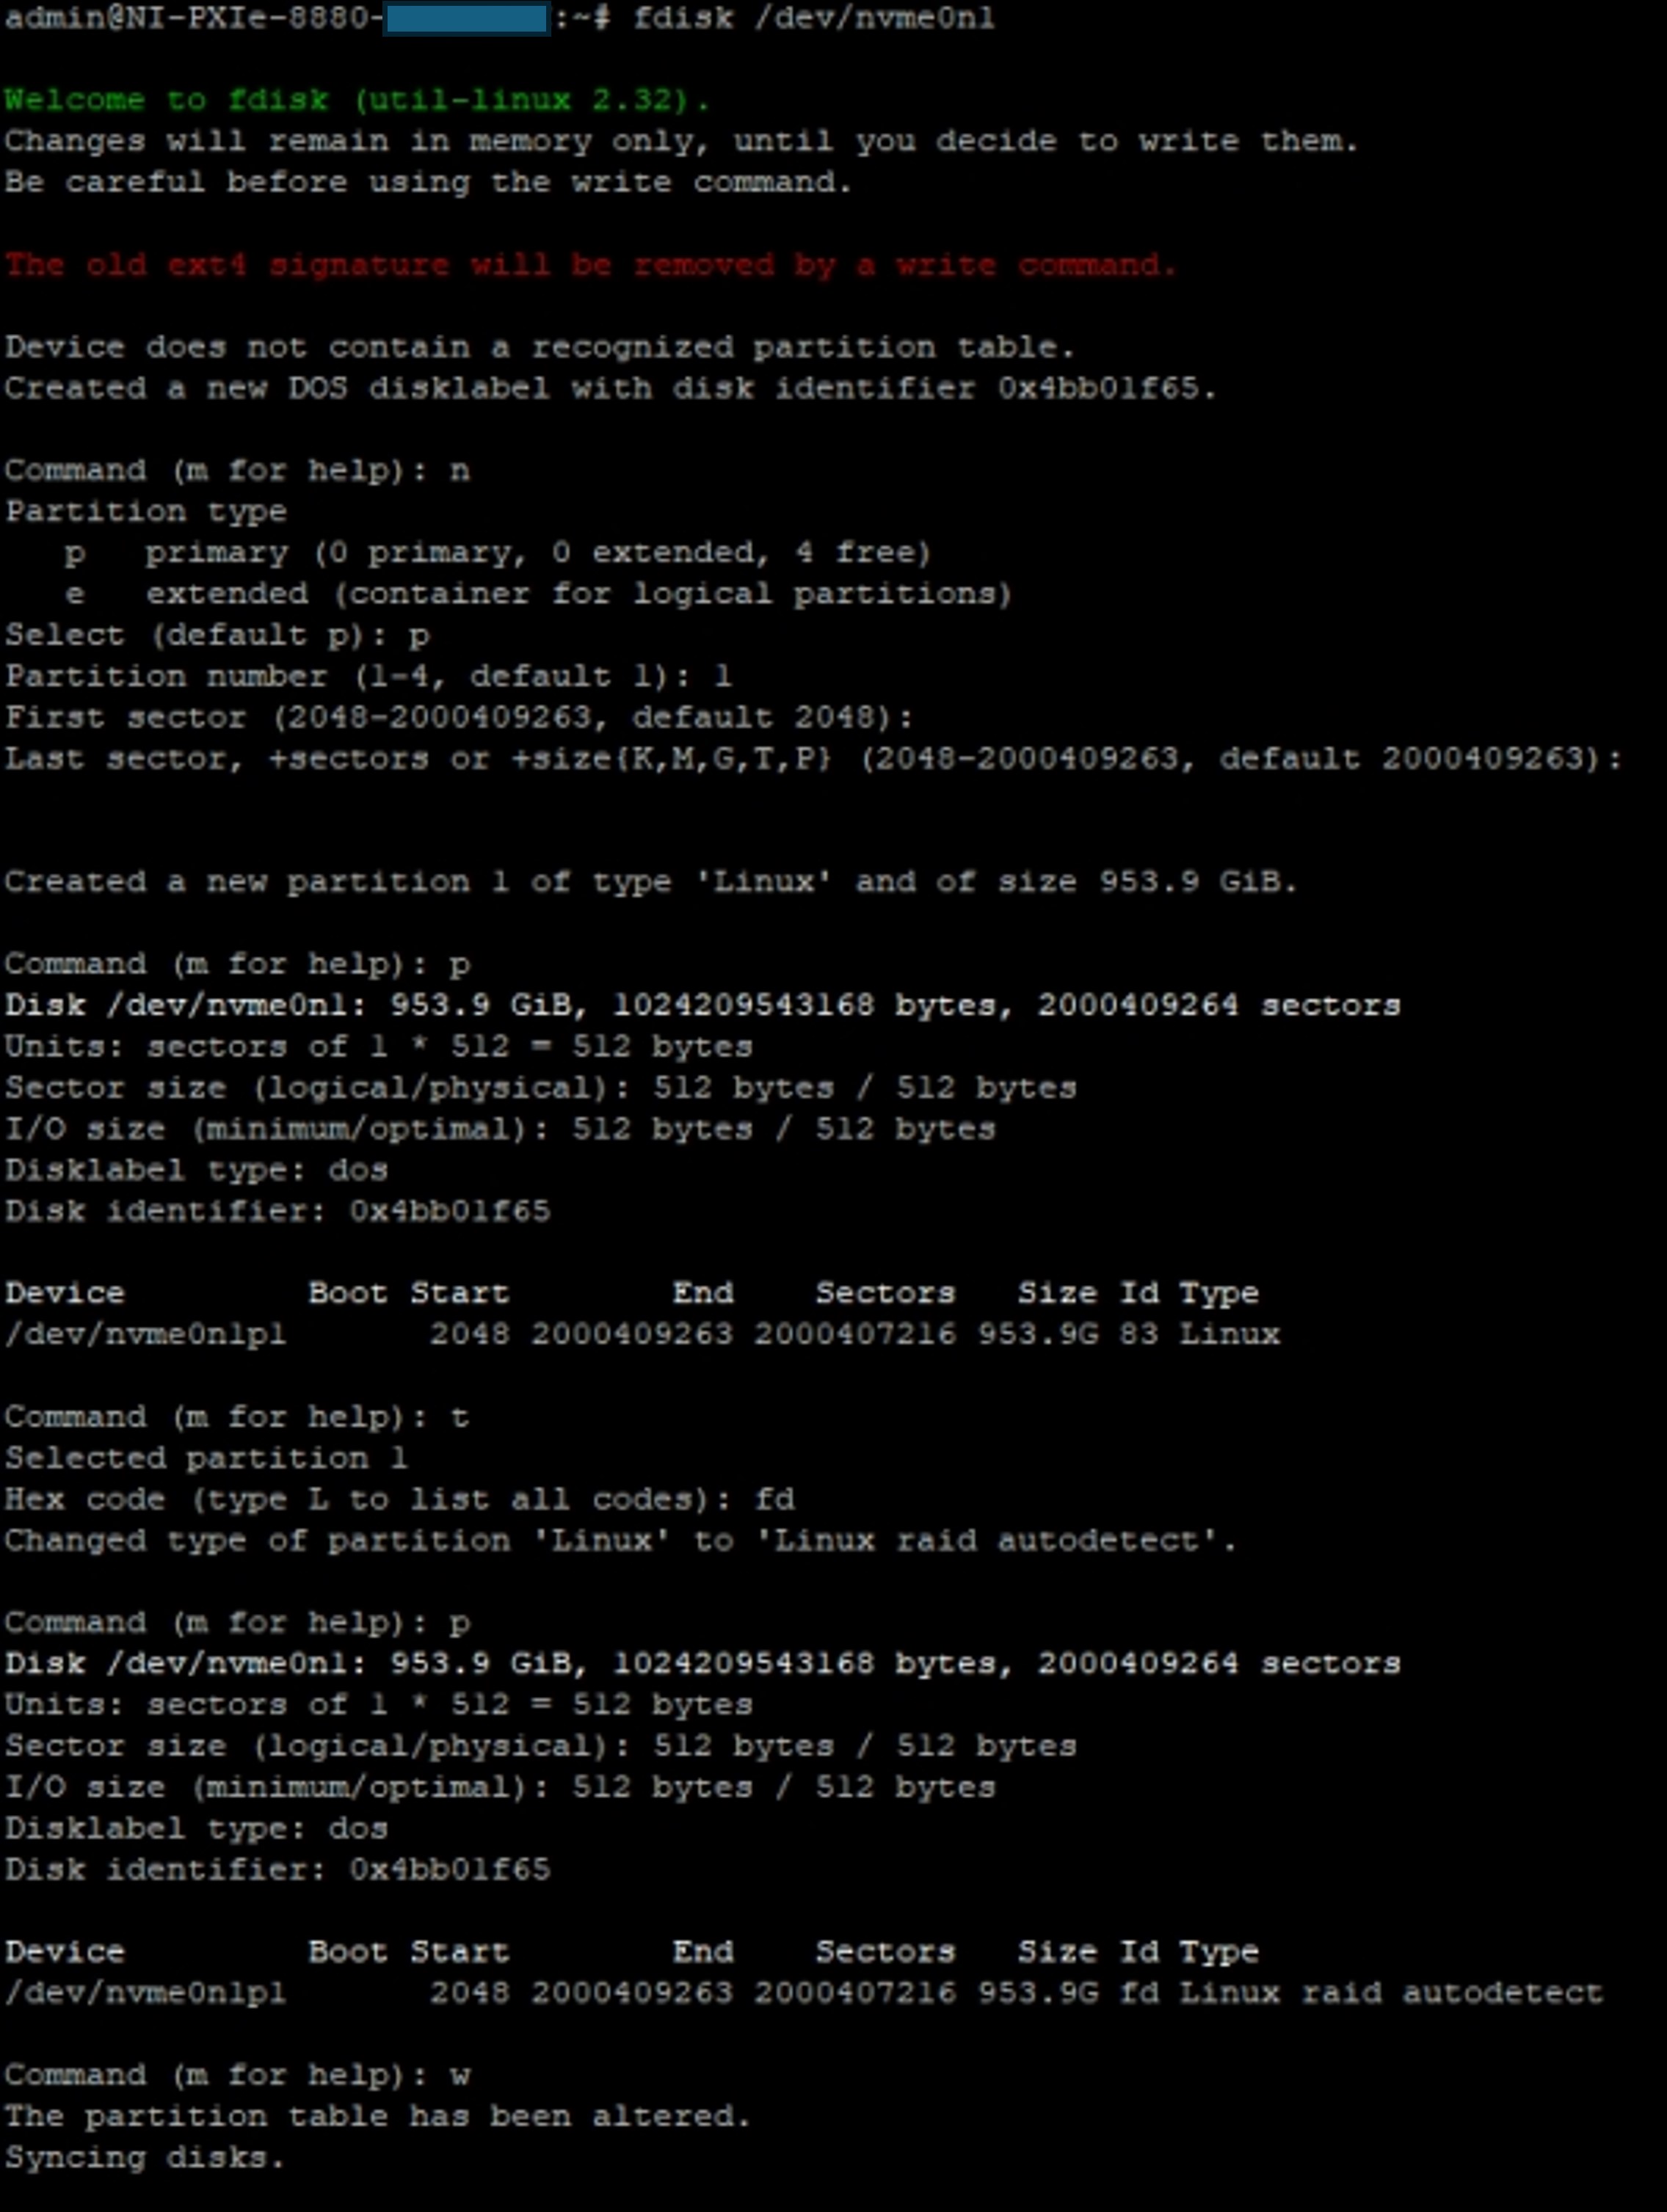
1.Use fdisk /dev/nvme0n1 command to format nvme0n1 SSD. fdisk is an interactive command which requires user inputs. Use the following sequence of inputs to format the SSD successfully.

2.Repeat the same step for each SSD that you want to format.
1.Install lvm2 software tools using opkg (NI Linux RT default package manager) by executing the below commands.
opkg update
opkg install lvm2
2.Execute vgcreate rd00 /dev/nvme?n1p1 to create Volume Group (VG). (Refer to vgcreate manual page for explanation on command arguments)

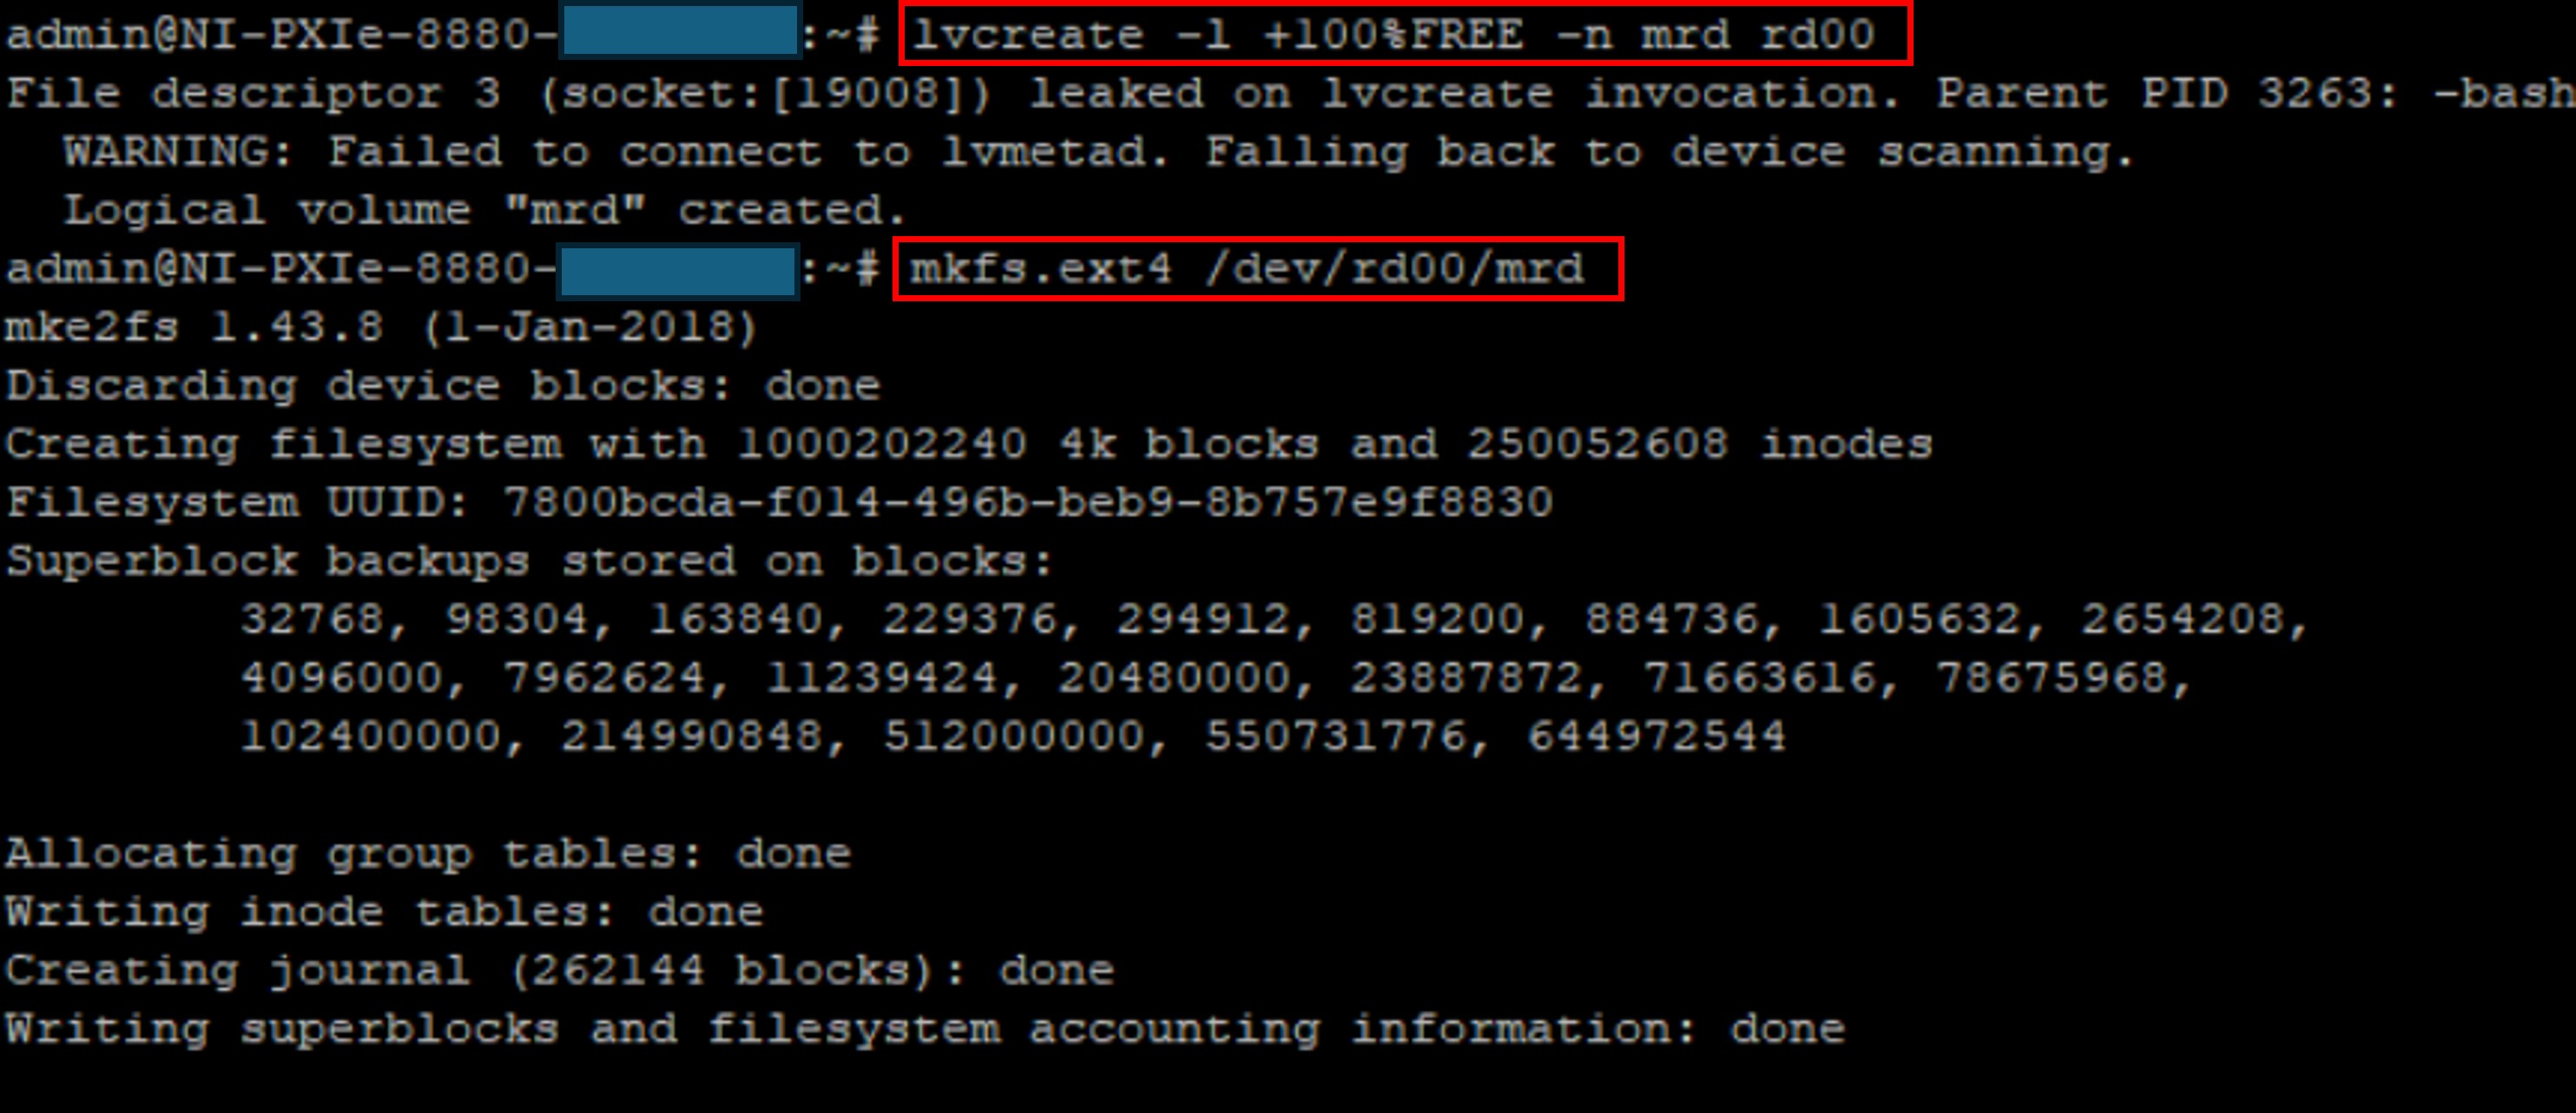
3.Execute lvcreate -l +100%FREE -n mrd rd00 to create Logical Volume (LV). (Refer to lvcreate manual page for explanation on command arguments)

1.Execute mkfs.ext4 /dev/rd00/mrd to create ext4 file system on the previously created logical volume. (Refer to mkfs manual page for details)
mkfs.ext4 /dev/rd00/mrd
2.Execute mkdir /home/raid command to create mountpoint directory named raid under the /home directory.
mkdir /home/raid
3.Change write/read access to the mountpoint directory by executing the below command. (Refer to chmod manual page for details)
chmod o+rwx /home/raid
4.Use mount /dev/rd00/mrd /home/raid command to mount the LVM drive to the mountpoint created previously.
mount /dev/rd00/mrd /home/raid
1.Use the following steps to create a Hello World text file.
cd /home/raid
echo “hello world” > hello_world.txt
2.Check the contents of the created hello_world.txt by executing cat hello_world.txt command. If the configuration executed properly the content of the created hello_world.txt file is returned as below.

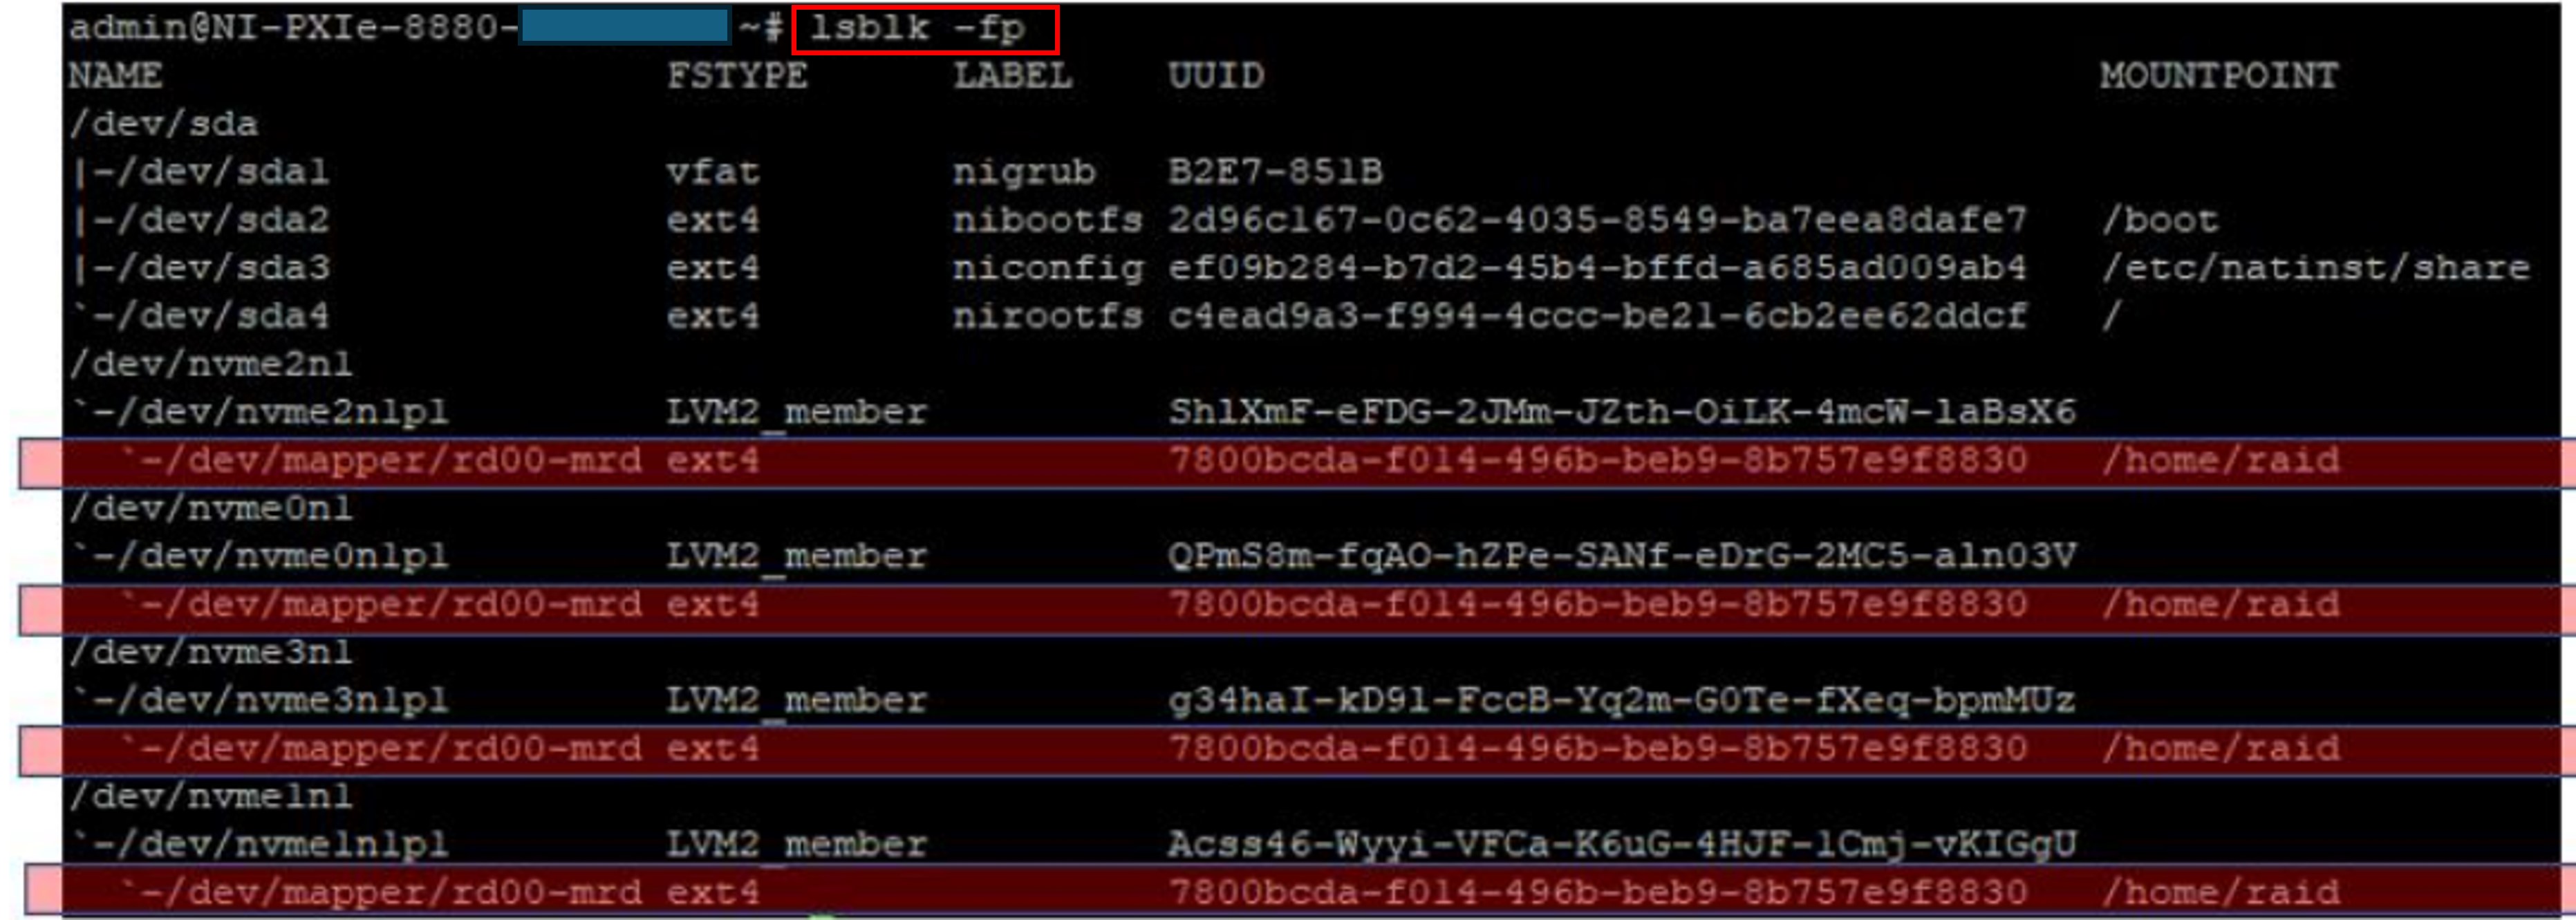
1.Use lsblk -fp to list the available drives. Notice the mapping between LVM drive and mountpoint.

2.Alternatively, it is also possible to use mount -l to list down the mounted devices.

The following steps are necessary to automatically mount SSDs after reboot.
1.Use blkid to find out the UUID of the mapped LVM drive. In the below example we get the UUID of the created LVM drive as 7800bcda-f014-496b-beb9-8b757e9f8830.

2.Execute cat /etc/fstab to view the content of fstab file. Below is an example of default fstab file contents.

3.Use vi /etc/fstab to modify fstab file contents. The LVM drive must be included in the fstab file. Below is an example of a fstab file after adding the LVM drives.

Note: "vi" is a command line interface text editor for Linux. Please refer to publicly available resources on how to use vi to edit files in Linux.
4.Use vi /etc/init.d/start_ssd.sh to create a new script to be executed when boot up. The script contents follow:
#!/bin/sh
vgchange -aa rd00
mount /dev/rd00/mrd /home/raid
You can verify the contents of the created start_ssd.sh script file using cat /etc/init.d/start_ssd.sh

5.Execute update-rc.d start_ssd.sh defaults to register the start_ssd.sh as part of scripts to be executed during system startup.
