- To access FlexLogger Plug-in template in LabVIEW, you need to install FlexLogger Plugin Development Kit .Launch NI Package Manager and search for FlexLogger Plugin Development Kit.
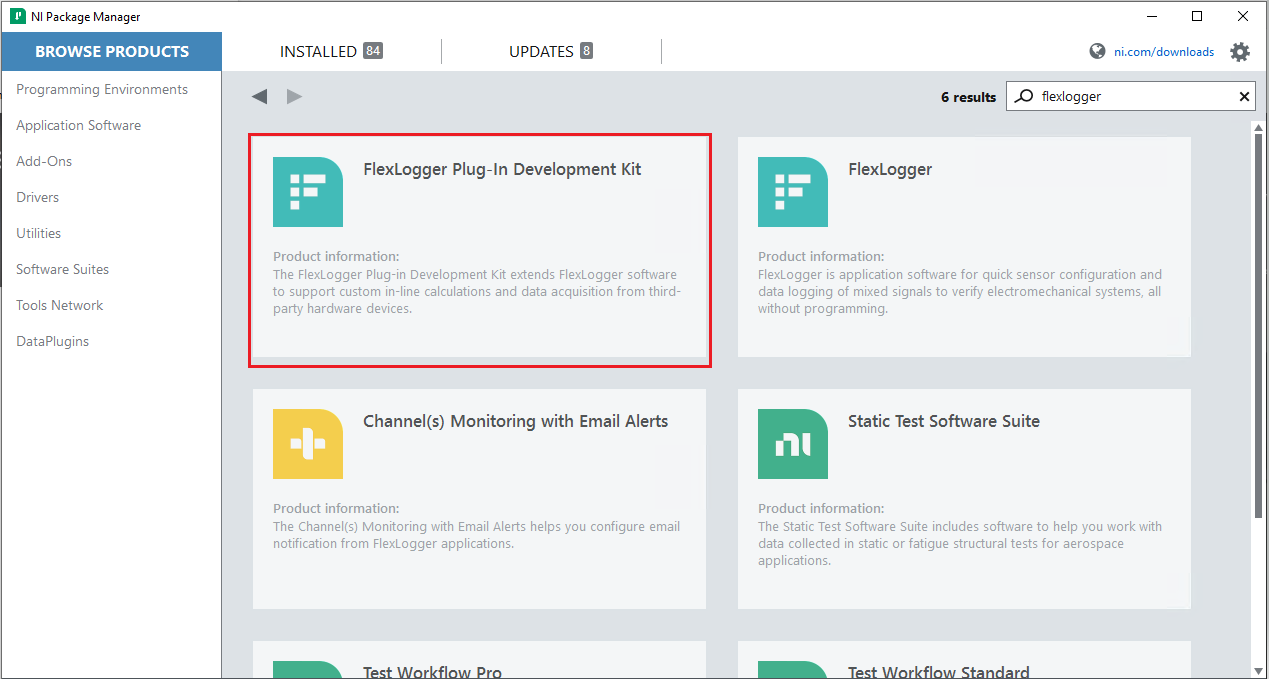
- Select and INSTALL the FlexLogger Plugin Development Kit version that is compatible with your FlexLogger and LabVIEW version.
(Click
here to check compatibility for LabVIEW, FlexLogger, and FlexLogger Plugin Development Kit.)
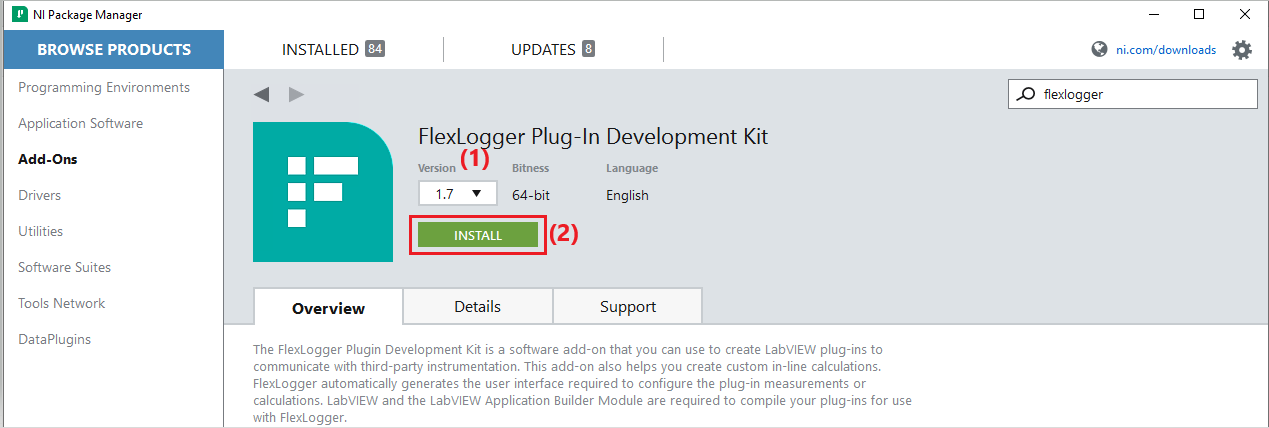
- Follow the pop-up windows instructions to complete the installation.
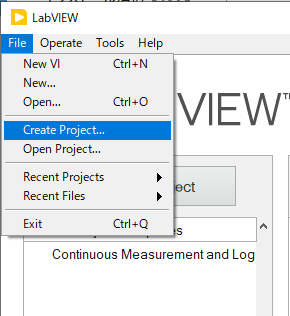
- Launch LabVIEW.
- In LabVIEW, click File >> create project .
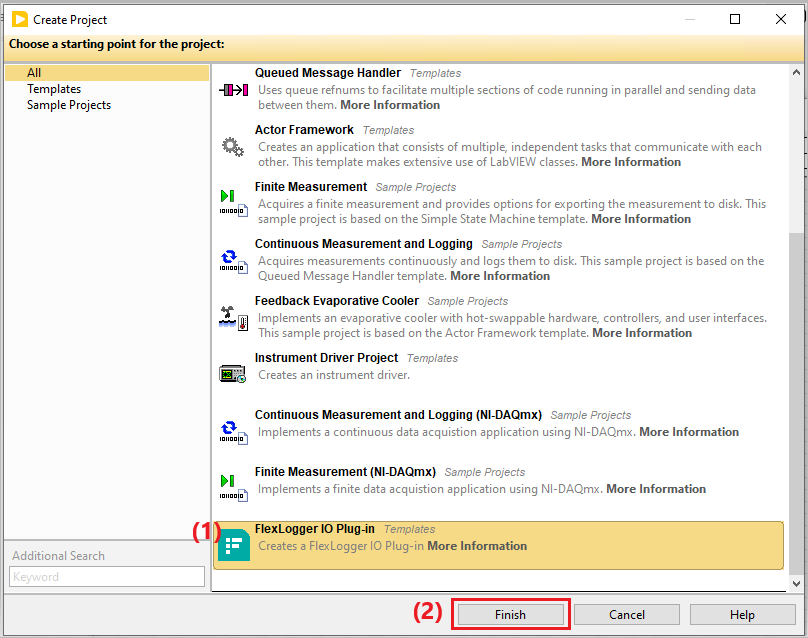
- From the Create Project window, select FlexLogger IO Plug-in and click Finish.
- In the Create FlexLogger IO Plug-in window, update the IO Plug-in Name and select a Plug-in Template based on your goal.
- (Optional)Update the Description and Destination Directory (Source) for the plug-in. By default, the wizard saves new plug-ins in
My Documents\LabVIEW Projects\FlexLogger IO Plug-ins\ directory
- CLick Create
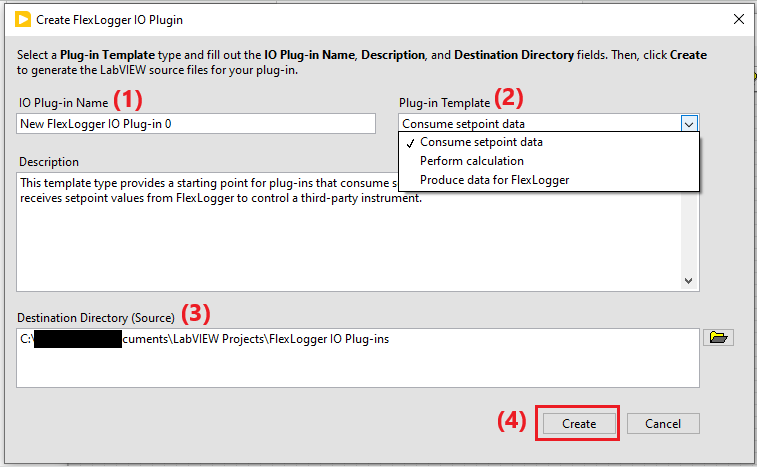 Table 1 : FlexLogger Plug-in Templates
| Goal |
Pug-in Template | Data Flow |
|---|
Create a plug-in that sends a setpoint value
you enter in FlexLogger to a plug-in
channel. A setpoint can have one value at a time.
Control a third-party instrument with
FlexLogger. For more information, refer to
Read Setpoint Channels from FlexLogger. section | Consume
setpoint data | User input → plug-in |
Create a plug-in that consumes one or
more waveforms from FlexLogger
channels, performs a custom calculation,
and produces a waveform of resulting data
that can be logged in FlexLogger.
In the template plugin,
Calculates the minimum or maximum value of multiple input channels and produces a resulting waveform channel.
| Perform
calculation | (a) FlexLogger →plug-in
and
(b) plug-in → FlexLogger |
Create a plug-in that generates waveform
data and sends it to FlexLogger.
The template plugin generates data for two channels with a constant value of 0. |
Produce data for
FlexLogger | plug-in → FlexLogger |
- (Optional) Customize your plug-in using the methods described in the Plug-in Development section here .
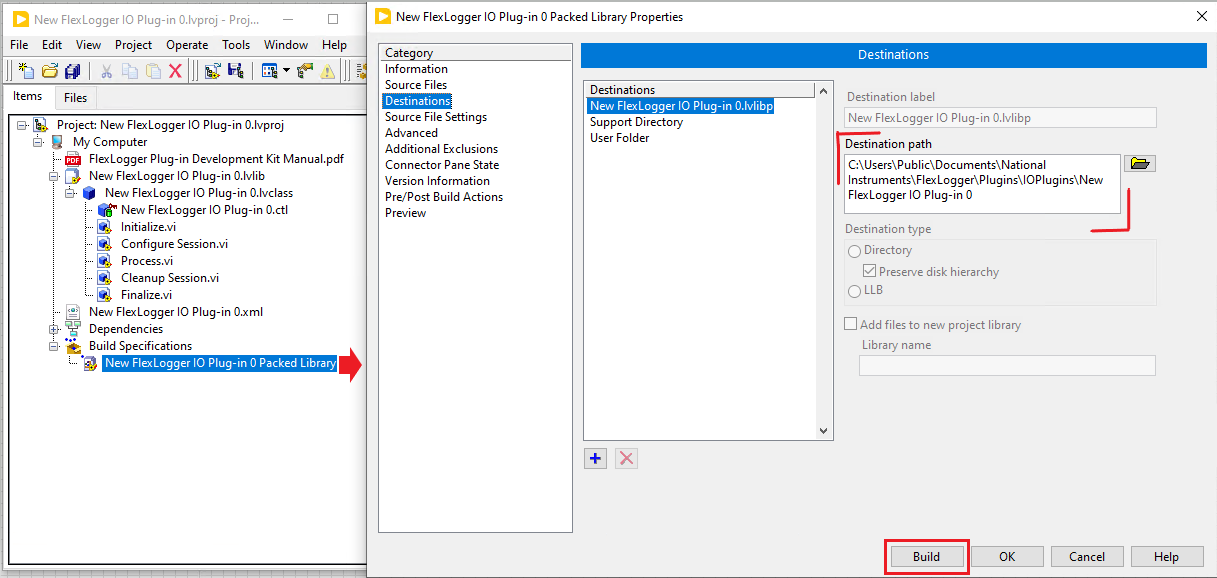
- Expand Build specifications , click Build .
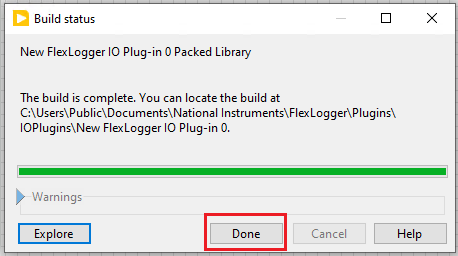
- Once the build is complete, click Done .
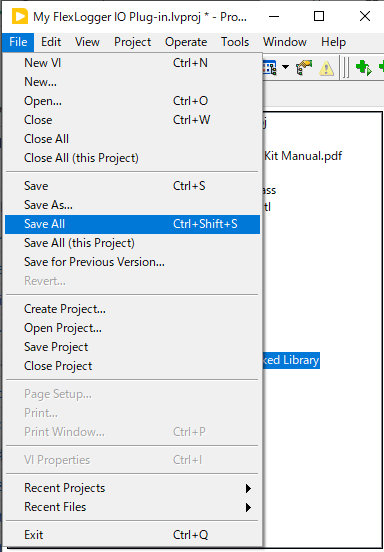
- In the Project explorer window, select File>>Save All to save your project.
After the build, a folder containing the plugin's packed library and XML files will be generated in the "Destination path" specified above. Flexlogger loads plugins from this folder on startup.