Before you Begin
Note: If your ECU Test System includes Acronis, use the Restoring to the Factory Image procedure described in the ECU Test System user manual.
- Contact NI Support to obtain access to the ECU Test System recovery image zip file. Refer to the ECUTS User Manual for more information on how to get in touch with NI Support for your specific system.
- Capture the software version installed in your system. You can retrieve the installed software versions using NI Package Manager.
- Ensure you back up relevant system information from the controller and follow the replacement procedure in the ECUTS User Manual if the controller is replaced.
Note: Restoring Windows will erase all documents and configurations from the ECU Test System. Ensure you have a backup of the data before restoring the operating system. NI cannot recover lost data during this process.
Step 1: Create Bootable USB Installation Media
Note: This step can also be performed on a different computer without the need for reimaging your PXI Controller operating system.
- Download and unzip the ECU Test System recovery image zip file received from NI Support SharePoint.
- Download the Rufus Portable executable file from https://rufus.ie to create the bootable USB drive.
- Plug a 16 GB or higher capacity flash drive into the system.
- Run rufus-3.3p.exe file.
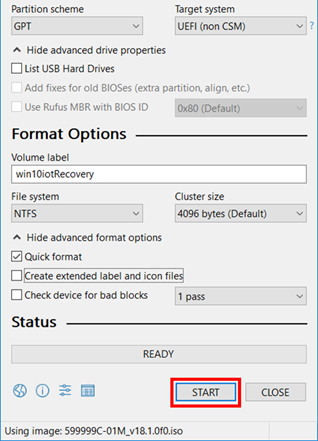
- Uncheck the Create extended label and icon files option.
- Click the highlighted button in the picture below to select the ISO file.
- Select the right ISO file.
| Windows | Variant | Name |
|---|
| Windows 10 LTSC | Multi-language | 285507A-01M_v21.0.0f1.iso |
- Set the rest of the settings as shown below in the figure. Then click START.
- When this is finished, eject the flash drive from the computer.
Step 2: Run Bootable USB Media
- With the ECU Test System turned off, plug the formatted USB into the controller. Ensure that the keyboard, mouse, Ethernet, monitor, and power are connected to the ECU Test System
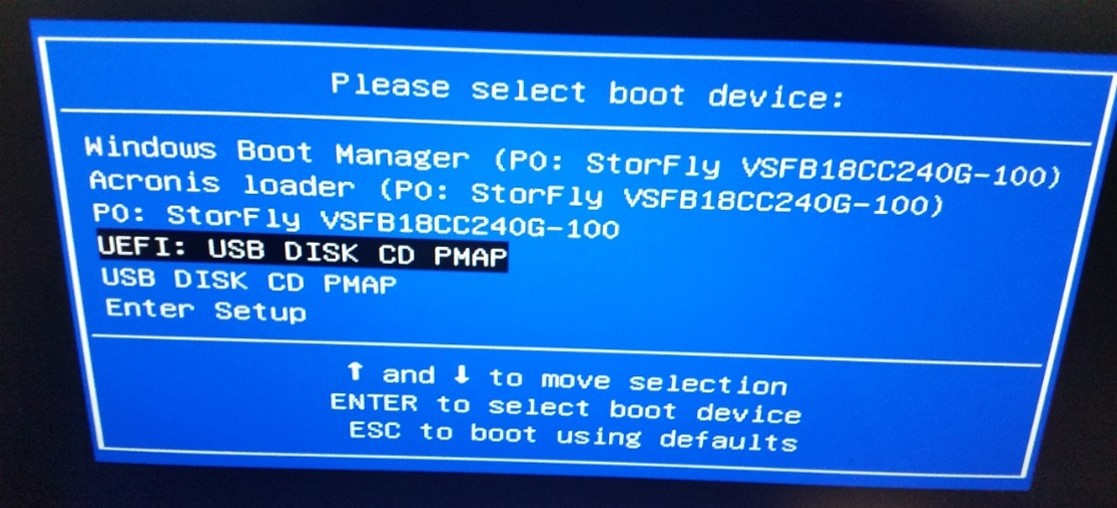
- Power on the ECU Test System and press <F10> until the boot menu loads.
- Select the UEFI option for the flash drive.
- Press any key when prompted to do so.
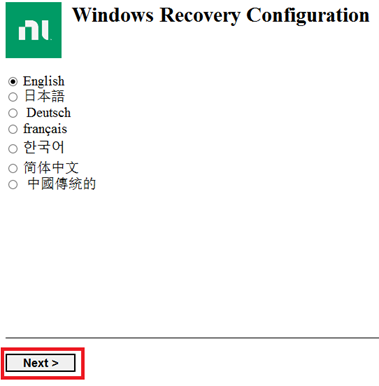
- Select a language and click Next to proceed.
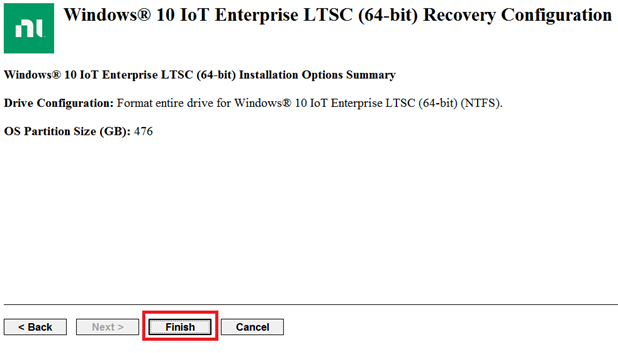
- Select Format entire drive for Windows 10 IoT Enterprise LTSC (64 bit) (NTFS) (Default) and click Next to proceed.

- Click Finish to proceed with the Windows installation.
- Once installation completes, it will enter Out-of-box experience (OOBE) setup screen.
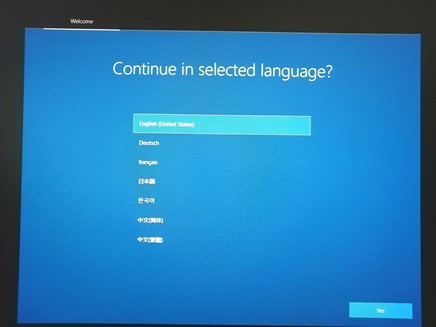
Step 3: Install NI Software and Configure the Controller
- Configure the Windows Operating System on first boot.
- Download the NI Software Packages for ECU Test System and execute the installer.
Note: Select the software version that was previously installed in your ECU Test System to ensure the system is restored to its original state.
- Set secondary IP address to static.
- Enter <Win + R> to open the Run box.
- Enter ncpa.cpl and click OK.
- Open the properties of the secondary network interface by selecting Properties from the right click menu.
- Select TCP/IPv4 in the list of protocols and click Properties.
- Select Use the following IP address and enter 169.254.160.2 in the IP address. Leave the other fields in their default values.
- Click OK in the first and second dialog boxes.
- If automotive ethernet device(s) are present, disable those ports in Windows:
- Enter <Win + R> to open the Run box.
- Enter ncpa.cpl and click OK.
- Select each of the automotive ethernet ports and click Disable in the right-click menu.
- Add the RMX Power Supplies, Electronic Loads and other Ethernet peripherals to NI MAX, if those are present. Refer to the repair and replacement procedures in the ECU Test System User Manual for instructions on how to add these devices to NI MAX.
Note: The SLSC chassis stores its configuration and should not require additional configuration.
- Copy back your test files to the ECU Test System.
- Open the Test System Maintenance Software and execute all tests (continuity checking requires of an FDT), and address any errors showing in the report.
- If a Serial module is present and the Test System Maintenance Software detects improper port assignments, then renumber the serial ports in MAX or device manager following the instructions in the Test System Maintenance Software help.
- Reboot your test system.