Section 1: Distribute as a LabVIEW Build Specification
Creating a Project
- Open LabVIEW, create a project by selecting File >> Create Project…
- Add the application VI which calls From SLSC FIU Physical Channels to DAQ AI Physical Channels.vi.
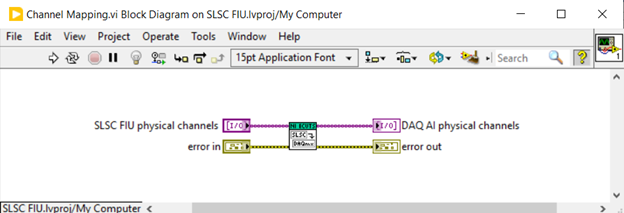
- In the block diagram, right-click and select Measurement I/O >> NI ECUTS >> From SLSC FIU Physical Channels to DAQ AI Physical Channels.vi, then do your implementation. This example just creates controls and indicators for From SLSC FIU Physical Channels to DAQ AI Physical Channels.vi.
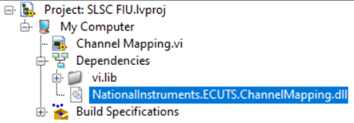
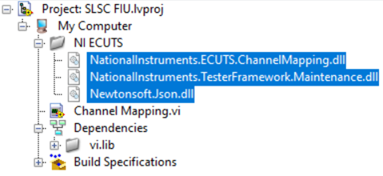
- In the Dependencies, you can see only NationalInstruments.ECUTS.ChannelMapping.dll is listed, its dependencies NationalInstruments.TesterFramework.Maintenance.dll and Newtonsoft.Json.dll are not loaded.
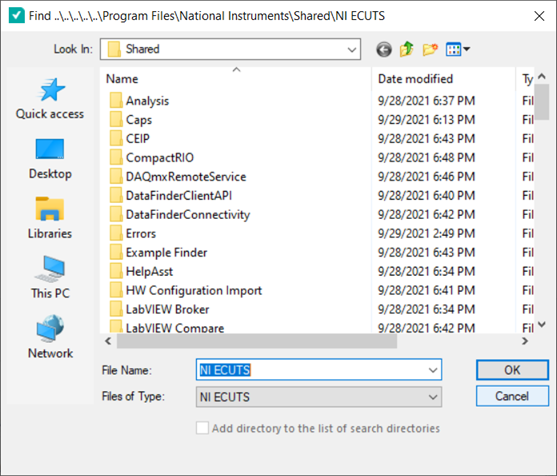
- Add indirect dependency DLLs to the project by using the right-click menu in My Computer in the Project Explorer Window and click Add >> Folder (Snapshot)..., and choosing the path where the following DLLs are located, by default it’s C:\Program Files\National Instruments\Shared\NI ECUTS\, select Current Folder after navigating here.br />
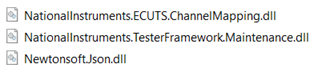
- Then all ECUTS related DLLs would be added to the project.
Creating an Executable
- Create an EXE Build Specification. For that, right-click Build Specifications on the Project Explorer Window and click New >> Application(EXE).
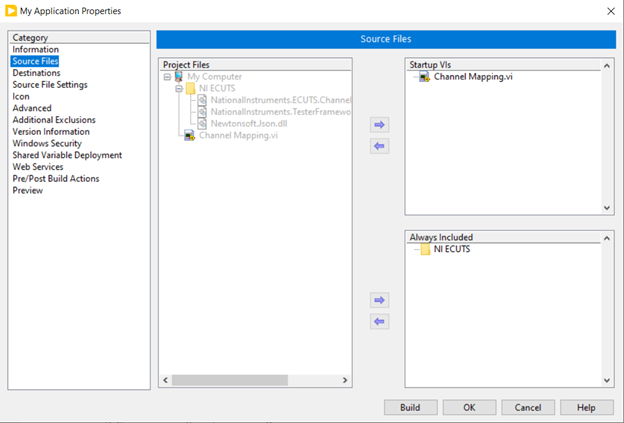
- Under the Source Files Tab, select the application VI as startup VIs, select the DLL files as Always Included.
- Configure any other properties necessary for your application, click Build to create the executable.
Building an Application Installer
- Create an Installer Build Specification. For that, right click on Build Specifications and choose New >> Installer.
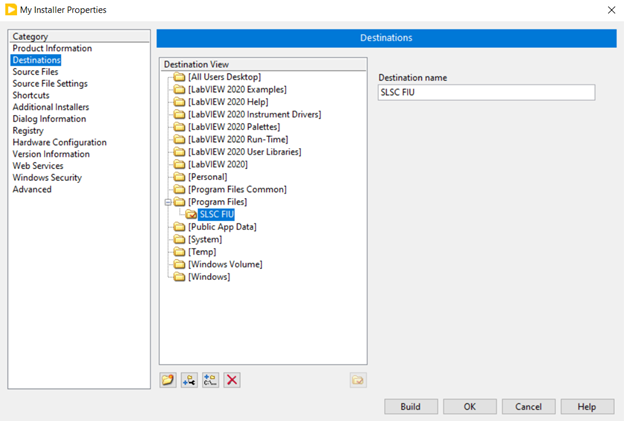
- In the Destinations category, you can create new folders on the target system and configure where your application will be installed.
- In the Source Files category, move your application to the Destination View.
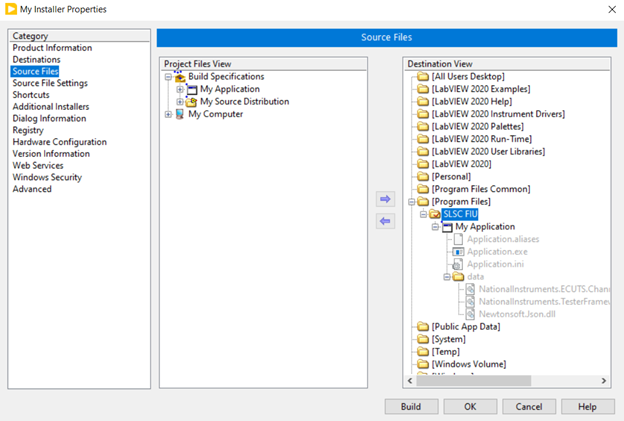
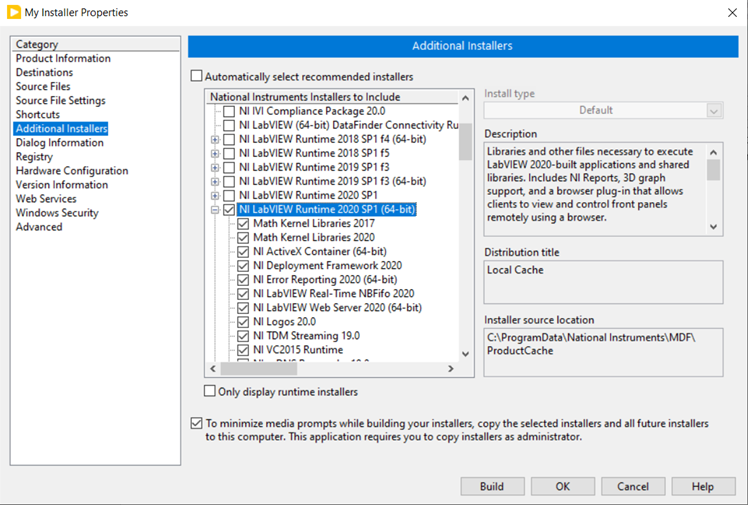
- In the Additional Installers category verify that the NI LabVIEW Run-Time Engine is selected. Deselect Automatically select recommended Installers as well as Only display runtime installers, you can also select additional software to be contained together in the installer.
- Configure some other properties, click Build to create the installer.
Install ECUTS Application on Deployment System
Copy the ECUTS application installer to the deployment computer, do the installation, then you can run the application on the deployment system.
Section 2: Distribute as a TestStand LabVIEW Code Module
Creating a Workspace
- Create a test sequence:
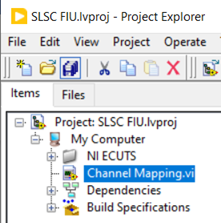
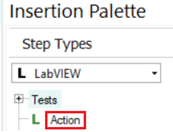
- Let’s take the Channel Mapping.vi in Section 1 as the code module in the TestStand sequence. Open NI TestStand, create a sequence and add a LabVIEW Action step by dragging it to the Main section of the MainSequence from the Insertion Palette:
- In the Action step settings, click the Project Path to open the folder browser, and select SLSC FIU.lvproj, click Open, use the default option Add the directory that contains the file you selected to the list of search directories, then click OK. In VI Path dropdown, select Channel Mapping.vi.
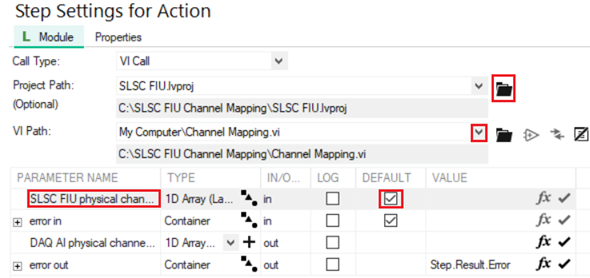
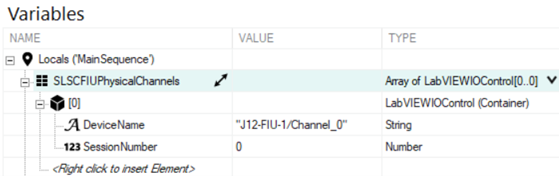
- Note that parameter SLSC FIU physical channels is DEFAULT checked as an empty array. You can configure the input value by creating a Local variable, go to Variables tab, on Locals, right click and select Insert Local >> Array of >> Type >> LabVIEW >> LabVIEWIOControl, file the DeviceName, for example: J12-FIU-1/Channel_0.
- Save the testing sequence, for example, name it “SLSC FIU.seq”.
- Create a workspace by selecting File >> New >> Workspace File… For example, name the workspace “Deploy SLSC FIU”.
- Add project to workspace by right-clicking on “Deploy SLSC FIU”, and selecting Insert New Project into Workspace… For example, name the project “SLSC FIU”.

- Add sequence file to workspace by right clicking on the “SLSC FIU” project, and selecting Add Files to Project…, choosing the sequence file created by step 1.
- Add From SLSC FIU Physical Channels to DAQ AI Physical Channels.vi dependency DLLs to workspace:
- Right click on the “SLSC FIU” project, select Insert Folder From Disk…, choose path where the dependency DLLs locate, by default it’s C:\Program Files\National Instruments\Shared\NI ECUTS. Select the directory, then click OK. When the following dialog shows up, click Cancel.
- Select Use a relative path for the directory you selected, then click OK.
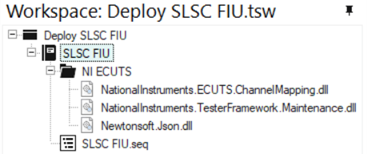
- The final workspace file structure looks like as the following:
Creating a TestStand Deployment Installer
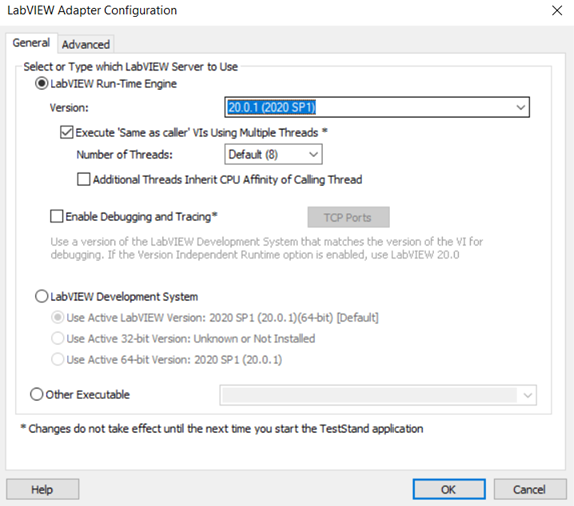
- Check and Configure LabVIEW Adapter Settings: Click on the Configure menu and select Adapters, In the Adapter Configuration dialog, select LabVIEW and click the Configure button, Select the LabVIEW Run-Time Engine radio button from the Select or Type Which LabVIEW Server to Use. Choose the version your LabVIEW code module uses or select Auto detect using VI version. Click OK to accept.
- Select Tools >> Deploy TestStand System… in the TestStand Sequence Editor, choose Output Type to either MSI-Based Installer or Package-Based Distribution. Leave the Distribution type as Create new Full Deployment.
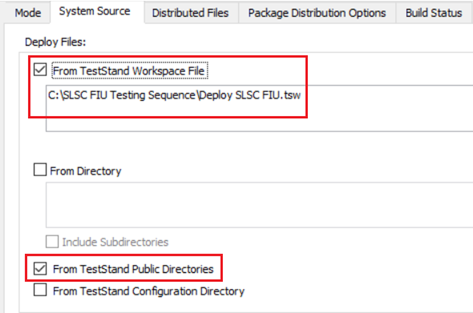
- On System Source tab, select Deploy Files >> From TestStand Workspace File, check From TestStand Public Directories to deploy the Operator Interface used to execute the test sequence on the deployment system.
- Switch to Distributed Files tab, a dialog will popup to confirm whether to Analyze Source Files, click Yes.

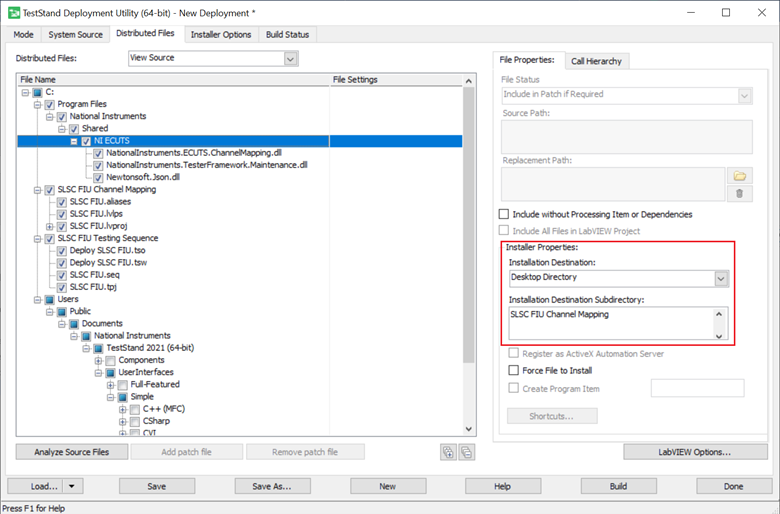
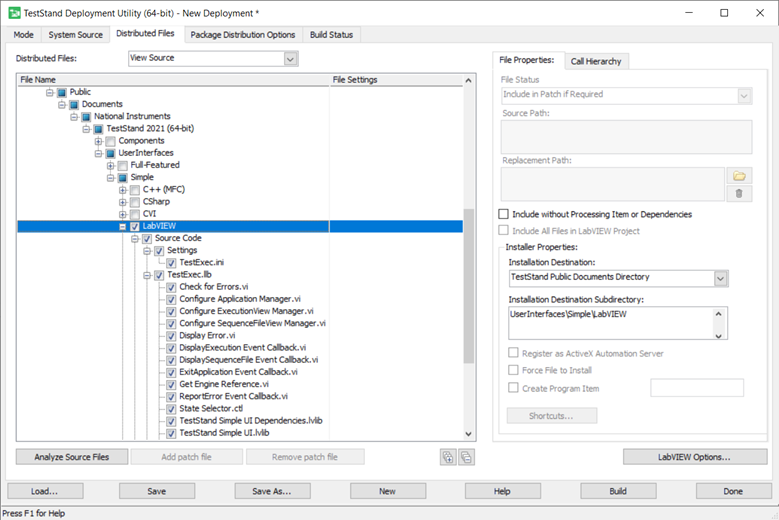
- Configure the Installer Properties for all the files in the workspace and for Operator Interface:
- Make sure the dependency DLLs under NI ECUTS directory are configured to the same installation destinations as the code module project SLSC FIU.lvproj. For example, configure them to Desktop Directory, subdirectory is SLSC FIU Channel Mapping.
- For Operator Interface, you can select any user interface Under the UserInterfaces directory. For example, select Simple\LabVIEW\.
- Select Additional Installers:
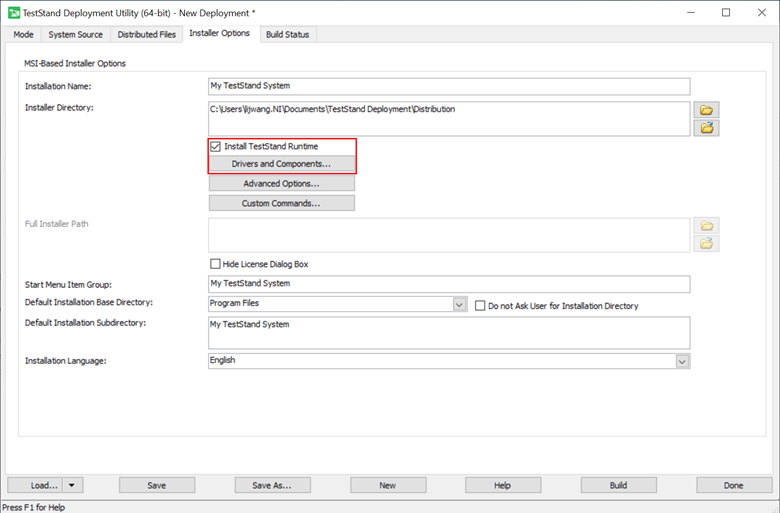
- For MSI-Based Installer, on the Installer Options tab, check Install TestStand Runtime and click Drivers and Components…, select your code module LabVIEW Run-Time Engine.
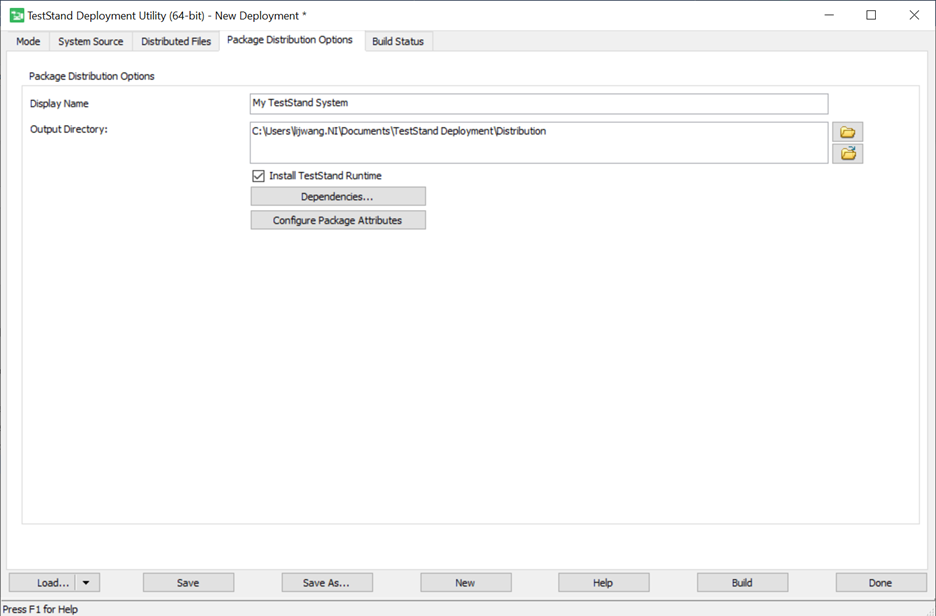
- For Package-Based Distribution, on the Package Distribution Options tab, check Install TestStand Runtime and click Dependencies…, select your code module LabVIEW Run-Time Engine.
- 6. Click Build button to build the distribution.
Installing and Running Sequence on Test System
Copy the built installer to the ECUTS Test System, and execute it to install.
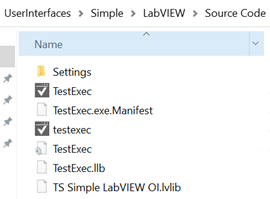
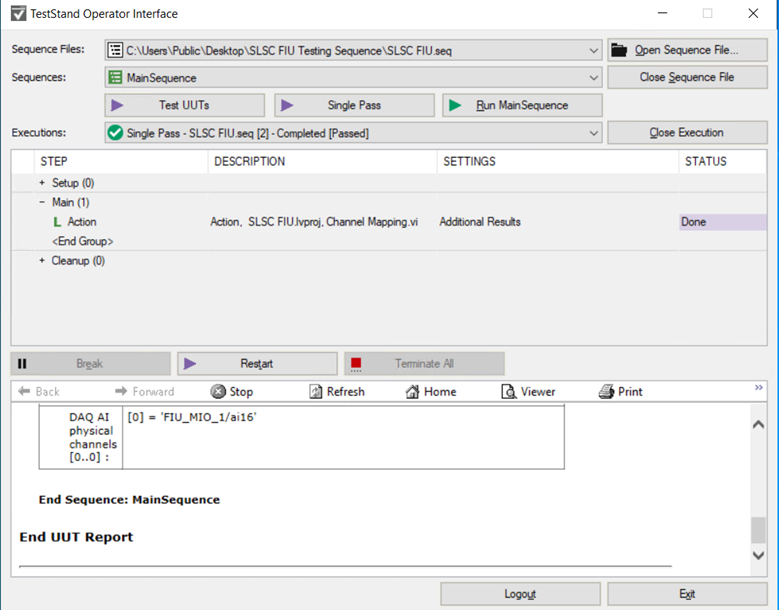
After installation, find
TestExec.exe, click and launch Operator Interface, then you can run the testing sequence.