Once you have a logging specification created and your VeriStand project deployed, you need to manually start the logging specification before it will start logging anything to file.
See points 4 and 5 of
Logging Data with the VeriStand Editor for detail on how to begin your logging session.
If you would like to configure triggering for your logging specification, follow these steps:
1. Navigate to your logging specification and then in the right-hand pane select the
Document tab. From here, select the
Trigger Mappings button.

2. Set the
Start Trigger field to
Start on Condition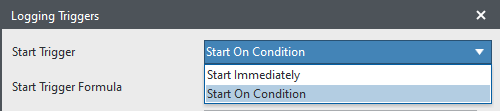
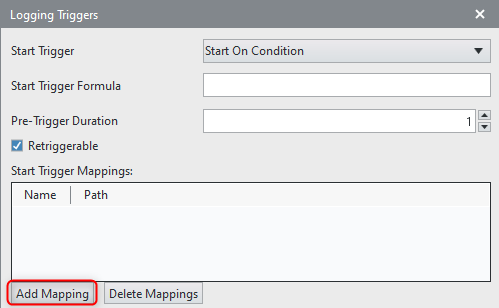
3. Before we can define the
Start Trigger Formula, we need to add some variables which we will use to define the condition the triggering should start. to do this, click the
Add Mappings button in the
Start Trigger Mappings section:
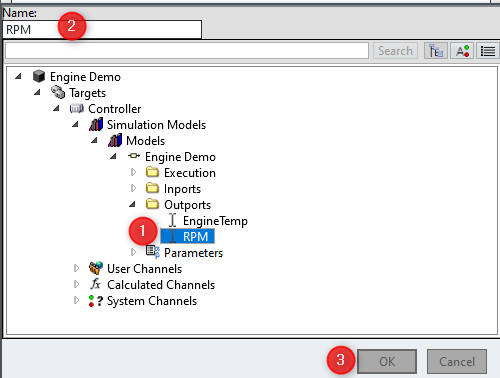
4. Enter a channel to add as a variable to be used for the trigger logic and give this channel/variable a name. for example you can add the Targets\Controller\Simulation Models\Models\Engine Demo\Outports\RPM channel and give the variable a descriptive name, such as
RPM:
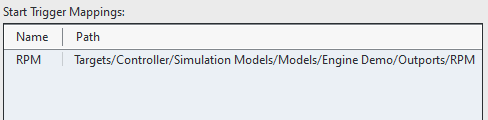
5. Once you have added all of the channels you will use to determine your trigger logic, you can add this logic to the
Start Trigger Formula section. This section must evaluate to either
true or
false. One example would be: RPM > 5000
This formula would evaluate to true whenever the Targets\Controller\Simulation Models\Models\Engine Demo\Outports\RPM channel, which we mapped to a variable named
RPM is over 5000, triggering the logging specification to start logging (assuming the logging session has been started).
If you are using statements such as '= true', ensure true and false are all lowercase as 'True' or 'TRUE' will not be accepted and lead to an error.
6. The same logic can be applied to the stopping of the logging specification. You can configure the logging specification to log indefinitely (until you undeploy), to log for a set duration, or to log until a condition is met. The condition is configured in the
Stop Trigger Formula section and works in the same way as the
Start Trigger Formula. Add your variable to the
Stop Trigger Mappings section to use them in the
Stop Trigger Formula.
7. Finally, you have the
Pre-Trigger Duration and
Retriggerable sections which allow you to define how much data to save and log before the trigger was seen and whether or not the logging specification can be retriggered/restarted once stopped, if the trigger condition is met again.