Solution
The cRIO's timestamp is affected by CPU load and network latency. This offset or delay can be corrected by checking the following points:
1. Ensure that the cRIO's CPU load does not exceed 25% at any time.
2. Introduce suitable timing to your LabVIEW code.
Follow the steps below to implement these checks.
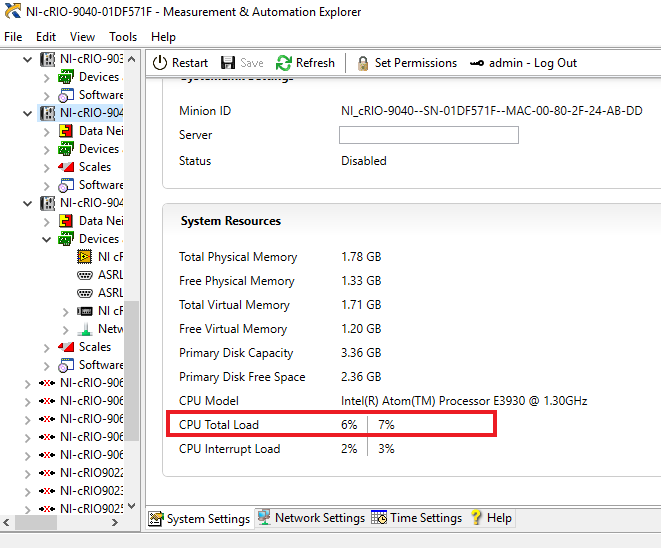
Checking the cRIO's CPU load
The CPU load of a can be seen in NI MAX under
System Settings of your Real-Time Target, as shown:
A good way to check whether your LabVIEW code is causing too much stress on your cRIO's CPU is by:
1. Deploying and running your LabVIEW code.
2. While the code is running, open NI MAX to view the
CPU Total Load resource.
3. Continuously refresh the display in NI MAX to get updates on the CPU load.
If your CPU load exceeds 25% at any time, consider changing your LabVIEW code or removing some unnecessary software on your cRIO.
Introducing Suitable Timing
If you intend to monitor the time of the cRIO, it is recommended to use a Timed Loop rather than a standard While Loop. The Timed Loop will allow you to use the cRIO's clock to control the loop iterations/update rate.
The code below simply displays the current time on the cRIO. The Timed Loop is using the 1MHz clock and each loop iteration executes every 1 second.
It is important to ensure that the loop is not iterating too fast, to reduce the CPU load and therefore, omit as much network latency as possible.
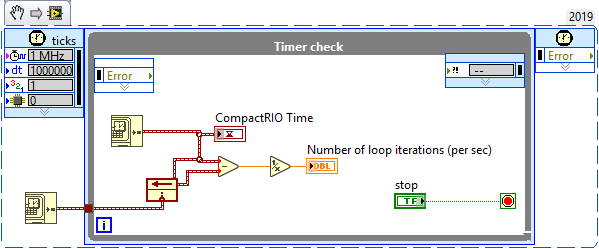
Note: This image is a LabVIEW snippet, which includes LabVIEW code that you can reuse in your project. To use a snippet, right-click the image, save it to your computer, and drag the file onto your LabVIEW diagram.
You can configure the update rate and clock of the Timed Loop by double-clicking the loop structure. This will open the following dialog box:
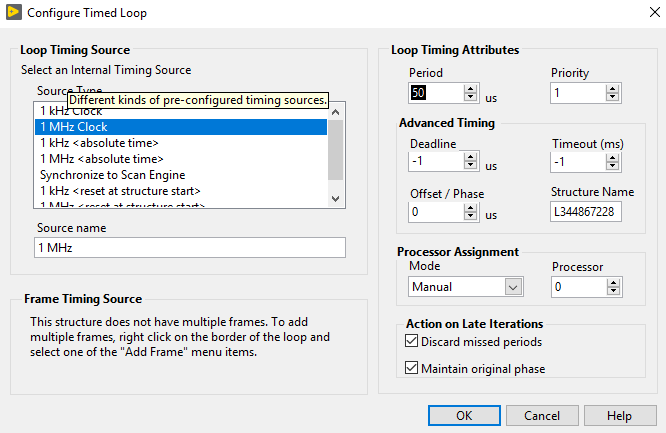
Here, you can select the clock Source Type to specify a clock rate. To define the update rate, change the Period attribute.