Use Cases for Vector Indexes
Vector Indexes can be thought of as labels for Vectors. Within the
Test Case Properties window (
.lvtest), each input and output can be assigned to a Vector. Each Vector can then be assigned an Index.
By default, Vectors have no Index. This results in a Test Case permutating through all possible Vector input combinations to result in an output Vector with size =
M x N where
M is the size of one input Vector, and
N is the size of the other input Vector. Consider the following example:
If a Test Case consists of two inputs (
X and
Y) and one output
Z, where
Z = X + Y, the following Vectors can be defined in the Vector File (
.lvvect):
X = [1, 2, 3]
Y = [1, 2, 3]
Z = [2, 3, 4, 3, 4, 6, 4, 5, 6]Z has a size of 9 because
M x N = 3 x 3 = 9.
If two Vectors are assigned the
same Vector Index, they are paired together. Now, instead of executing every possible permutation, the Vector values will iterate one row at a time. Consider the following example where
Z = X + Y:
X = [1, 2, 3]
Y = [1, 2, 3]
Z = [2, 4, 6]In this implementation,
Z has a size of 3. This is because column one of
X is compared against column one of
Y and so on.
Note: There must be at least two Vectors with the same index to implement a row-by-row value test. If every Vector has been assigned a different Index, the default permutation test will occur. If the input Vectors are different sizes, the test will stop when the end of the smallest Vector is reached.
Implementing Vector Indexes
Follow the steps below to assign and implement Vector Indexes. These steps refer to an example project that consists of a simple addition VI (
Z = X + Y).
1. Open you LabVIEW Project.
2. Create or open your Vector File (
.lvvect).
- If a Vector File doesn't exist, right-click My Computer and select New >> Test Vectors. Save the file in the same directory as the project.
- Double-click on the Vector File to open it's Properties window.
3. Define the Vectors.
- Based on the Controls and Indicators in your LabVIEW VI, create corresponding Vectors to that test expected results. For example, the image below indicates that a VI adds inputs X and Y and stores the result in the output Z.
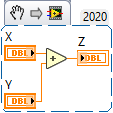 Note:
Note: This image is a LabVIEW snippet, which includes LabVIEW code that you can reuse in your project. To use a snippet, right-click the image, save it to your computer, and drag the file onto your LabVIEW diagram.
- Create a Vector by clicking New in the Test Vector File Properties window.
- In the pop-up window, define a name for the Vector (i.e. X if the Vector corresponds to the X input on the VI), Data type and size, as shown below.
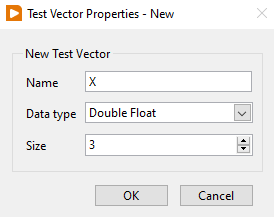
- Click OK to save changes.
- Repeat this process for Vectors Y and Z. Note: since we will be implementing Vector Indexes, Z should have a size of 3.
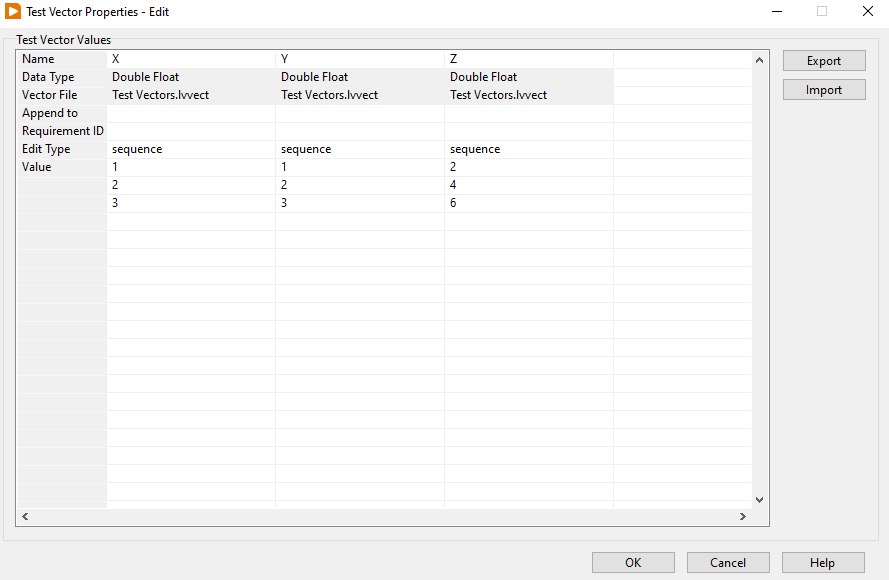
- Click Edit Values to assign values to the Vectors.
- Replace each 0 in X and Y with input values to test, and each 0 in Z with the expected output value for that row.
- Click Save to save changes.
4. Assign the Vector Indexes to a Test Case.
- Create or open a Test File (.lvtest). If one does not exist, right-click on your VI and select Unit Tests >> New Test. Double-click on the file to open it.
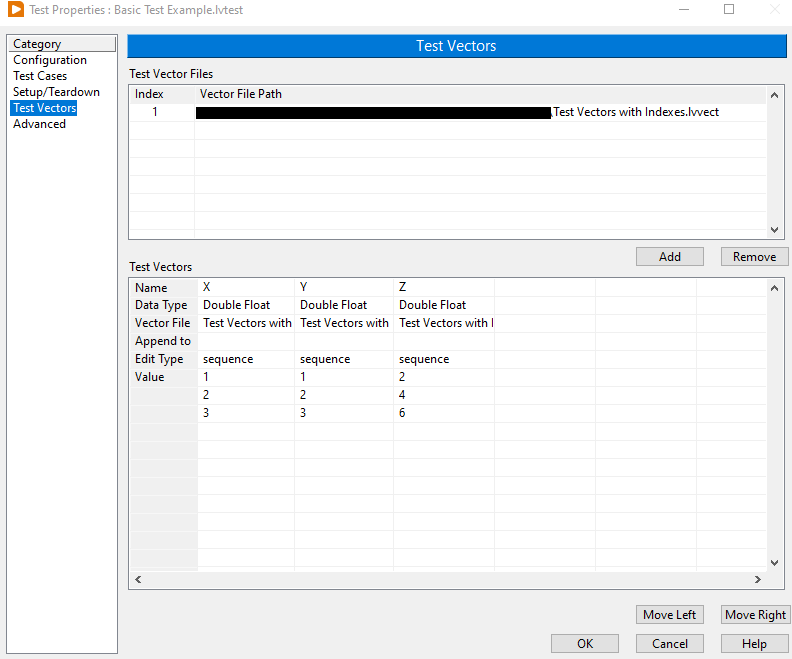
- In the Test Properties window, navigate to the Test Vectors tab.
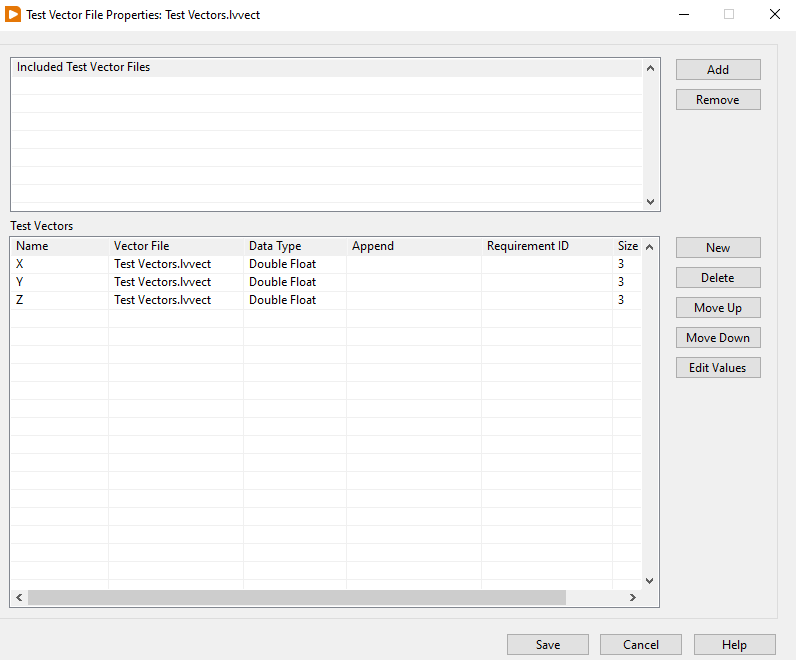
- Click Add to browse for and include the Test Vector File that was just created. Once added, the page should populate as follows.
- Navigate to the Test Cases tab.
- Expand the Input Name and Output Name trees to view your VI Controls and Indicators. Note: If the Controls and Indicators do not appear, ensure that they have been connected to the VI Front Panel Connector Pane.
- Right-click on each input and output and select Assign Test Vector.
- For each, click on the drop-down menu in the Input Value column and select the corresponding Vector.
- For the first input, right-click on it and select Assign Index >> New Index. By default, this will assign Index 1.
- For subsequent inputs, right-click on it and select Assign Index >> Index 1.
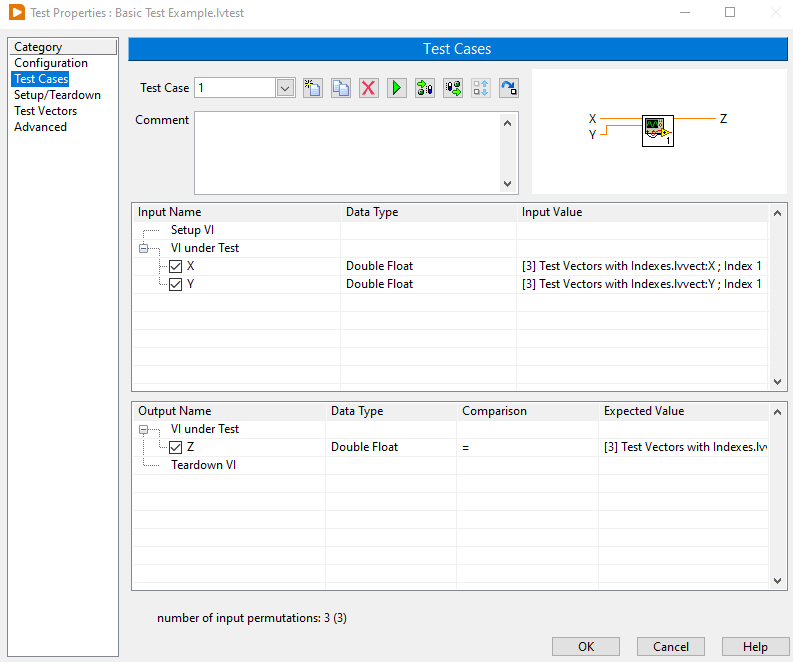
- The Test Cases should now appear as follows with a message stating the number of input permutations.
- Click OK to save changes.
- To run the tests, right-click on the VI from the project tree and select Unit Tests >> Run.