The steps below include preparations that have been done on both LabVIEW and TestStand from scratch.
LabVIEW
- Create an empty LabVIEW VI.
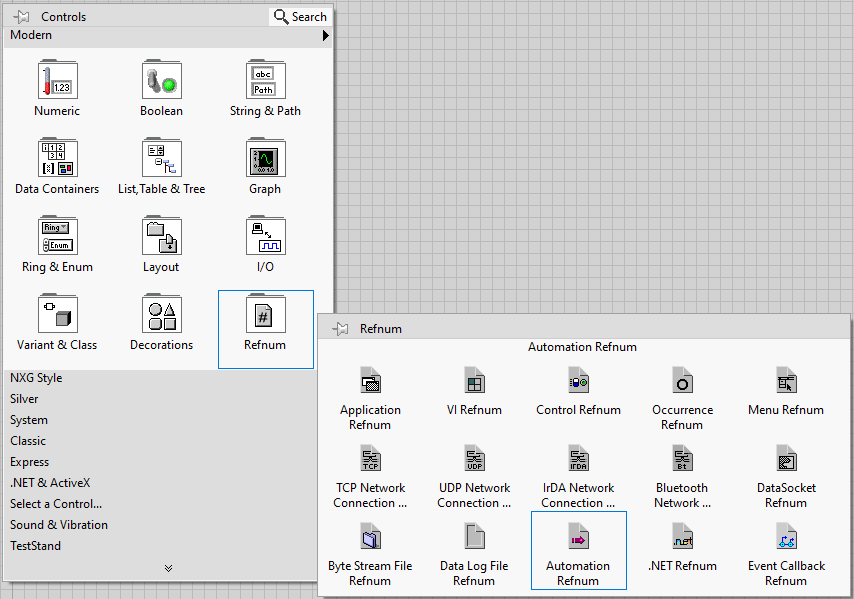
- In the front panel, place an Automation Refnum control from Controls Palette»Refnum»Automation Refnum.
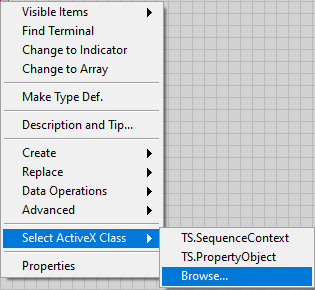
- Right-click on the Automation Refnum and select Select ActiveX Class»Browse. A Select Object From Type Library dialog box will appear.
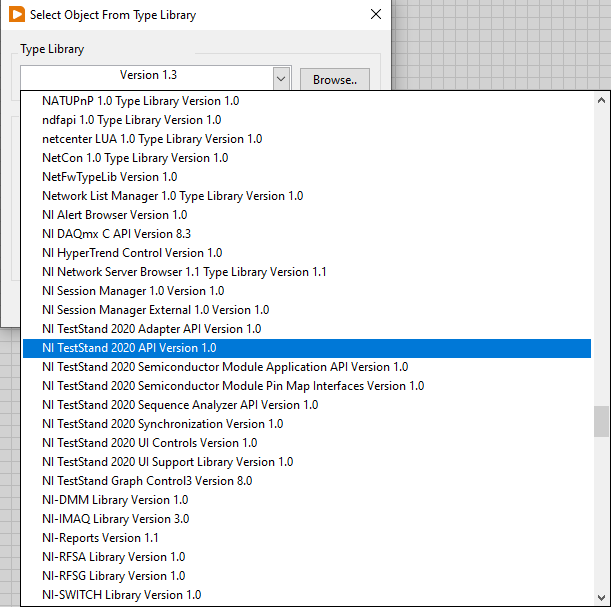
- Within the Select Object From Type Library dialog box, select NI TestStand <Year> API Version x.0 as value for Type Library dropdown.
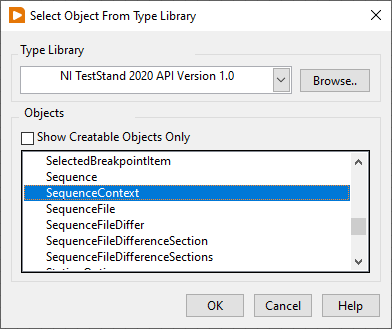
- Select SequenceContext from the Objects listbox and click OK.
- It can be observed that the name of Automation Refnum is now TS.SequenceContext.
- Click the upper left square box of the connector pane and click TS.SequenceContext. The upper left square box of the connector pane should now be green in color.

- Place TestStand - Initialize Termination Monitor.vi, TestStand - Get Termination Monitor Status.vi and TestStand - Close Termination Monitor.vi into the block diagram from Functions Palette»TestStand.
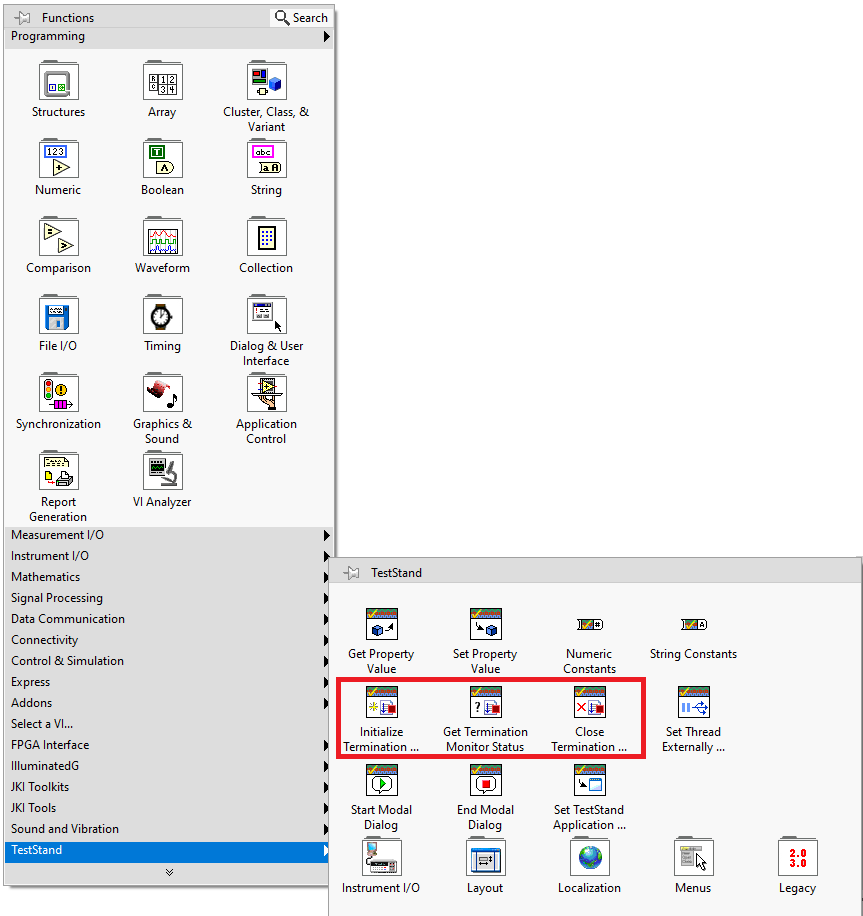
- Interconnect TestStand - Initialize Termination Monitor.vi, TestStand - Get Termination Monitor Status.vi and TestStand - Close Termination Monitor.vi.
- Connect TS.SequenceContext to the Sequence Context In input of TestStand - Initialize Termination Monitor.vi.
- Surround TestStand - Get Termination Monitor Status.vi with a while loop and connect its Terminating and Aborting output to termination terminal of the while loop.
- Within the while loop, create an indicator for the iteration terminal and place a 100 ms of delay using Wait(ms).
- Image below illustrates the block diagram at this stage.
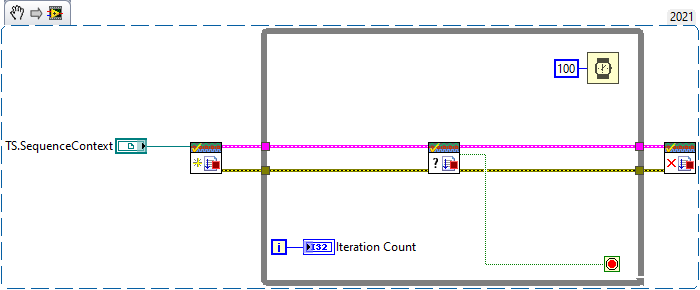
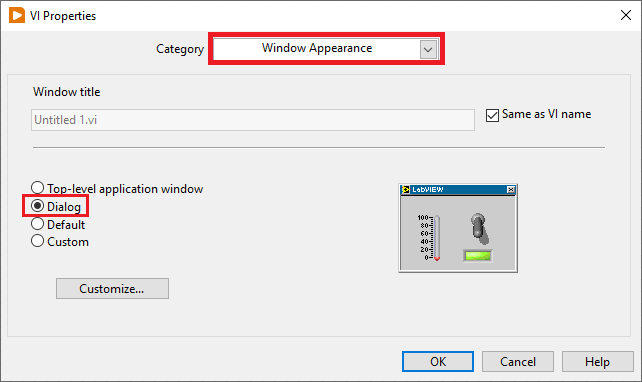
Note: This image is a LabVIEW snippet, which includes LabVIEW code that you can reuse in your project. To use a snippet, right-click the image, save it to your computer, and drag the file onto your LabVIEW diagram. - Press <Ctrl-I>, select Window Appearance in the Category dropdown and select Dialog.
- Save the VI. It will be called in TestStand later.
TestStand
- From Insertion Palette >> LabVIEW Utility, drag and drop Run VI Asynchronously into your Steps.
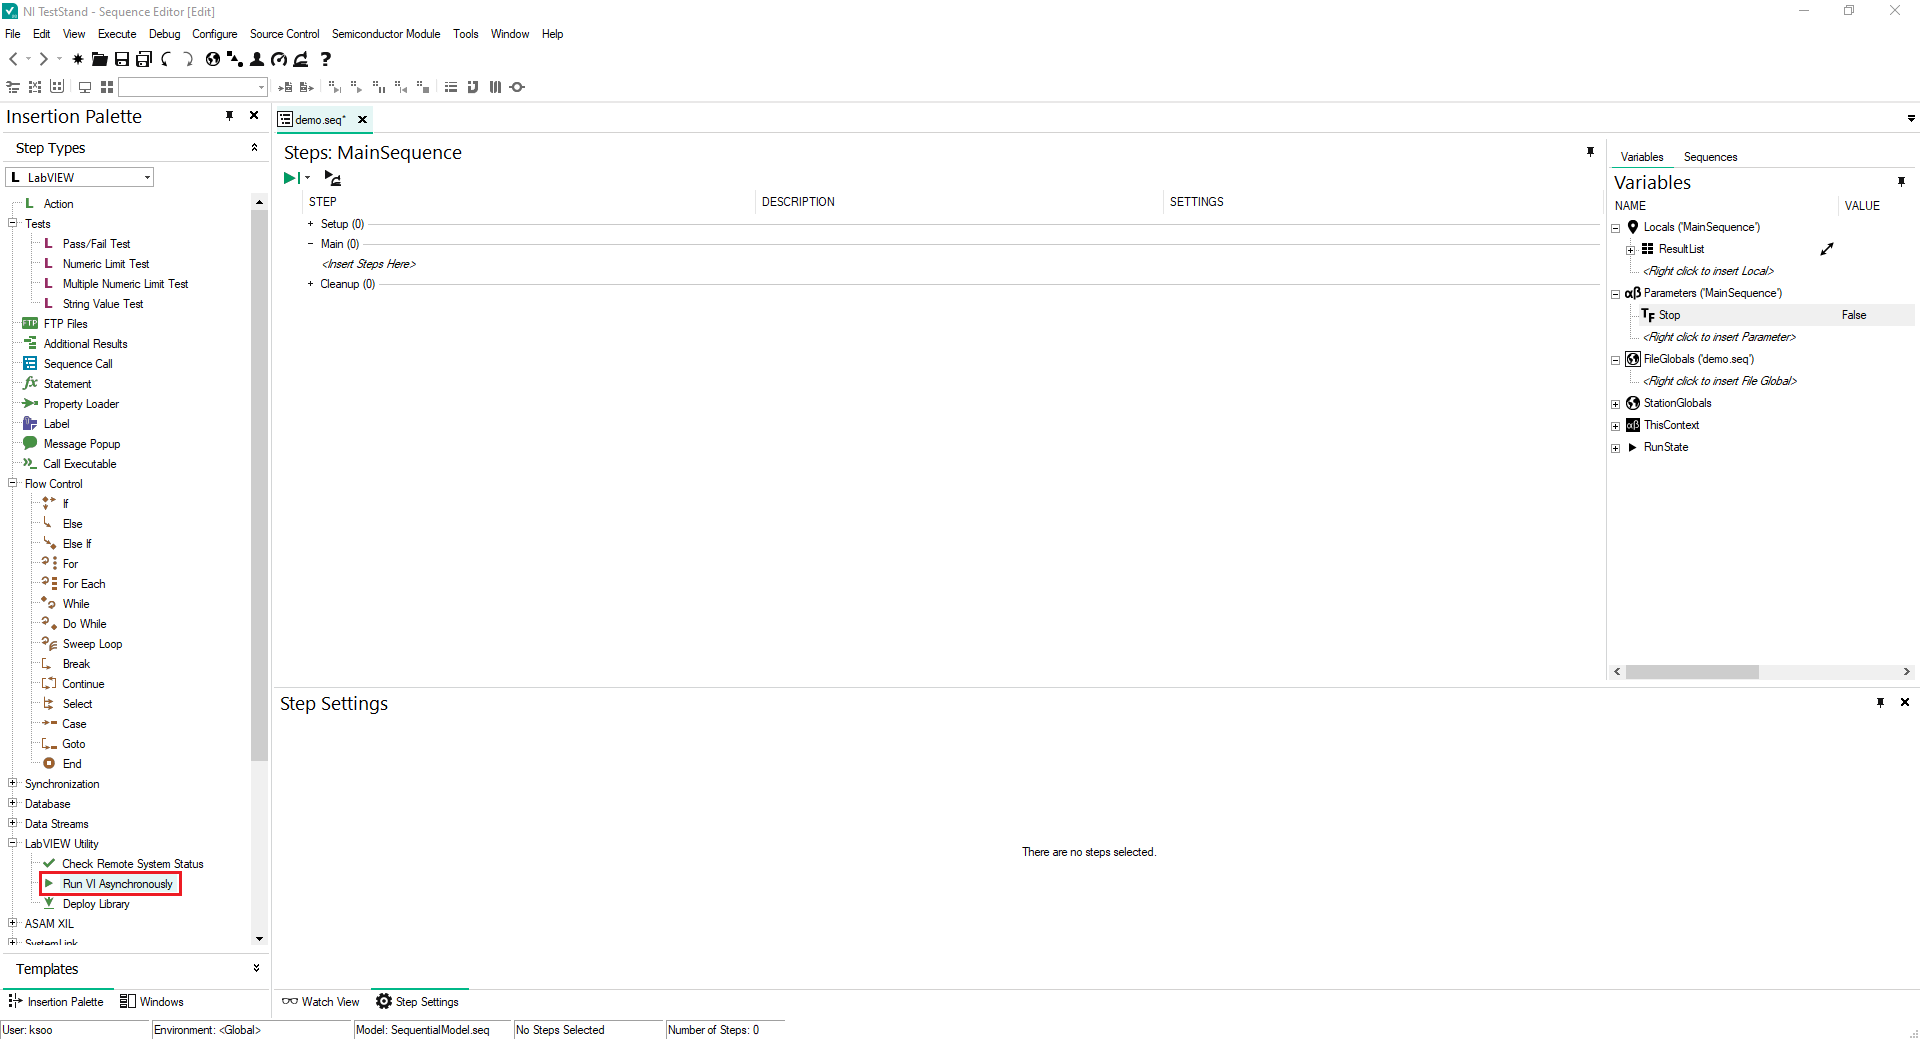
- Select the inserted Run VI Asynchronously in the Steps pane. Step Setting pane of Run VI Asynchronously will be shown.
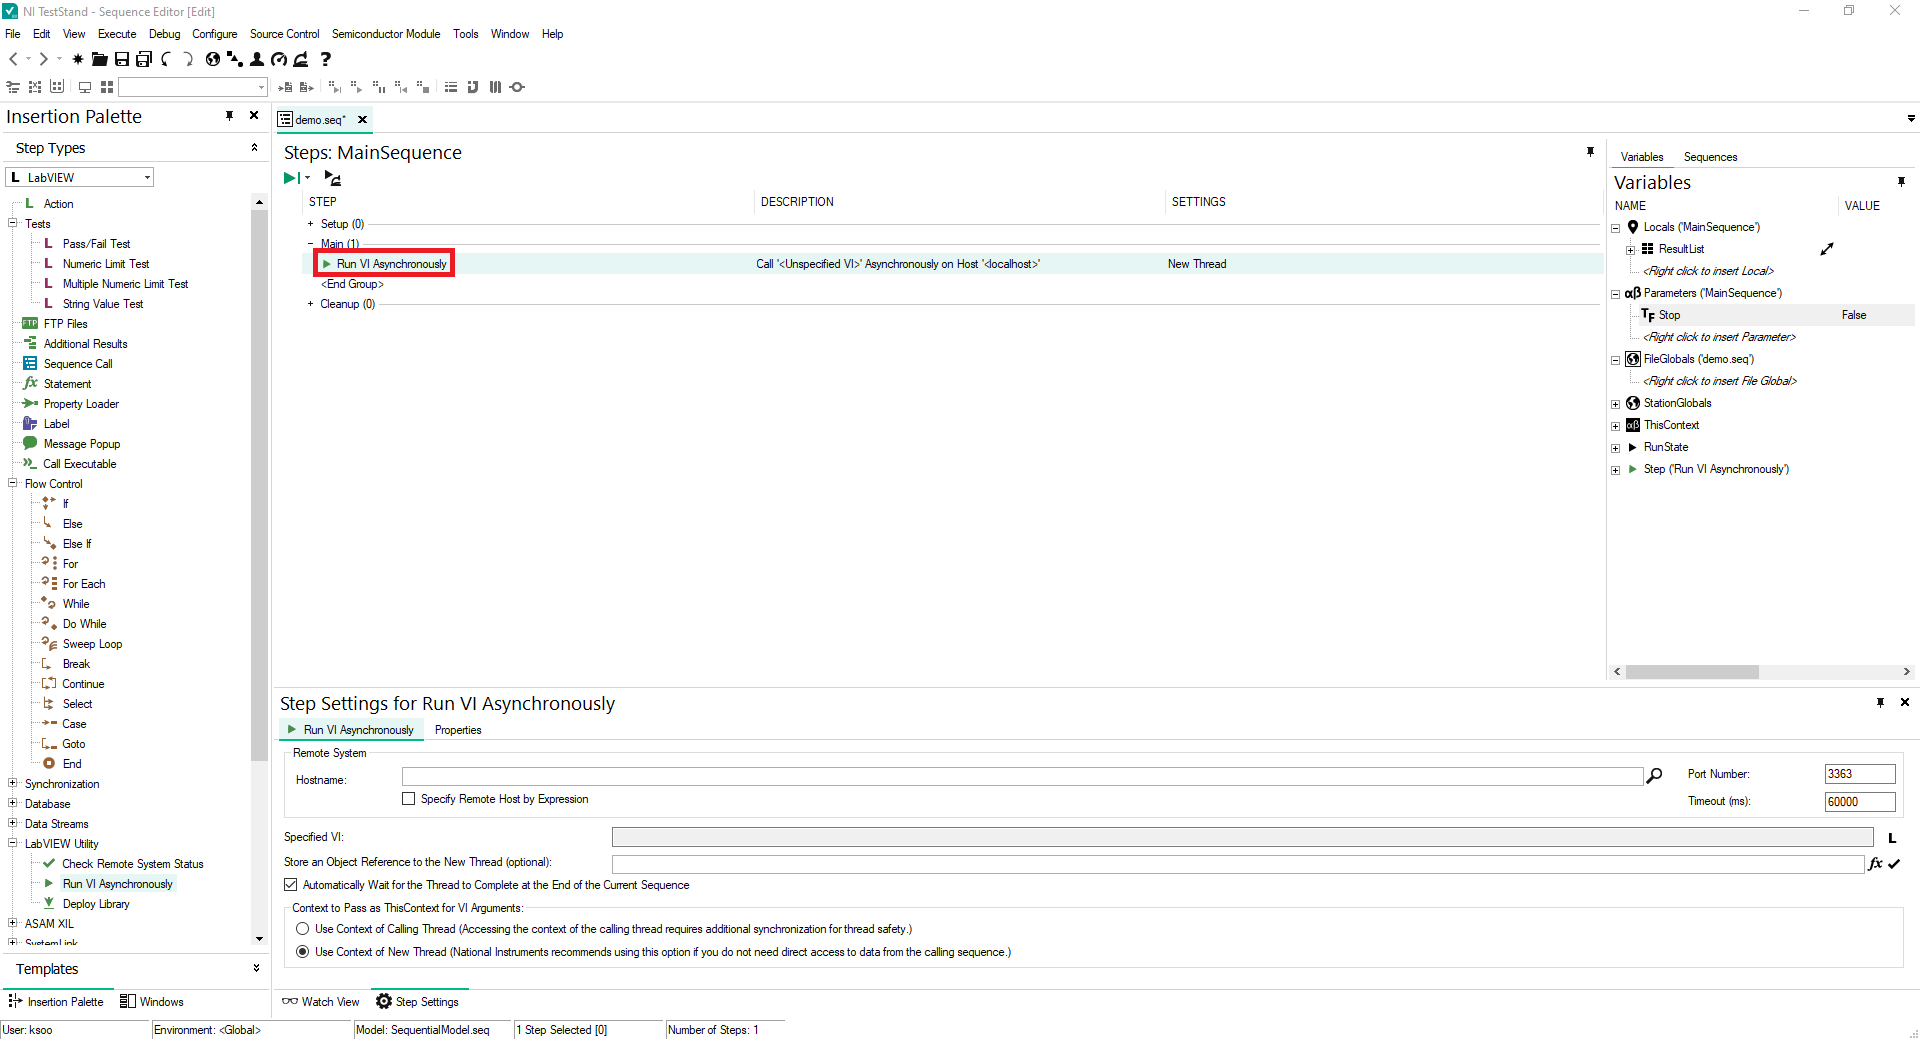
- In Remote System, fill in the hostname and port number of the remote system's VI Server accordingly. As this article is using LabVIEW installed on the local computer, both hostname and port are leave default.

- Select Use Context of Calling Thread for Context to Pass as ThisContext for VI Arguments.

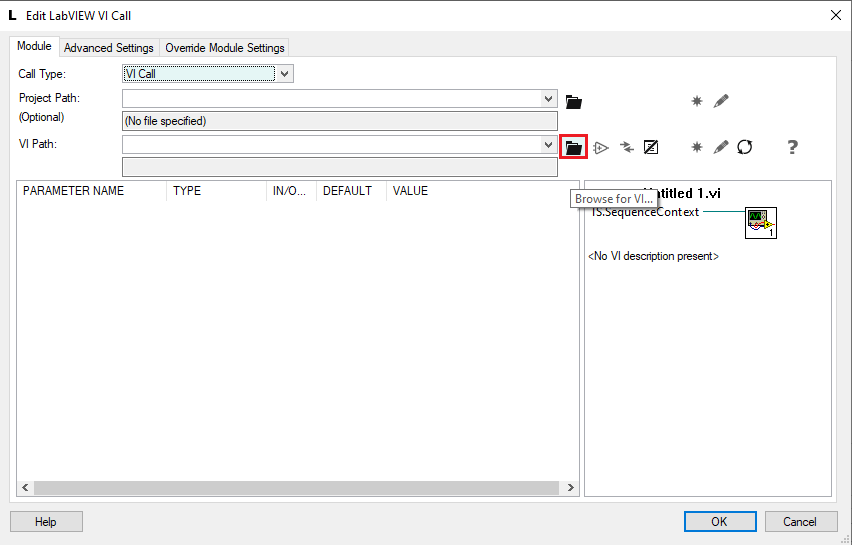
- Click the L icon to specify which VI to call.

- In the Edit LabVIEW VI Call dialog box, click Browse for VI and select the VI created in LabVIEW section of this article.
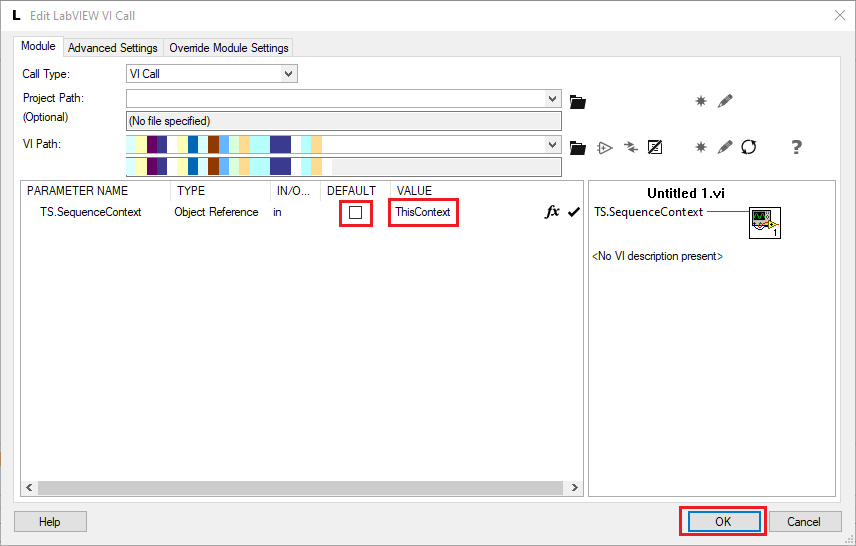
- After specify the VI, un-check the Default box for the TS.SequenceContext parameter and set the Value to
ThisContext. Press OK.
With the above implementations, when you run the sequence file, you will now be able to see the LabVIEW VI is started and running while TestStand is proceeding to the next step without waiting the VI finish executing.