Necessary Hardware
- NI Camera Link Framegrabber
- NI Camera Link I/O Extension board
- Linescan Camera Link Camera
- 37 Pin Connector Block
- NI Digital I/O DAQ Device
- SCB 68 Connector Block
- 44 DSub to 37 DSub Cable
- SHC68-68-EPM Cable
Necessary Software
- Measurement & Automation Explorer (MAX)
- LabVIEW
- Vision Acquisition Software
- NI-DAQmx
Optional
Part 1: Connecting the Hardware
- Connect the camera to the framegrabber with a Camera Link cable. If your camera does not support POCL (Power Over Camera Link) then ensure the camera is properly powered
- Connect the 37 Pin connector block to the Camera Link I/O Extension Board using the 44 DSub to 37 DSub cable
- Connect the SCB-68 to the DAQ Device using the SHC68-68-EPM cable
- Make the following connections between the SCB-68 and the 37 Pin Connector Block (Refer to the user manuals for your DAQ device and framegrabber for the proper pin-outs
| DAQ Card | I/O Extension Board |
| Counter 0 (Out) | TTL I/O 1 |
| Digital Ground | Digital Ground |
Part 2: Configure the Camera and DAQ Device in MAX
Most cameras default to continuous free-run acquisition mode. In order to do a triggered acquisition, we must first ensure that the camera is configured for edge-controlled triggered acquisition. We must also associate the SCB-68 accessory with the DAQ Device.
- Open MAX and expand Device and Interfaces
- Right-click on your DAQ device and select Properties
- Under the accessory tab, choose the SCB-68 from the drop-down menu and click OK
- Expand NI-IMAQ Devices and then expand your Camera Link framegrabber board
- Right click on the camera and navigate to Camera»Manufacturer»Model and choose the correct model number
Note: If your camera model does not appear this means that the camera ICD file is not installed on your computer. Refer to the What is a Camera File and Do I Need to Generate One to Work With NI Vision Software for instructions on download and installing camera files.
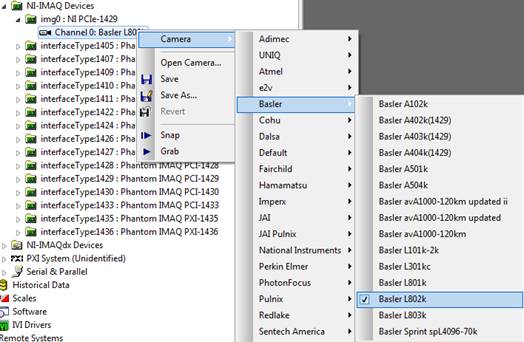
- Open the Acquisition Parameters tab and set the Height to 1000
- Open the Camera Attributes tab and select ExSync from the Camera Attributes menu
- Choose Edge-controlled from the drop down menu
- Under the Camera Control Lines Source section, uncheck the box next to Use Default Source
- Choose External from the drop down menu next to CC1 and change the number control to 1
Note: If the only option the CC1 External Type Number will give you is “0”, then make sure the framegrabber and Camera Link IO Board have a good connection using the 50-Pin Ribbon Cable. There should be a lit green LED on the Camera link IO Board. After completing these steps, your screen should look similar to the image below.

- Press Save to save these settings to the camera file
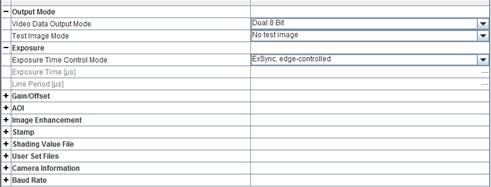
- Check that the camera itself is set up for ExSync, edge-controlled. This is most easily done using the manufacturer’s software, below is an example of what it may look like.
Part 3: Generate Continuous TTL Pulse Train in MAX
Most digital DAQ cards can generate TTL signals on the counter output. These signals can be routed to the camera control line and used for triggering acquisition on the framegrabber. In the following steps we will configure this pulse train in MAX using test panels.
- Expand Devices and Interfaces in MAX
- Right-click on your DIO DAQ card and choose Test Panels…
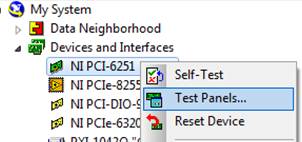
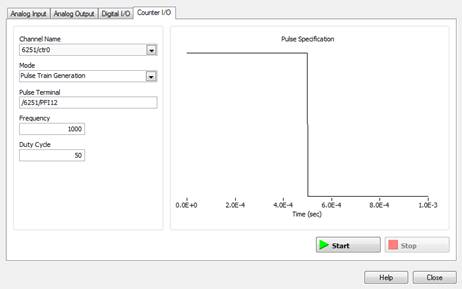
- Open the Counter I/O tab and select Counter 0 for the Channel Name and set the Mode to Pulse Train Generation. Enter 1000 for the Frequency.
- Click Start to begin generating the pulse train
Part 4: Perform a Triggered Acquisition in LabVIEW
Now that we are generating a TTL pulse in MAX, we can configure an acquisition in LabVIEW to trigger off of this pulse. For this example we will make use of one of the shipping examples included with the Vision Acquisition Software.
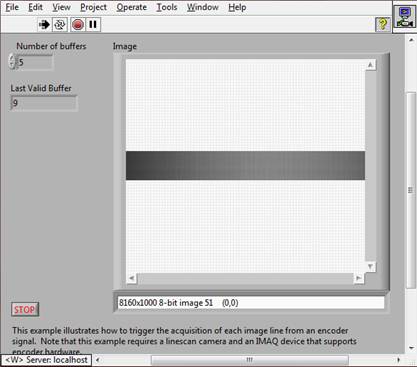
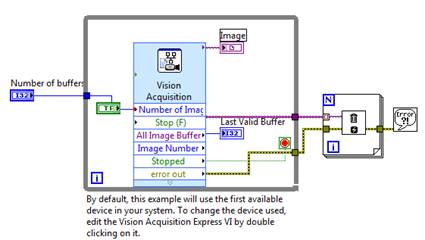
- Open Example Finder in LabVIEW and navigate to Hardware Input and Output»IMAQ»Signal Input and Output»HL Trigger Each Line from Encoder(Express).vi
- Open the block diagram and double-click on the Vision Acquisition Express VI
-
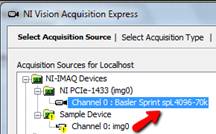
Select your camera from the list and click Next>>
-
Choose Continuous Acquisition with inline processing for the acquisition mode. Choose Acquire Every Image from the drop-down menu and click Next>>.

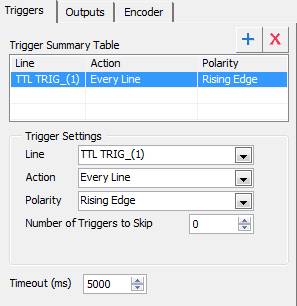
Under the Triggers tab select TTL TRIG_(1) from the drop-down menu. Set the Action to Every Line and Polarity to Rising Edge. When you are finished your window should look like the image below.
- Click Finish to apply these settings
- Switch to the front panel and click Run. You should see the image indicator update with a new image once every second.
