The functions in LabVIEW that can be used to convert
fixed-point (FXP) to integers or floating points are:
Scale Any Size FXP to an Integer
The Fixed-Point to Integer Cast can be used to convert FXP number to an integer and the size of the integer will be based off the size of FXP number. For example, if you have a FXP with a word length of 8 bits, this will be cast to a I8, but a FXP with word length of 9 will be cast to I16. (Word and integer word length descriptions)
This can be fine for some circumstances, however if we need convert any FXP (with any word length) to a particular size integer, for example any size FXP to I16, we need to cast that FXP to have a word length of 16 bits before using the Fixed-Point to Integer Cast:
- Create your initial FXP number, this could be from a FPGA I/O, a constant or control.
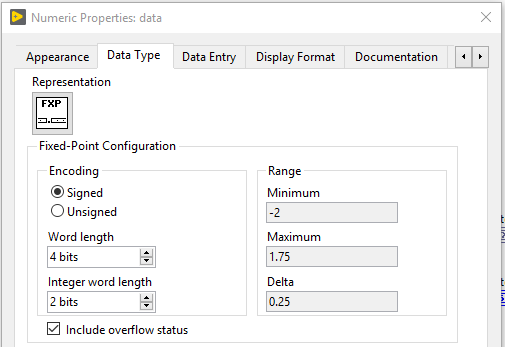
- If using a control or constant, you can right click on it, select Properties => Data Type and edit the word length and integer word length. Set word length = 4 bits and integer word length = 2 bits.
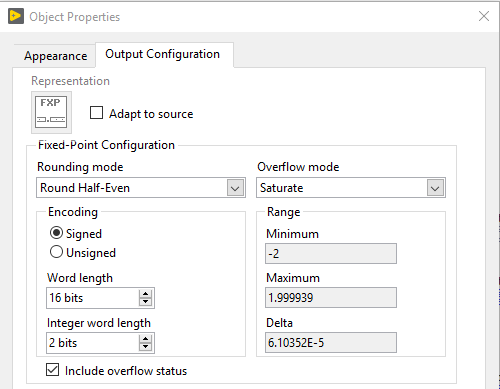
- Wire the FXP control (or constant) to a To Fixed Point conversion function, and set the output configuration to 16 bits.
- Right click on To Fixed Point and select Properties => Output Configuration. Set Encoding to Signed, Word length = 16 bits and Integer word length = 2 bits. This will ensure that the output is set to a 16 bit signed integer (I16), meaning the full range of the I16 number -32768 I16 to +32767 I16, whereas an unsigned 16 bit integer (U16) would have the range 0 to 65535
- Wire the output of To Fixed Point conversion function to a Fixed-Point to Integer Cast function. The output of this will be a 16-bit integer, scaled to the correct range.
Convert Integer back to FXP
To convert back to a fixed point number, reverse the functions.
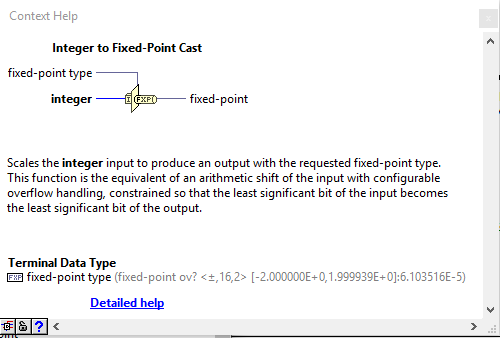
- Wire the integer to a Integer to Fixed-Point function,
- Wire a known FXP value into the fixed-point type input on the Integer to Fixed-Point Cast function. A control or constant can be used, as long as has the same properties (word and integer word length) as the initial FXP number to ensure its converted back in the correct format. Alternatively, wire the initial FXP value directly to the fixed-point type input.
- Note: Its not a Required input, but its recommended to connect so you have more control over the functionality.
- The output of the Integer to Fixed-Point Cast will be a FXP number with the same properties as the initial FXP number.