Updating the BIOS
1. Determine if your PXIe controller is supported in NI Linux Real-Time and if you need to update the controller BIOS . See the example picture below.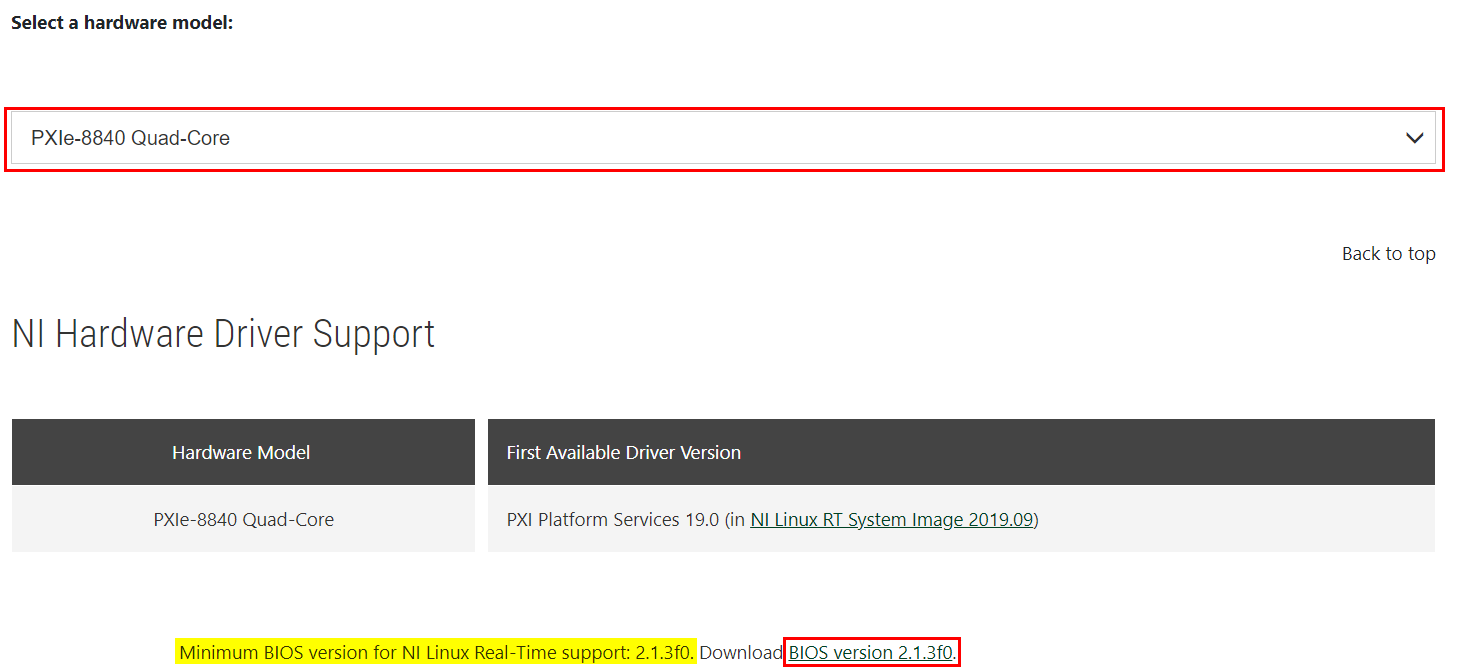
2. Select your controller from the drop-down menu on the above link.
3. Note the Minimum BIOS version for NI Linux Real-Time support stated.
4. Ensure that your controller has a compatible BIOS version. During the controller's start up, press Delete on your keyboard to enter the BIOS. The BIOS version will appear on the top of the screen in the main tab.
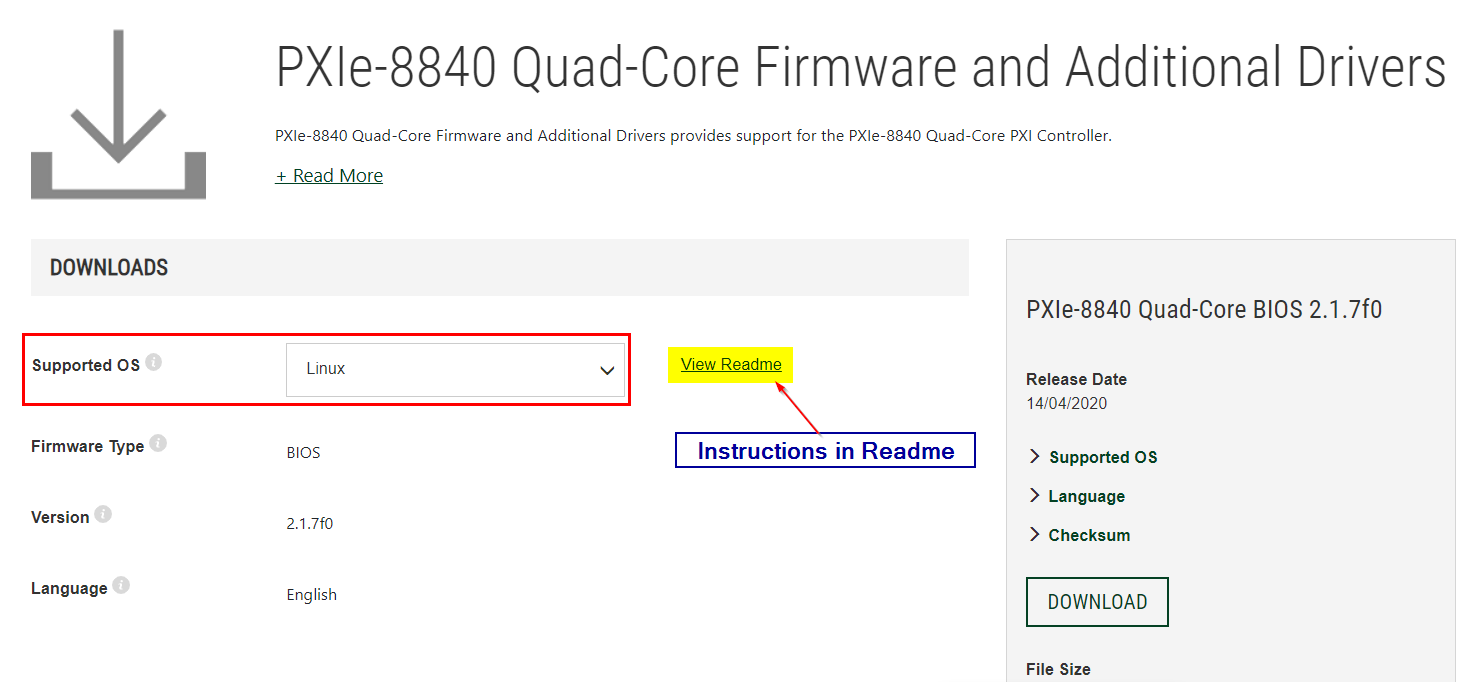
5. Search your controller's model on the NI website to find the BIOS download page. For example, the PXIe-8840 Quad-Core BIOS can be found here.
6. Follow the BIOS Firmware Installation Instructions section in the Readme of the BIOS download page to install the BIOS update. For this step, a FAT32 USB drive is required.
Installing Software to the Host Computer
Note: If your aim is to format your CompactRIO when its administrator password is unknown, follow the steps from this point.
You will need to install software on a host computer to create the USB partitioning utility.
1. Install LabVIEW and LabVIEW Real-Time Module 2019 or later. Make sure you are using the compatible software version for both LabVIEW and LabVIEW Real-Time Module.
2. Plug your USB storage device into the host computer.
3. Launch NI Measurement & Automation Explorer (MAX).
4. Select Tools >> Create NI Linux RT Recovery USB Drive.

5. Select your USB storage device under Drive. You can use the default disk image version or select any version under Disk Image.
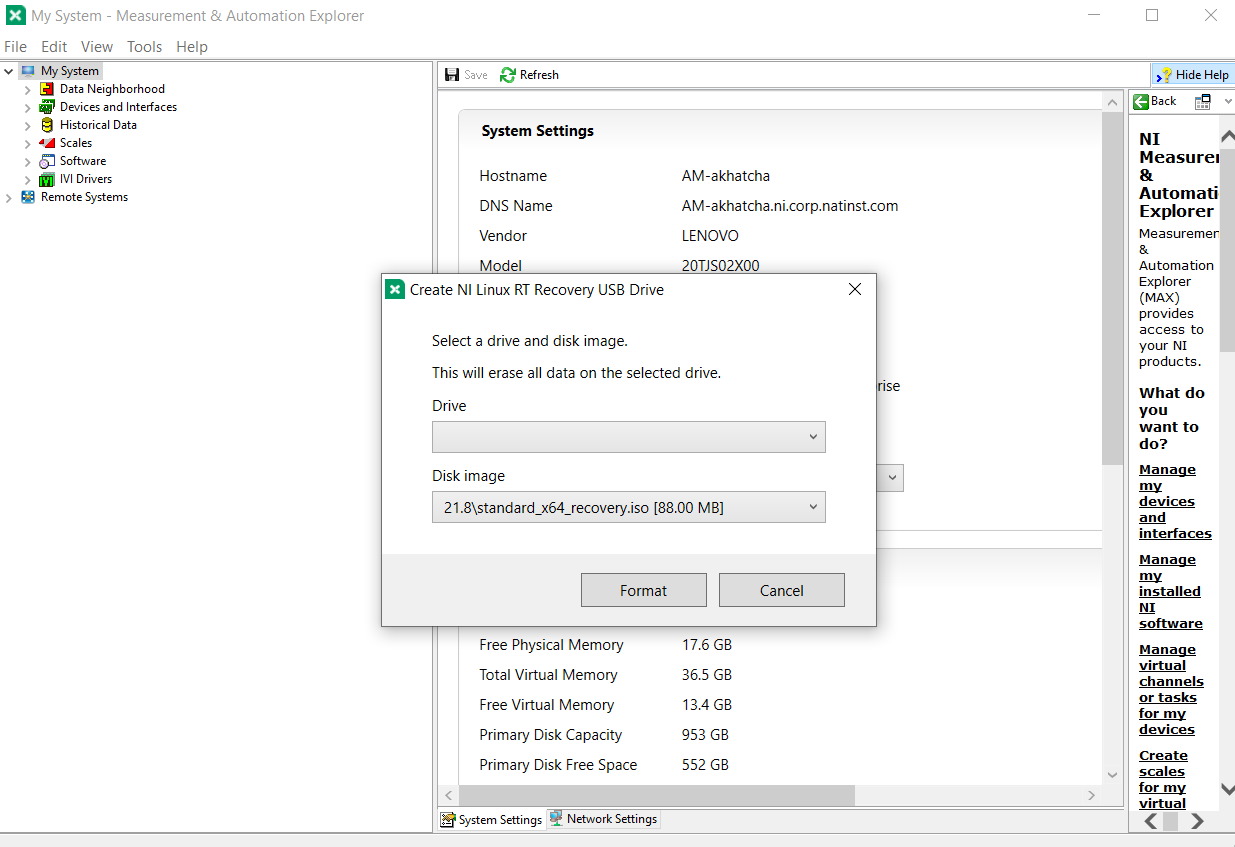
6. Select Format.
7. Once complete, eject the USB from the computer.
Partitioning the Controller for NI Linux Real-Time
1. Plug your formatted USB and a keyboard into the controller.
2. Restart the controller, and press Delete on the keyboard to enter the BIOS.
- Note: For newer PXIe controllers like PXIe-8861 and PXIe-8881, skip steps 3 and 4. They do not support Phar Lap OS and thus do not have a LabVIEW RT configuration option.
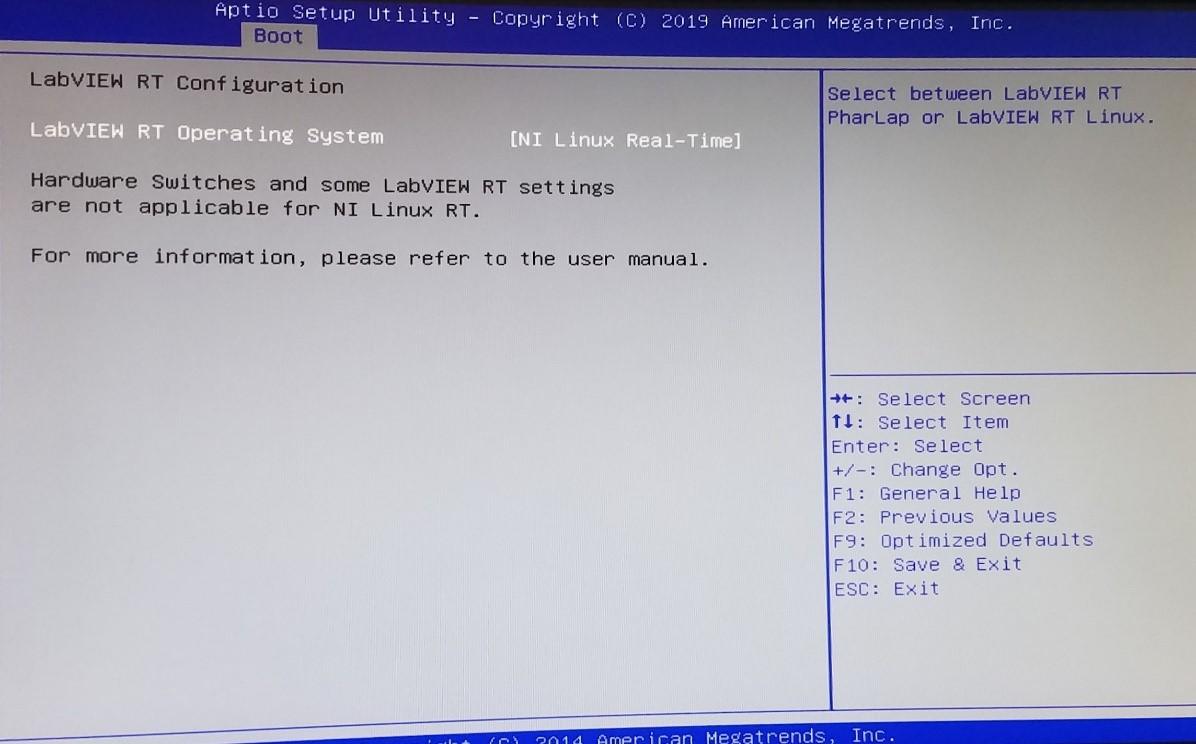
3. In the Boot Configuration tab, select LabVIEW RT Configuration. Then, select [NI Linux Real-Time] as the LabVIEW RT Operating System.
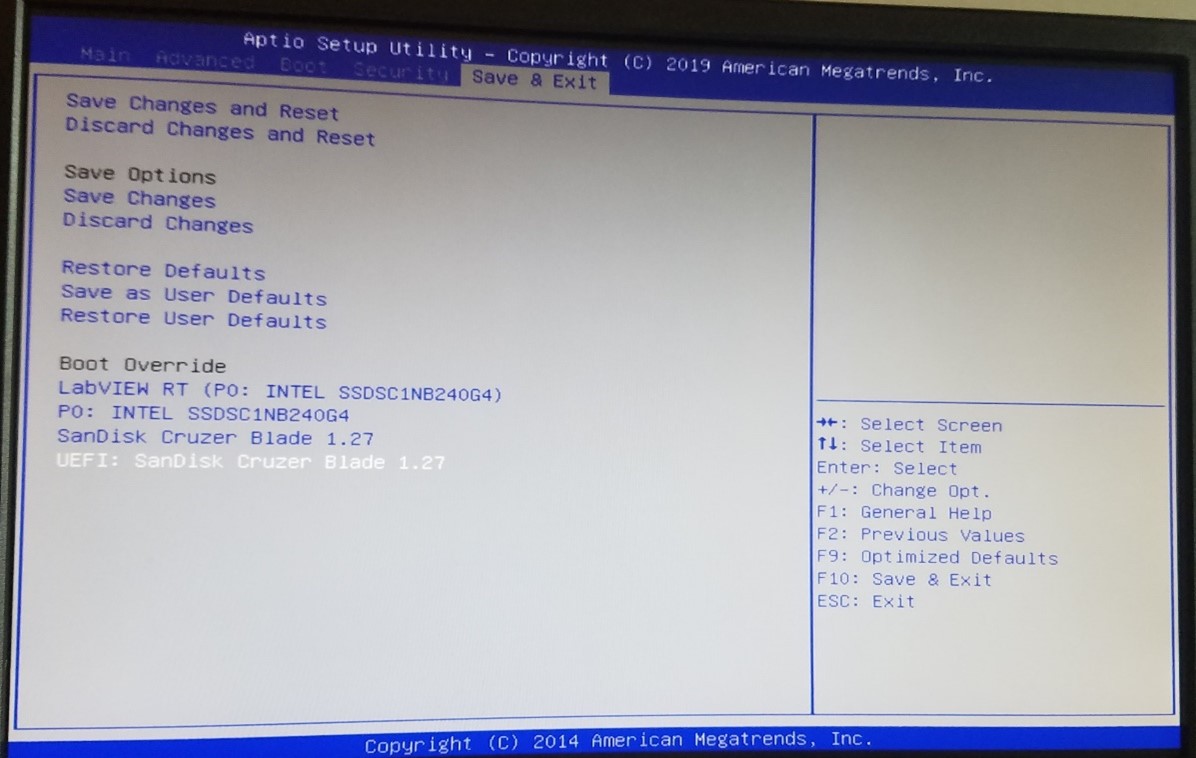
4. In the Save & Exit tab, select Save Changes.
5. In the same tab, select the UEFI: <USB drive name> under Boot Override.
- Note: This will reboot the controller and boot into the USB. If this USB does not work, attempt to use another USB.
- If the USB is not detected by the BIOS, connect the drive to a different USB port and try again.
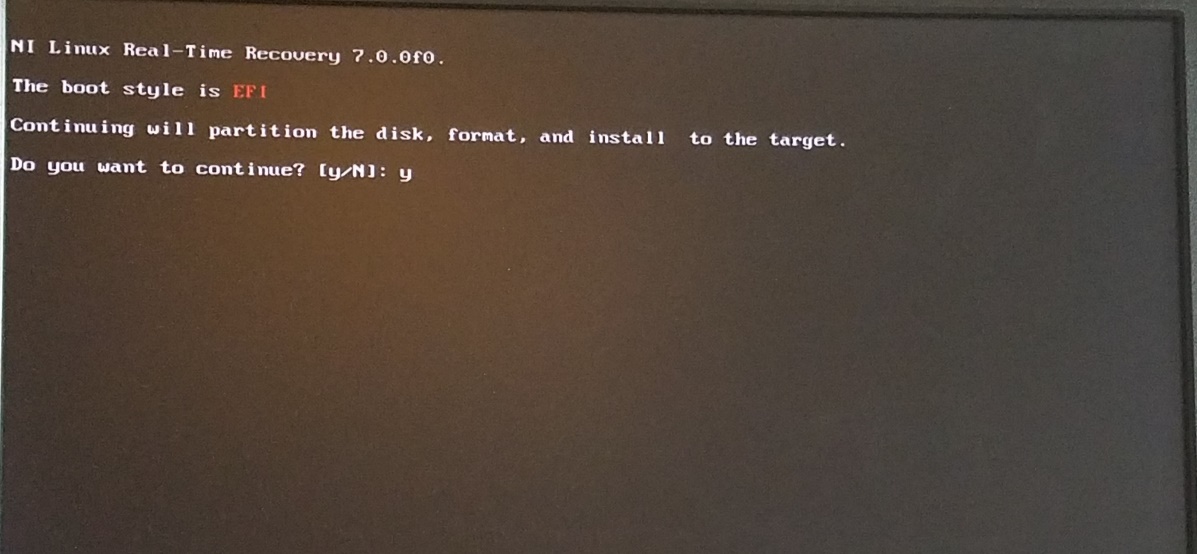
6. After the USB boots, you will be prompted with the option to partition the disk. Type y and press Enter.
7. Once formatting is complete, remove the USB and reboot the controller by power cycling or by typing reboot and Enter.
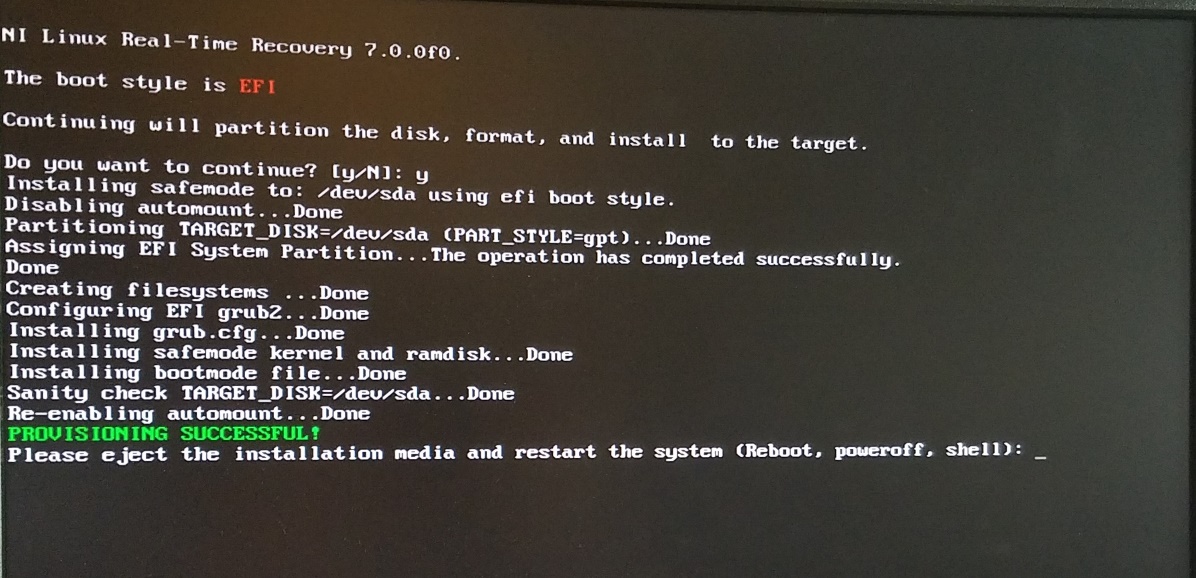
8. The controller should reboot into NI Linux Real-Time Safemode.
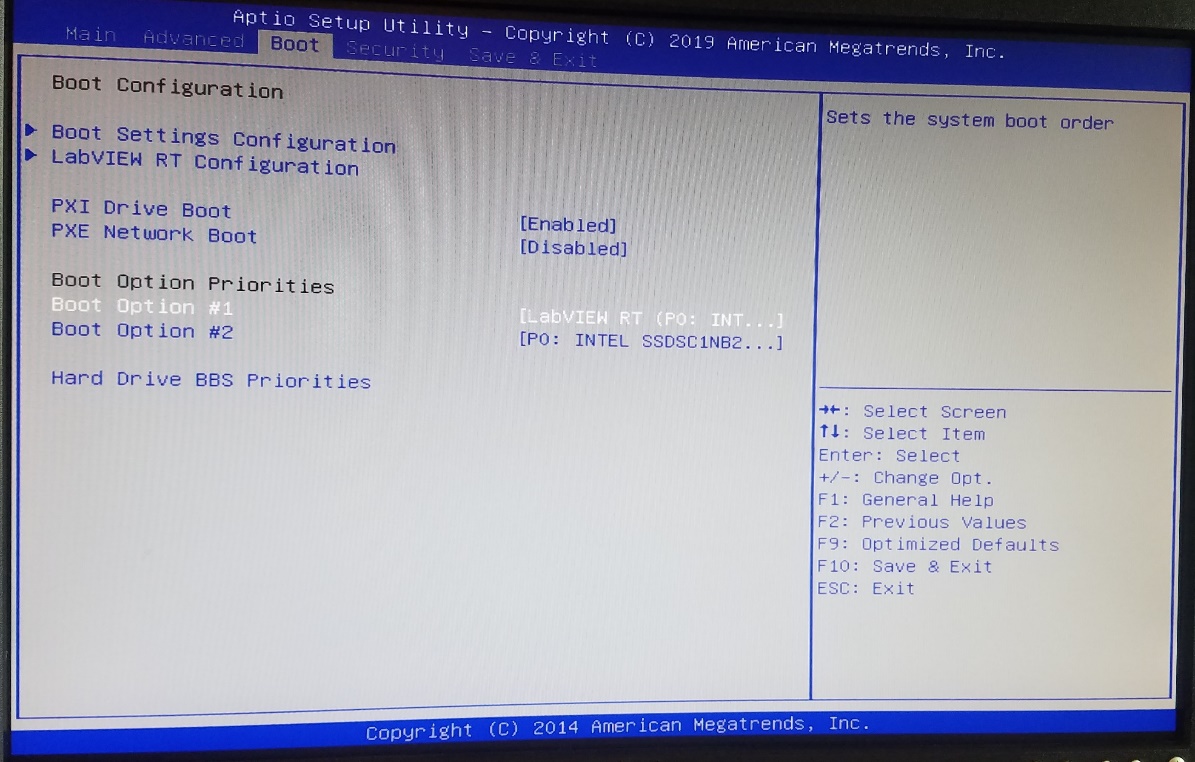
9. If the controller does not boot into Safemode, enter the BIOS and select LabVIEW RT as Boot Option #1 in the Boot Configuration tab.
10. When finished with the provisioning, use [External] Rufus to recover the USB drive, as it will not be discoverable by Windows.
- Download and open Rufus.
- Insert the USB you wish to recover/make discoverable again and ensure the correct USB is selected in the Device drop down.
- Set Boot Selection to FreeDOS and hit Start.