You will be amazed at how easy remote panels are to configure and use. There are two steps:
The following sections describe these steps for operating remote panels in both the LabVIEW environment and web pages.
For both remote panel scenarios (within the LabVIEW environment or embedded in a web page), the web server must be configured and enabled on the server machine. It is important to note that server in this context simply means a networked computer that is running the LabVIEW Web Server.
Three areas of configuration are required:
- File directories and network settings
- Permitted clients
- Visible VIs
You can configure directories and network settings by selecting Tools>>Options>>Web Server: Configuration (see Figure 2). Enable the web server by clicking the appropriate checkbox. The default port number for the web server is 80. In general, port numbers 49152 through 65535 are dynamic/private ports recommended for custom TCP/IP applications. Other options that you can set include the root directory for the server HTML files, the timeout for reading by the web server, and log file enabling to record information pertaining to client connections.
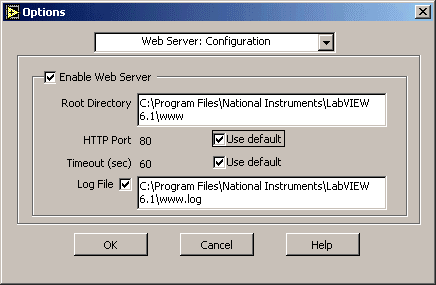
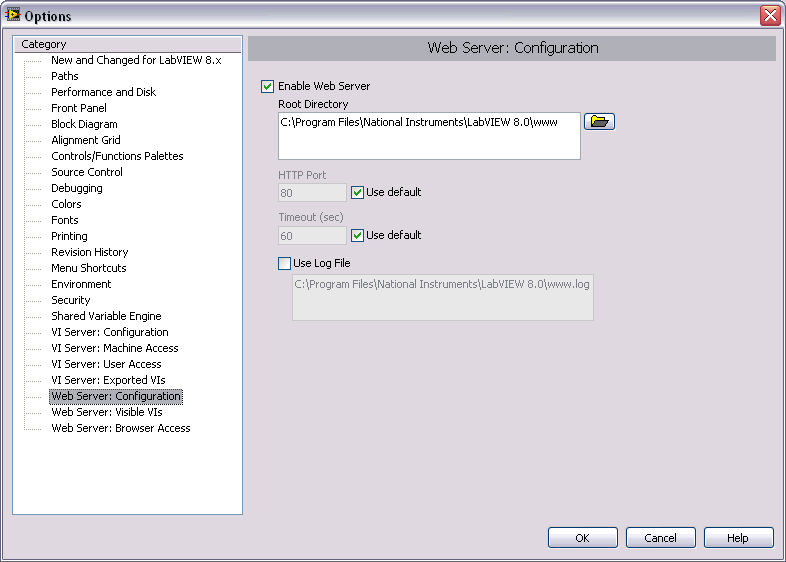
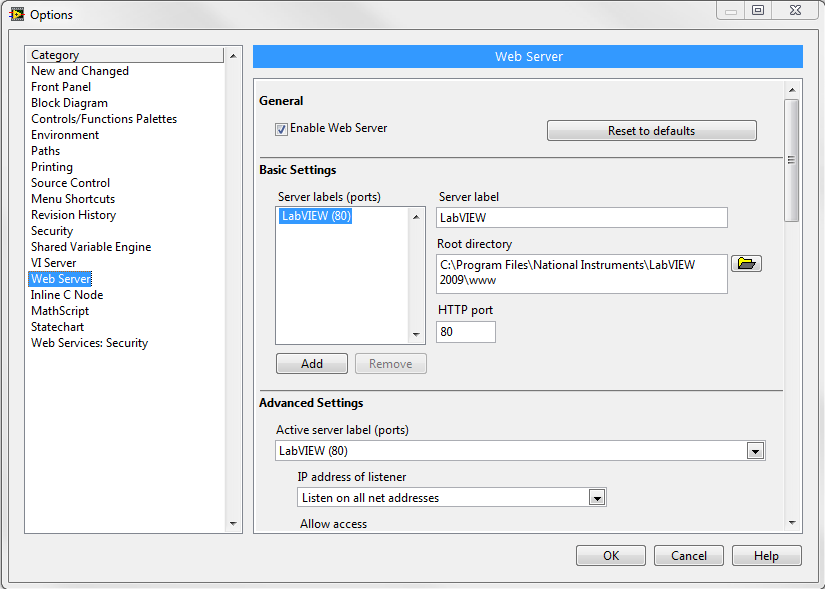
Figure 2: Web Server: Configuration Dialog Box for LabVIEW 6.1-7.1, 8.0, 2009-2012.
The next step is to specify a list of client IP addresses that are allowed to access the Web Server. Each IP address may be granted controlling privileges, viewing only privileges, or denied access. You can find this dialog box by selecting Tools>>Options>>Web Server: Browser Access(see Figure 3). An asterisk (*) as shown is the wildcard that grants access to any IP address.
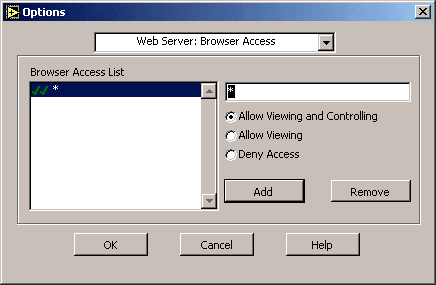
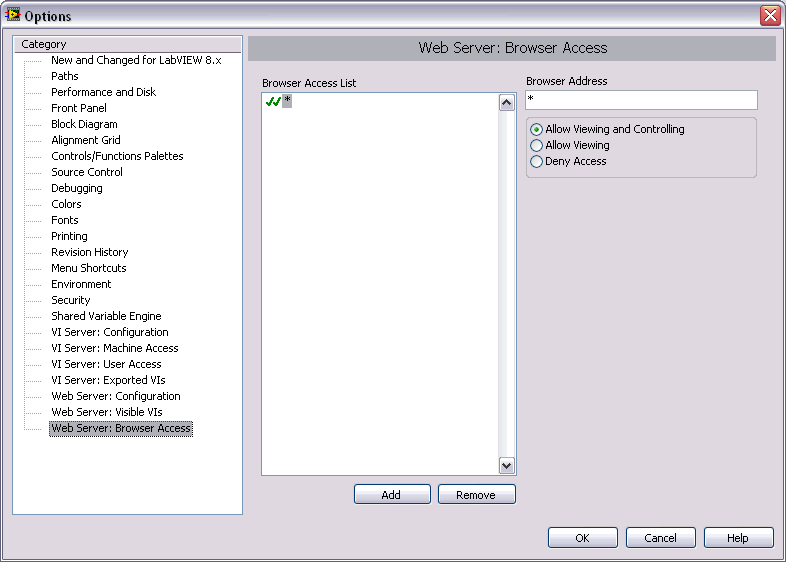
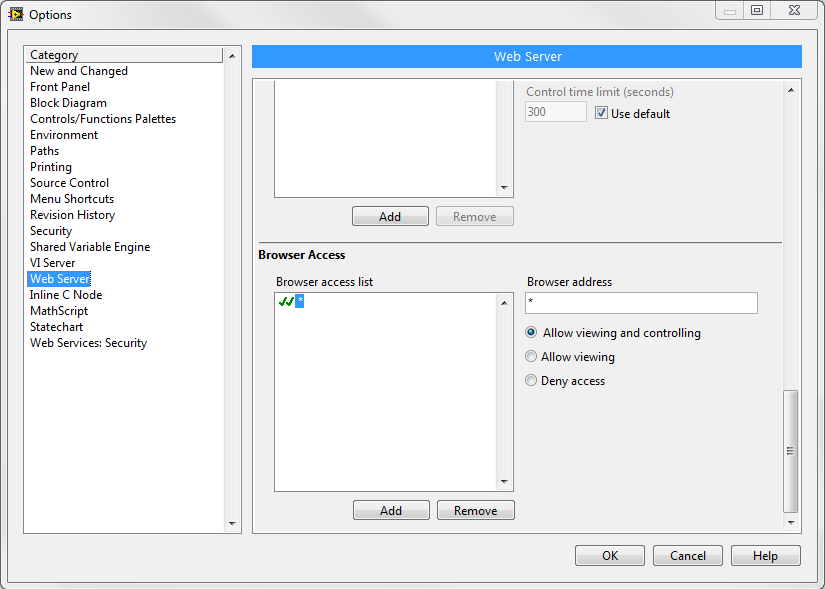
Figure 3: Web Server: Browser Access Dialog Box for LabVIEW 6.1-7.1, 8.0, 2009-2012.
The final step is to specify a list of VIs that can be accessed remotely. You can find this dialog box by selecting Tools>> Options>>Visible VIs (see Figure 4). You can set control time limits for each VI in the list. This control time limit is very useful if your VI will be accessed by multiple users. If there is no control time limit, a single user could monopolize control of the application, preventing other users from assuming control.
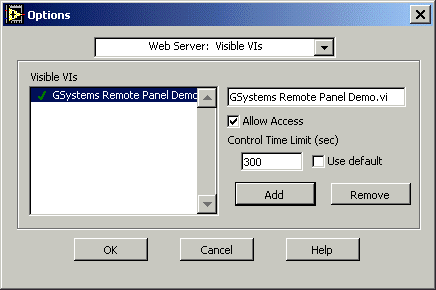
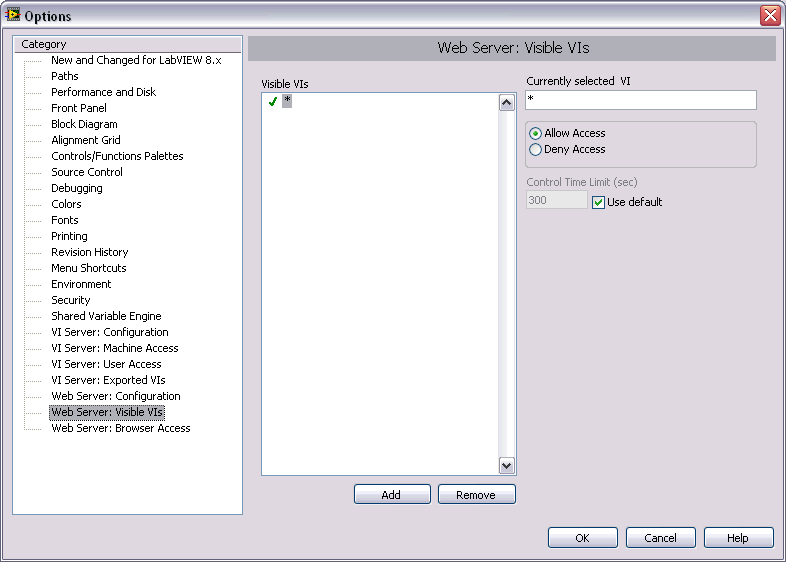
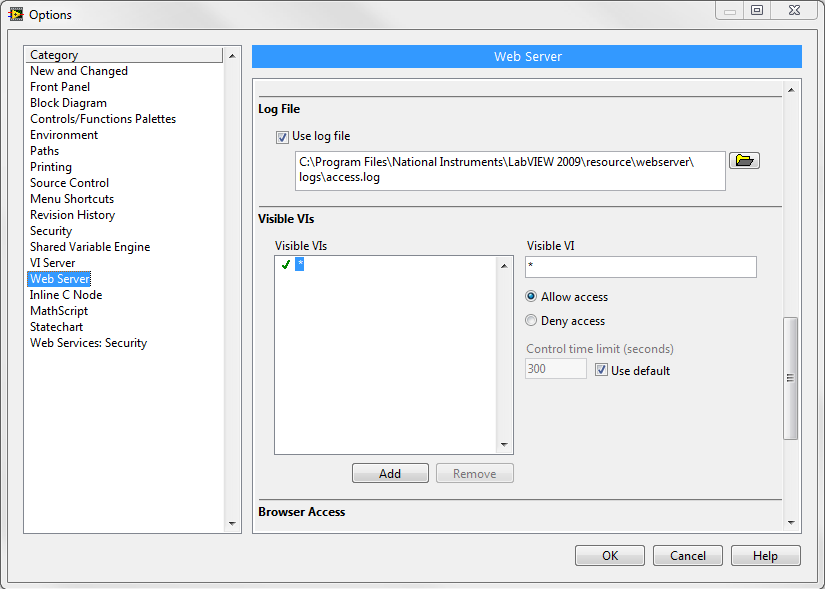
Figure 4: Web Server: Visible VIs Dialog Box for LabVIEW 6.1-7.1, 8.0, 2009-2012.
All of these configuration values are also available through VI Server and can be controlled programmatically. To provide web browser access, one additional step is required in setting up the server machine: you must publish a web page to be accessible through the web server using the Tools>>Web Publishing Tool menu selection. This tool allows user input of the VI name to embed, a title, and text information on the provided template. It then automatically creates an HTML file that you must save to the root directory specified during the first step of Web Server configuration. The Web Publishing Tool is a convenient method for creating the page, but you also can create your own HTML page manually. See the LabVIEW online help for information on how to create your own.
You only need to create a web page for top-level VIs. All subVI front panels set to open during execution will pop up on the remote machine in separate windows from the browser window (see the "Special Considerations" section for more details).
Now you are ready to run a remote panel from the LabVIEW environment. If you have LabVIEW, copy GSystems Remote Panel Demo.vi from the LTR Resource CD to your LabVIEW Web Server machine. Configure the Web Server options as previously described. (If you want to bypass the Web Server configuration for now and just operate a remote panel, you can connect to a demo VI on a G Systems server.)
Even if you do not currently have the LabVIEW development system, you can still operate a demo remote panel. We have included a simple LabVIEW application, Launch Demo From LabVIEW, on the LTR Resource CD that provides the standard LabVIEW Operate menu. Installing this demo application also installs the LabVIEW run-time engine.
On your client machine, from either the LabVIEW development system menu or the Launch Demo From LabVIEW application menu, select Operate>>Connect to Remote Panel to display the Connect to Remote Panel dialog box from LabVIEW (see Figure 5).
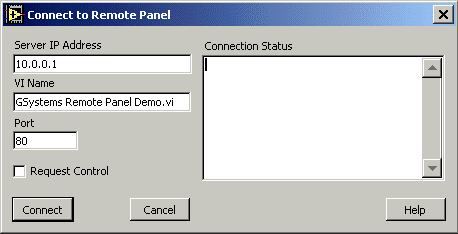
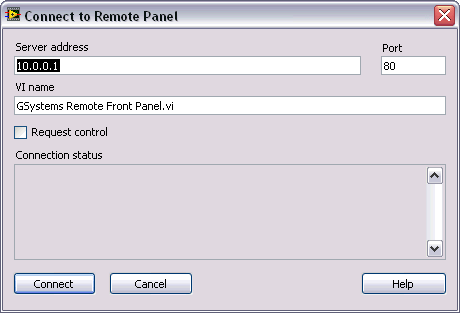
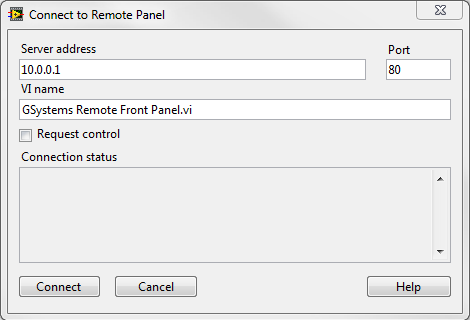
Figure 5: Connect to Remote Panel Dialog Box for LabVIEW 6.1-7.1, 8.0, 2009-2012.
Complete the following steps for this dialog box:
- In the Server IP Address field, enter the IP address, domain name, or computer name to which you will connect. For the G Systems demo server, enter demo.gsystems.com.
- In the VI Name field, enter the name of the top-level VI you want to operate remotely. For the G Systems demo, enter GSystems Remote Panel Demo.vi.
- In the Port field, enter the HTTP Port that was enabled during the Web Server configuration. The G Systems demo value is 50000.
- If you want to immediately request control of the front panel, place a checkmark in the Request Control checkbox. (You can request control later by right-clicking on the remote front panel window when it appears.)
- Click the Connect button. The remote panel will appear on your computer. If access is denied, an error message appears in the Connection Status section of the Connect to Remote Panel dialog box. The number of licenses for the G Systems demo is limited. If you are not granted control, please try again later.
By default, the number of remote panel connections LabVIEW allows is limited to one. You can purchase additional licenses from NI to allow multiple simultaneous connections managed by the NI License Manager. In this regard, an important tool for monitoring and controlling remote connections is located at Tools>>Remote Panels Connection Manager. This utility displays connection information and provides server control of current connections (see Figure 6).
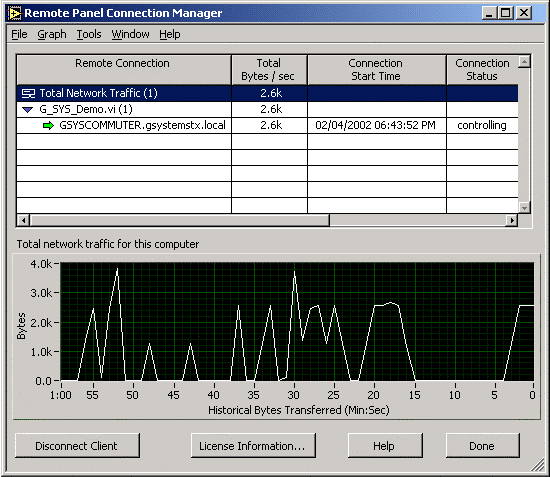
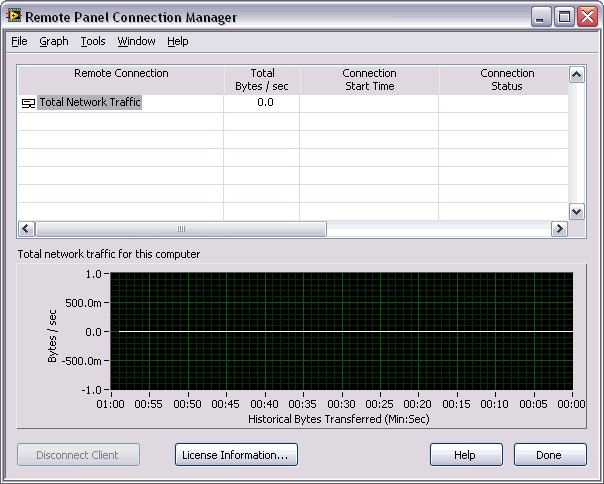
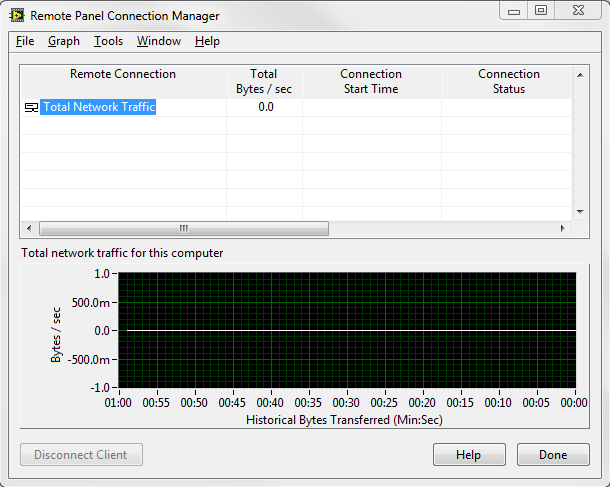
Figure 6: Remote Panel Connection Manager for LabVIEW 6.1-7.1, 8.0, 2009, and 2012.
The most exciting feature of remote panels is the ability to control LabVIEW remote VIs from a web browser. To operate remote panels from a browser, you must first have the LabVIEW run-time engine and browser plug-in installed on the client machine. (If you do not have LabVIEW yet, install the LabVIEW 6.1 run-time engine from the LTR Resource CD.) Next, you simply browse to the URL that comprises the server IP, network name, or domain name plus the HTML file name containing the embedded VI you want to operate. Within a LAN environment, the URL might appear as http://PcName: Port/ViName.htm. If you are operating the VI from an internet connection, the URL might appear as http://lpAddr:Port/ViName.htm.
When the remote panel appears in the browser, right-click on the panel to display a pop-up menu. Use this menu to request remote control of the demo VI as shown in Figure 7. You can set up your own web page using the VI on the LTR Resource CD or one of your own.
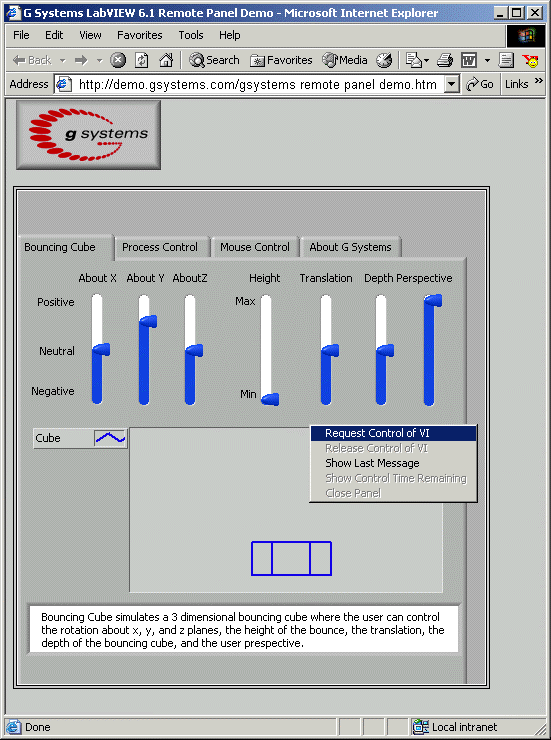
Figure 7: Requesting Remote Control of the Demo VI
One interesting thing to try: From the Operate menu on a browser-displayed remote panel, you can select Connect to Remote Paneland connect to a remote panel using the dialog box you would normally see from the LabVIEW environment!
- To execute remotely, the VI you want to execute must be loaded in memory (not necessarily running) on the server.
- From the server, you can regain control of the application at any time.
- User interface manipulation, such as window position and size, does not work as intended on the remote panel.
- Size and complexity of the front panel impacts control latency.
- Sound and other system access calls do not operate on the client machine, but on the server machine only.
- ActiveX controls are not functional on remote panels.
- SubVI front panels do not open when viewed in a browser on a Mac. They are disabled due to technical limitations of Mac browser plug-ins.
- If your VI is designed to open other VIs front panels by using the FP .Open VI Server property (as opposed to a subVI call where the subVI is configured to open its panel when called), the front panel will not open.
- On all platforms, VI properties that manipulate a VI front panel do not take effect on the remote client side.
- Duplicate IP addresses and visible VIs are allowed in the Web Server configuration the last entry overrides any previous entry.
- The File Dialog function (File I/O>>Advanced>>File Dialog) in LabVIEW returns TRUE for the cancelled output terminal and does not show a file dialog when the VI is remotely controlled. This is for security considerations to prevent remote clients from viewing the server’s file system.
- If you build an executable application for remote control, you must also include the NI License Manager utility in your installer by clicking the Advanced button in the Settings tab and placing a checkmark in the Remote Panel License Support checkbox. Without the Remote Panel Support, an executable will allow one connection. If an executable is to be installed on another machine, a separate license will need to be purchased for that machine.
- For web page remote panels, the size of the remote panel is the same as the size of the panel used to create the HTML file. To change the size of the remote panel, you must resize the server VI window and resave the HTML file.
Table 1 compares some differences between remote panels in a Web Browser and remote panels in the LabVIEW environment.
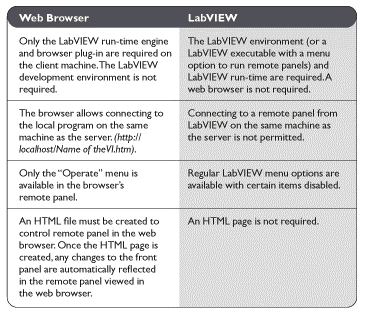
Table 1: Remote Panels in a Web Browser vs. LabVIEW
With LabVIEW, remote front panels not only can be viewed, but can also be controlled from either the LabVIEW environment or a web browser. This powerful tool will enable many programmers to create distributed applications easily. Just think - you can sit at home relaxing on the weekend while you monitor and control your LabVIEW application at the office, lab, or production line from your laptop! 'Most importantly, you can call up your friends and say, "Hop on the web and try out this cool LabVIEW application I just wrote!"
Many thanks to Naresh Shenkeshi, Mike Fortenberry, Yumiko Kawachi, and Carlos Yapura, who made major contributions to this article.
LabVIEW Technical Resource (LTR) is the leading independent source of LabVIEW-specific information. Each LTR issue presents powerful tips and techniques and includes a Resource CD packed with VIs, Utilities, Source Code, and Documentation.