Installing a Base Image
With the release of NI Linux Real-Time Controllers, NI has introduced the concept of Base Images. A Base Image is a lightweight installation of the minimum software needed to configure, install software to, and successfully use all available features with a Linux Real-Time PXI Controller.
If you are planning to deploy a VeriStand project to NI Linux Real-Time Controllers, please refer to VeriStand and NI Linux Real-Time Base System Image Compatibility to select the compatible base system image.
To apply a base image, follow these steps:
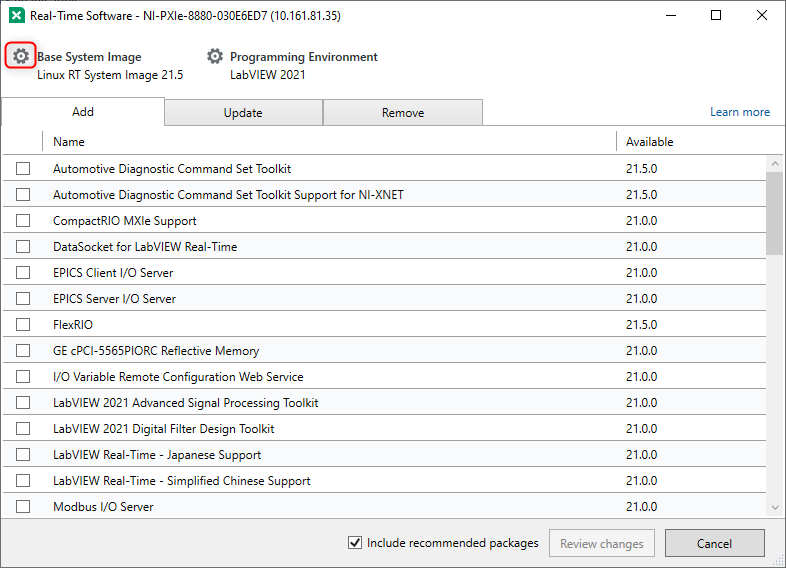
- Expand your controller in NI MAX and right-click on Software and select Add/Remove Software.

- Click on the cog icon next to Base System Image to bring up a list of the available Base Images you can apply.
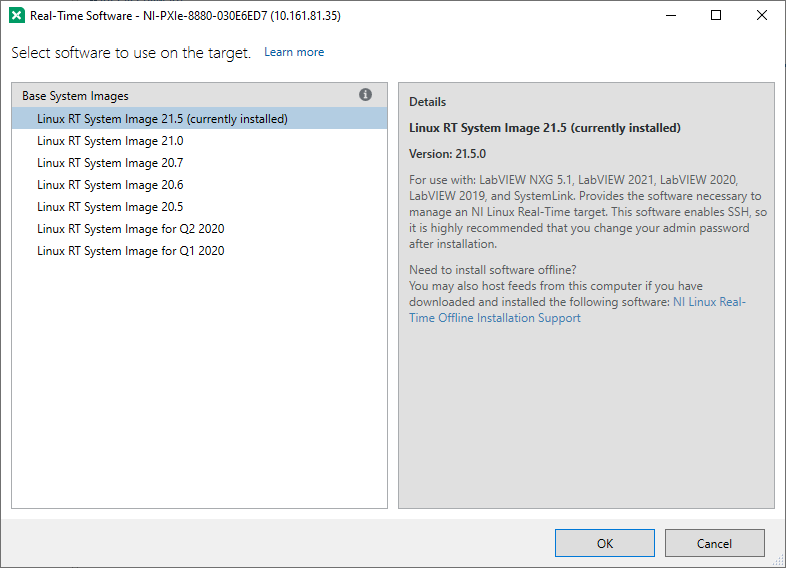
- Select the Base Image you wish to use and select OK.
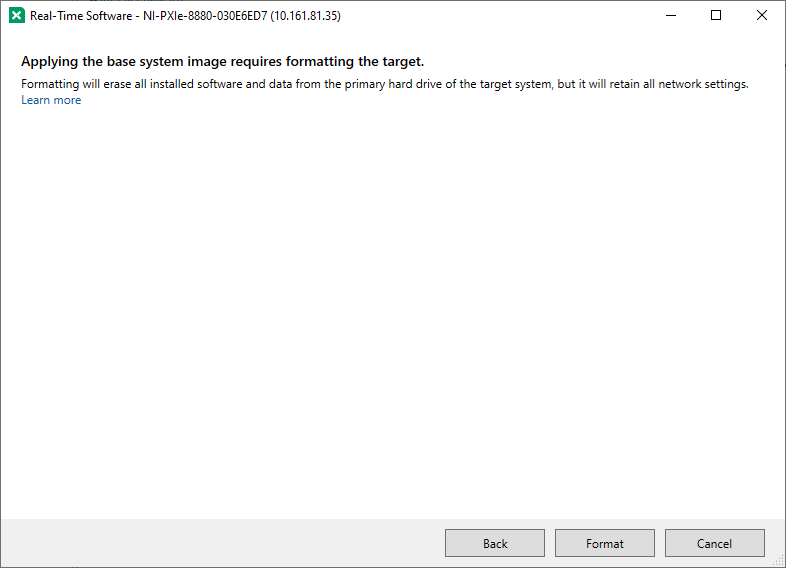
- Now click Format to format your controller and apply your selected Linux Base Image,
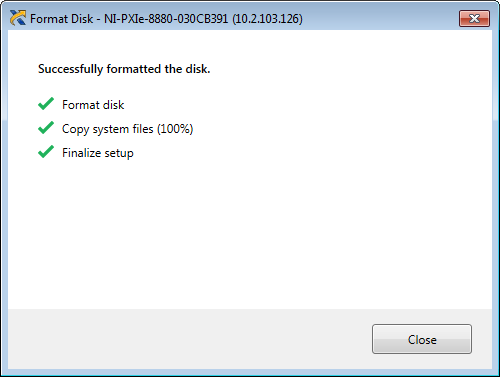
- Wait until the format has finished. Once finished, you have successfully applied a Base Image. Click Close and you can now install software onto your PXI.
Installing Software
Unlike past NI Real-Time Controllers, NI Linux Real-Time PXI Controllers install NI Drivers and Software as packages within a Linux package manager, opkg. This section will cover the PXI Linux Real-Time install system and how to install software using the wizard.
Online Package Repository and opkg
In the past, installing software to NI Real-Time Controllers has required installing the relevant software and drivers to a Host PC and then running an install process to push these items from the Host PC to the Real-Time Controller. This meant that all NI Software necessary for the controller had to be present on the Host PC in the exact versions necessary for a system.
Instead, NI Linux Real-Time PXI Controllers now use a process that scripts installation through a lightweight package manager: opkg. Existing users of NI Linux Real-Time may already be familiar with using this package manager to install many third-party software from the official NI-hosted package repository. As of the 2019 release of the LabVIEW Real-Time Module, software and drivers for NI Linux Real-Time PXI software and Controllers are now hosted in this same repository. As of the 2020 release, software and drivers for NI Linux Real-Time PXI software and Controllers can be installed to offline Real-Time Targets. Refer to Installing Software to Offline NI Linux Real-Time Targets for more information.
As a result of this change, the Host PC no longer needs every driver or utility in order to install software to an NI Linux Real-Time PXI Controller. Only NI MAX is necessary to facilitate the installation once a system has been imaged with a Base Image. This makes replicating or restoring different software versions on a Real-Time controller much easier, with the Base Image ensuring access to the right versions of the repository feeds.
Once the software is installed, the controller can be used as with any other NI Real-Time controller. NI recommends keeping a development machine configured with all relevant software and drivers as the development APIs and environments will still be necessary for programming the controller.
Installing Software from NI MAX
To install software from NI MAX, follow the instructions below:
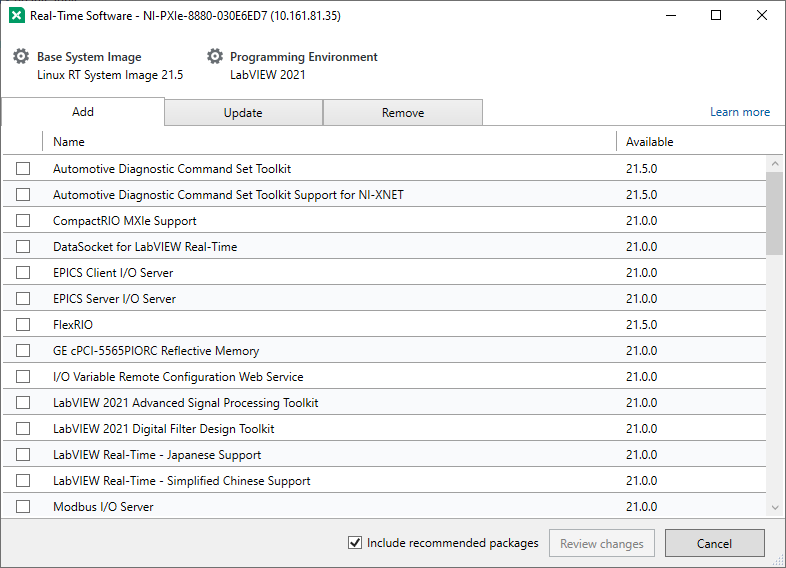
- In NI MAX, expand the controller by clicking the arrow to the left of the controller and Right-Click on Software and select Add/Remove Software.

- A prompt to log in as the admin user will appear. If an admin password has been set, enter the password and click OK. Otherwise, just click OK without entering a password.
- Select the items to install, update, or uninstall from the Add, Update, and Remove tabs respectively. Use the cog next to Programming Environment to ensure select the environment and version you will be using to program with your controller. This is important to ensure the correct driver versions are loaded.
Note: If you select the Other (Select to use C,C++,Python,etc) option in the Programming Environment entry, you'll only be presented with the set of NI IPKs to install from the ni-main feed. If you select one of the LabVIEW versions, you'll also be able to install NI IPKs present in the ni-lv20XX feed.
Any IPK that depends on ni-labview-realtime, directly or indirectly, you must select one of the LabVIEW subfeeds to be able to install it. This is because ni-labview-realtime is only available in one of these subfeeds.
For example, the ni-rfsg has a dependency chains that is inclusive of ni-labview-realtime. The dependency chain is included below, so you must select one of the LabVIEW subfeed versions to be able to have ni-labview-realtime be installable, and therefore be able to install ni-rfsg.
Dependency chain inclusive of LabVIEW RT: ni-rfsg -> ni-rf-vst2-libs -> ni-rf-vst-583x -> ni-rf-vst-583x-libs -> ni-labview-http-client -> ni-labview-realtime
- Click Review Changes to see a summary of the changes that will be made to the system through the installation process. This may take a few minutes.

- Click Continue to make the required updates. This may take a few minutes.
- If the installation process gets stuck on the "Restart System" step, try with a direct Ethernet or USB connection.
- Once the updates are complete, click the Close button. The software will now appear under the Software dropdown for the controller in NI MAX.