Introduction
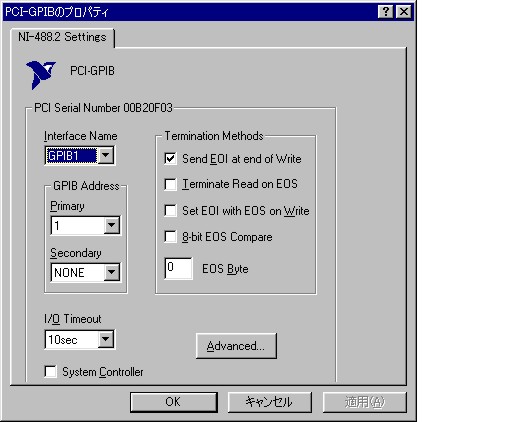
The example discussed below shows how to communicate between two GPIB devices on the same computer. We will use an AT-GPIB/TNT+ configured as the controller and a PCI-GPIB configured as the non-controller. The specific settings for these boards are:
- AT-GPIB/TNT+: GPIB0, PAD = 0, SAD = None, controller

- PCI-GPIB: GPIB1, PAD = 1, SAD = None, non-controller

For this example, we will use two IBIC (Instrument Bus Interactive Control) sessions - one for the controller(GPIB0), and another for the non-controller(GPIB1) (you can start these sessions from the start menu or through Measurement & Automation Explorer (MAX)). We then connect GPIB0 to GPIB1 as if GPIB1 was a device (dev1). Enter the following commands to see communication between the two devices:
| IBIC on GPIB0: | IBIC on GPIB1: |
| ibfind gpib0 | ibfind gpib1 |
| ibsic (make sure the CIC flag is up*) | |
| ibrsc 1 | |
| ibsre 1 | |
| ibfind dev1 | |
| ibwrt "Message from GPIB0" | |
| | ibrd 18 |
| | ibwrt "Message from GPIB1" |
| ibrd 18 | |
* If the Controller-In-Charge (CIC) flag does not go up, it may be because GPIB1 is set as the system controller. In order to fix this problem, unplug the cable connecting the 2 boards and enter the following commands in IBIC for GPIB0:
ibfind gpib (if not already entered)
ibrsc 1
ibsic (at this point, the CIC flag should pop up)
Now reconnect the cable to GPIB1.
ibsic
This time, the CIC flag should still be up, meaning that this board is the CIC.