-
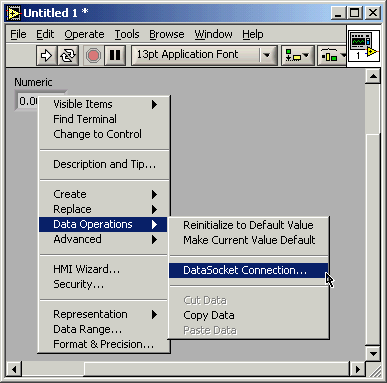
Create a numeric or Boolean indicator on the front panel of your VI.
-
Right-click the indicator and select Data Operations»Datasocket Connection.
-
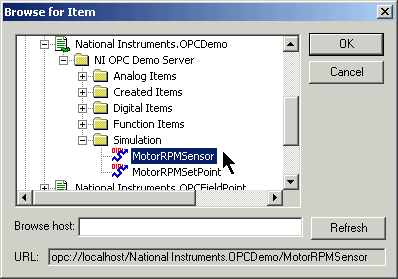
In the DataSocket Connection dialog box, click the Browse button and select Browse Measurement data.
-
All the OPC Servers installed on your computer appear in the Browse for Item dialog box.
-
Expand the node for an OPC Server and navigate to the desired data items. The URL for the data item appears in the URL text box.
-
Click the OK button.
-
LabVIEW populates the Connect To text box with the URL for the data item you selected.
-
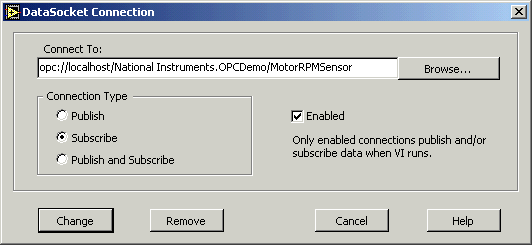
Select a Connection Type. Selecting Publish sets the connection to write-only, Subscribe sets the connection to read-only, and Publish and Subscribe sets the connection to read/write.
-
Click the Attach button.
-
Add a While Loop and Stop button to the block diagram to make the VI run continuously. The indicator on the front panel does not have to be inside the loop.
-
Place a Wait Until Next Millisecond Multiple function in the While Loop to prevent the VI from using too much memory.
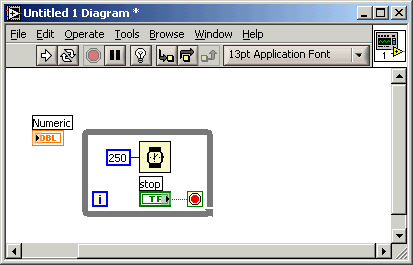
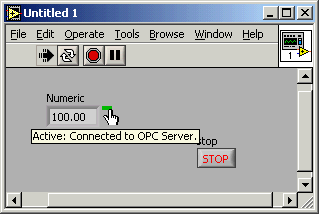
12. Run the VI. The LED on the indicator turns green and the value of the indicator updates if the connection to the OPC Server is successful.
If you want to connect to many data items in an OPC Server, use the LabVIEW Datalogging and Supervisory Control (DSC) Module. The DSC Module simplifies the task of monitoring ranges of OPC items and includes alarming and security.