Setting Up the Example
Create a new directory named Waveform in your <TestStand Public>\Components\StepTypes directory. Copy the contents of the zip file for this tutorial to your new directory. This zip file contains:
- Edit_Limits.vi, which displays an edit dialog box,
- Set_Status.vi which sets the step status.
- Get_Waveform.vi, which is the code module that the step calls. It creates a sinusoidal waveform and returns the waveform to the step property, Step.Waveform.
Creating the Waveform Step Type
1. In the TestStand Sequence Editor, click the Type Palette button  in the toolbar, or select View » Types to bring up the Types window.
If you create the custom step type in the Type Palettes section of the Types window, it will be available in all sequence files. You can also create a step type in the Sequence File Types view by selecting an opened sequence file underneath the Sequence Files section of the Types window.
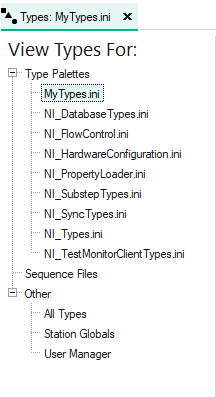
However, a step type that is created in a sequence file will only be available in that sequence file. Of course, you can copy that step type to a Type Palette or to other sequence files.
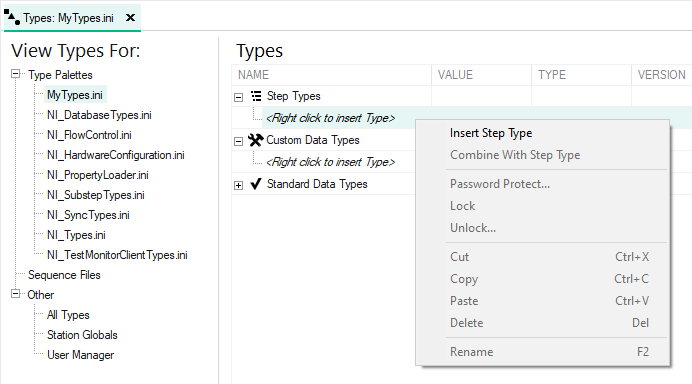
2. Under the Type Palettes section, select MyTypes.ini, then right-click in the right pane underneath Step Types and select Insert Step Type from the context menu.
3. Name the new step Waveform as shown below.
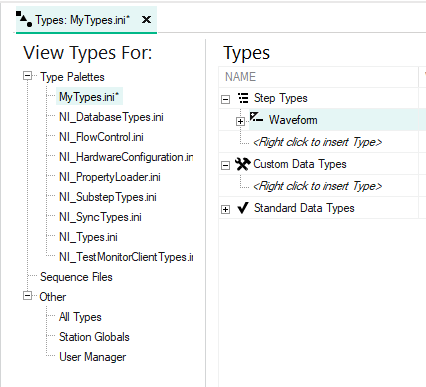
4. Click the  button next to the Waveform step type to expand its properties, and then right-click on the child item of the step type labeled <Right click to insert Field> and select Insert Field » Container from the right-click menu. Name the container Limits.
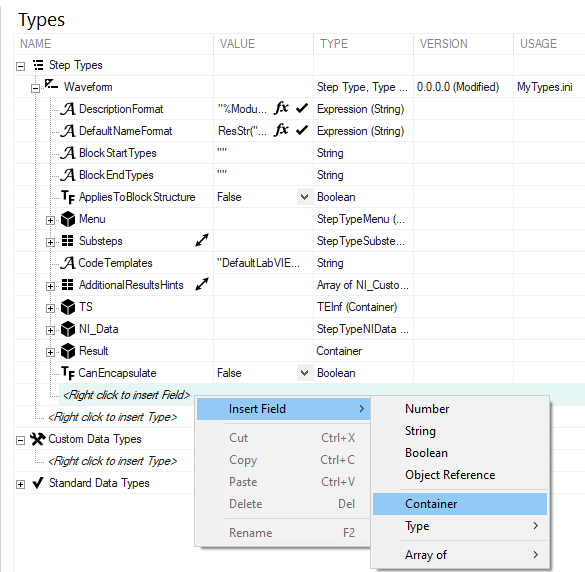
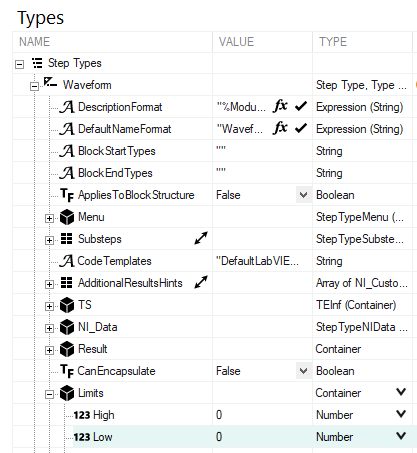
5. Expand the Limits container, right-click beneath it and select Insert Field » Number to create two new numeric fields within the Limits container. Name them High and Low, as shown below. You can assign initial values to Limits.High and Limits.Low properties, if you like.
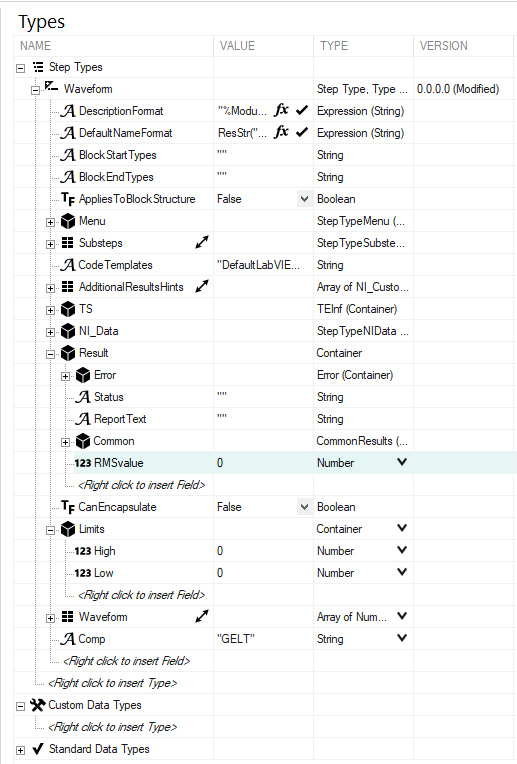
6. Under the Waveform step type, create a new numeric array property. Leave the default values for the array in the Array Bounds popup dialogue, and name the array Waveform.
7. Under the Waveform step type, create a new string property. Name the string property Comp. Give the string property a default value of GELT which corresponds to Greater than or Equal – Less Than. This matches LabVIEW’s In Range and Coerce function which is used in the Set_Status.vi. The Comp property will be used to evaluate the precondition when the report includes the high and low limits.
8. Under the Result container of the Waveform step type, insert a new numeric property and name it RMSvalue. When the step executes, the TestStand engine automatically copies any step properties under the Result container to the ResultList. The report generation sequence creates the report from the entries in the ResultList. Later in this tutorial, you will modify the report generation sequence to include RMSvalue in the report.
9. Your new step type properties should appear as shown below.
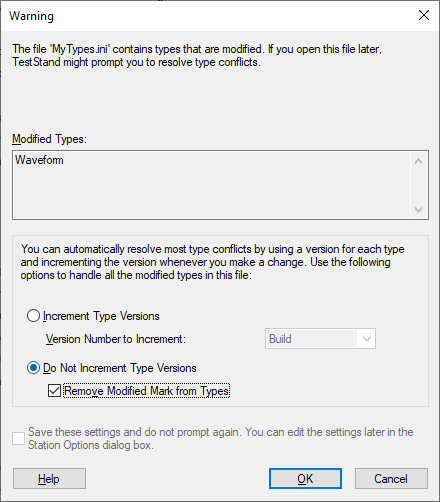
10. Save the Type Palette. If you get a prompt like the one shown below, select Do Not Increment Type Versions, check the Remove Modified Mark From Types option, and click OK.
Configuring the Waveform Step Type Properties
1. In the Type Palette, right-click on the Waveform step type in the right pane and select Properties from the context menu. This displays the Step Type Properties dialog box. The Step Type Properties dialog box is for configuring the properties, code modules, and default actions for a step type. For more information on the Step Type Properties dialog box, refer to the TestStand Help.
You will now examine several tabs and configure the properties for the new step type.
General Tab
This tab contains the default name, description, icon, and adapter type associated with a step type.
2. In the Default Step Name Expression control, enter Waveform, as shown below. When a step is created from this custom step type, it will have this default name. The sequence developer can later change the name of the step.
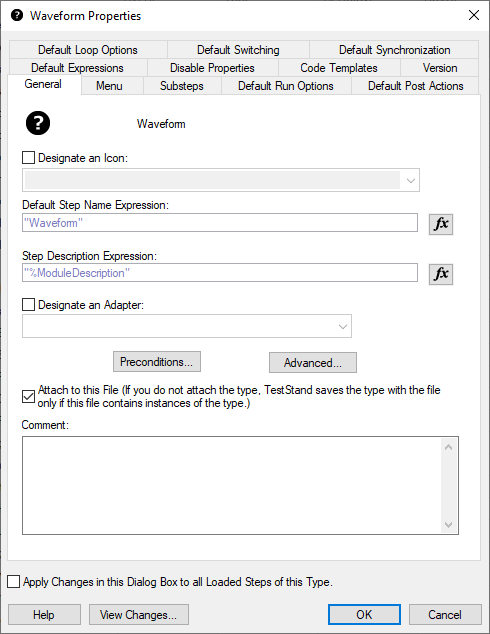
3. In this tutorial, leave the Step Description Expression as %ModuleDescription. When a step of this step type is created, the description will be the name of the code module that the step calls.
4. For this example, we will not designate an adapter. If you designate an adapter for this step type, any steps created from this step type would be restricted to using the specified adapter. If you were to designate an adapter, you could further restrict the step type to call a specific code module of your choice. If you did not want to call any code module from your step type, you could select None for the adapter. If you wanted to prevent sequence developers from specifying a different code module, you could go to the Disable Properties tab and check Specify Module.
Menu Tab
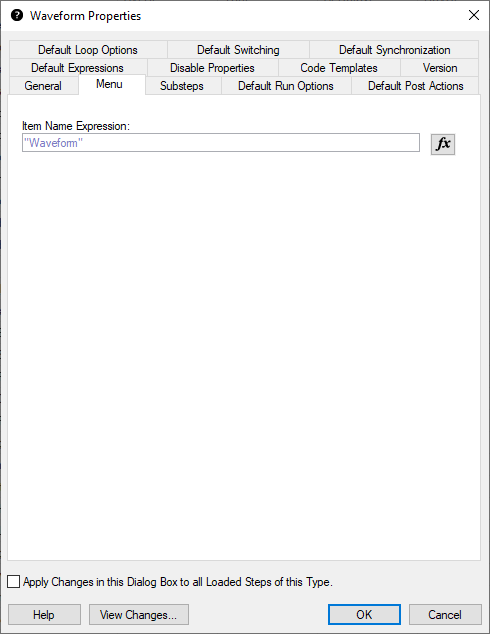
5. Click on the Menu tab. The Menu tab specifies the text that appears in the Insert Step context menu when a step is inserted into the sequence file. Enter Waveform in the Item Name Expression control, as shown below.
Substeps Tab
The Substeps tab specifies substeps for the step type. It is possible to call code modules as Pre-Steps and Post-Steps for each step type. This is not the same code module that can be specified for each step instance. The sequence developer cannot customize the substeps for a particular step. If a Pre-Step or Post-Step Substep is specified, that code module is called at every execution in every instance of the step type. During execution, TestStand calls the Pre-Step substep before calling the step module and the Post-Step substep after calling the step module. You can use any of the TestStand adapters when specifying code modules in the Substeps.
The default step types use the Status Expression to set the step status at run time. In this tutorial, you will use the Post-Step Substep to set the step status of the Waveform step type.
6. On the Substeps tab, select LabVIEW from the Adapter pull-down ring, and then click Add… » Post-Step.
7. With the newly created Post-Step Substep selected, click Specify Module…. In the Edit LabVIEW VI Call dialog box, click the Browse For VI... button and browse for Set_Status.vi in the <TestStand Public>\Components\StepTypes\Waveform directory. If prompted, select Use a Relative Path for the file shown above. Click OK to return to the Edit LabVIEW VI Call dialog box.
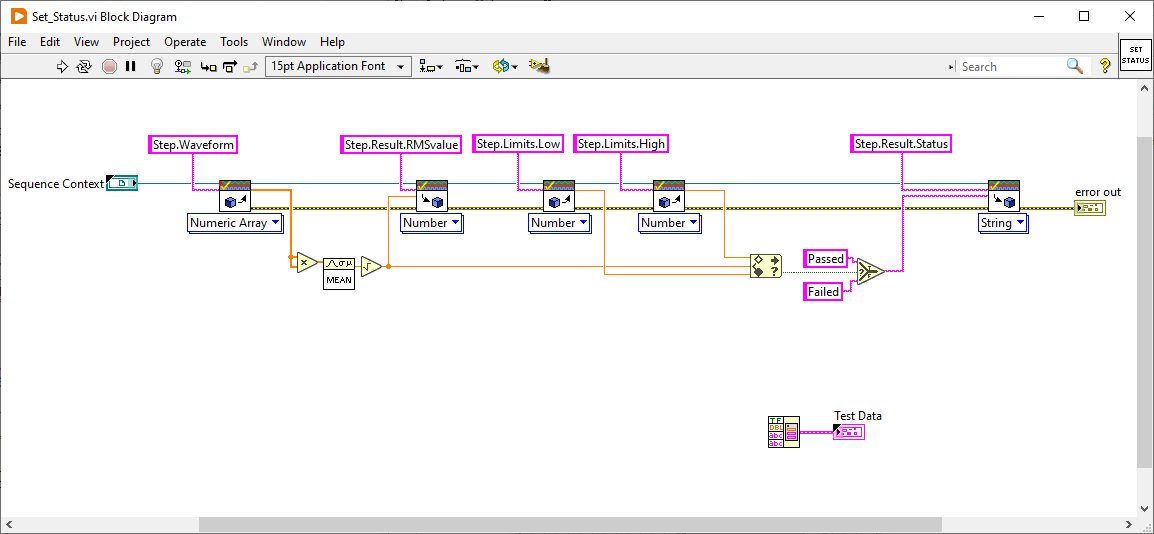
The diagram of Set_Status.vi is shown below where the RMS Value of the waveform is compared to the high and low limits. If the RMS Value is within the high and low limits, the status is set to Passed, otherwise the status is set to Failed.
8. Click OK to exit the Edit LabVIEW VI Call dialog.
9. On the Substeps tab, click Add… » Edit to create an Edit Substep, and name the substep Edit Limits.
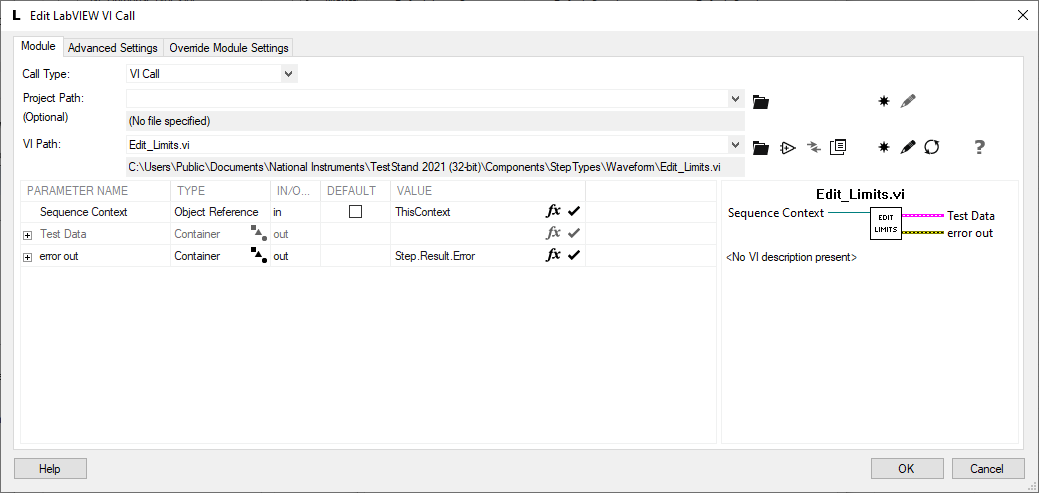
10. Click Specify Module… to bring up the Edit LabVIEW VI Call dialog.
11. In the Edit LabVIEW VI Call dialog, click the Browse For VI... button  and browse for Edit_Limits.vi in the <TestStand Public>\Components\ StepTypes\Waveform directory. If prompted, select Use a Relative Path for the file shown above, and click OK to return to the Edit LabVIEW VI Call dialog box.
12. Click the Show VI Front Panel button  so that it is enabled
  . This way the Edit_Limits.vi will open its front panel when running so that the user can interact with the VI to configure the step.
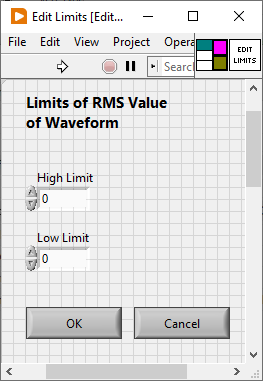
The Edit_Limits.vi is shown below. All edit substeps must be modal to the sequence editor.
13. Click OK to exit the Edit LabVIEW VI Call dialog.
Disable Properties Tab
The Disable Properties tab allows you to prevent sequence developers from modifying certain step properties. In this example, you will prevent sequence developers from setting a Status Expression because that would override the status that the Post-Step Substep sets.
14. Check Status Expression in the Disable Properties tab.
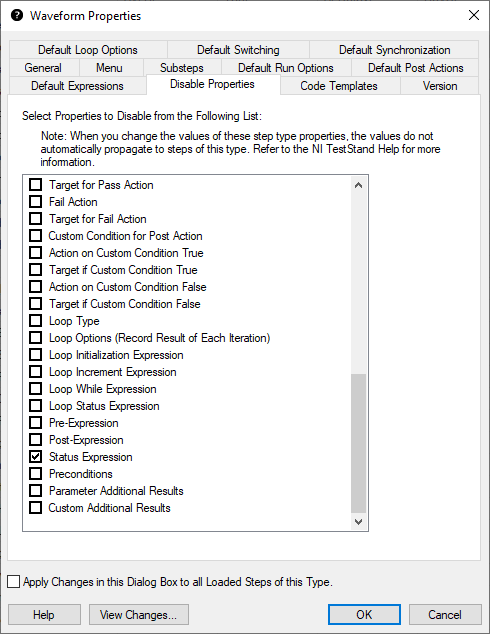
15. Click OK to close the Waveform Step Type Properties dialog box and save the Type Palette.
16. Click File » Save from the menu bar. If you get a warning about modified types, select Do Not Increment Type Versions, check the Remove Modified Mark From Types option, and click OK.
Creating a Step from the Waveform Step Type
1. Create a new sequence file by selecting File » New Sequence File from the menu bar.
2. Change the adapter to LabVIEW in the Selected Adapter pull-down ring menu.
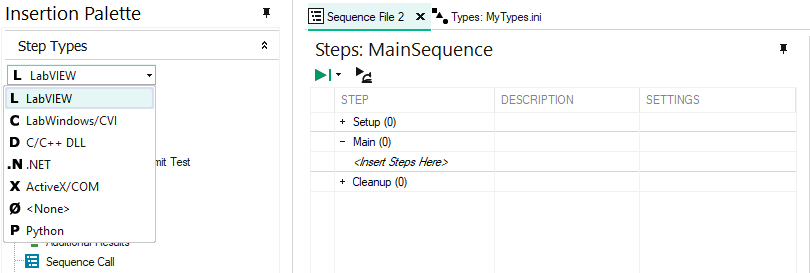
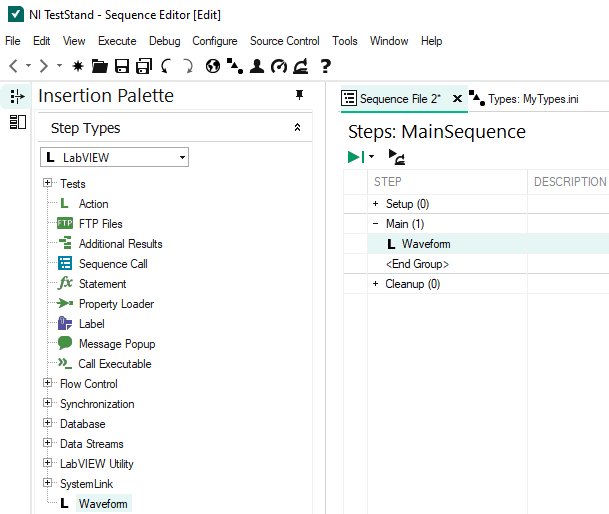
3. Drag the Waveform step type from the Insertion Palette, and drop it into the Main step group of MainSequence in your sequence file.
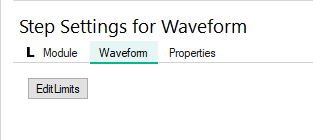
4. On the Waveform tab of the Step Setting pane, click the Edit Limits button to bring up the Edit Limits VI.
5. Set the High Limit to 1.0 and the Low Limit to 0.0 and click OK.
6. Switch to the Module tab in the Step Settings pane, click on the Browse for VI… button  , and select Get_Waveform.vi from the <TestStand Public>\Components\StepTypes\Waveform directory. Get_Waveform.vi will pass a sinusoidal waveform to Step.Waveform. At run time, the user specifies the amplitude and number of cycles for the waveform.
7. Click the Show VI Front Panel button  so that it is enabled
  . This way the VI's front panel will allow the user to specify the characteristics of the waveform at run time.
When you run your sequence, the status will be Passed if the RMS Value is greater than or equal to the Low Limit and less than the High Limit. The report includes the limits because the default process model calls the Include Limits in Results step. The report also includes the comparison property, Comp, because the default process model calls Include Comparison Type in Results. However, Step.Result.RMSvalue is not included in the report. You will include this in the next section.
Including Step.Result.RMSvalue in the Text Report
In this section, you will modify the text report generation sequence in the TestStand process model. If you do not want to modify the process model, you can use the ModifyReportEntry callback.
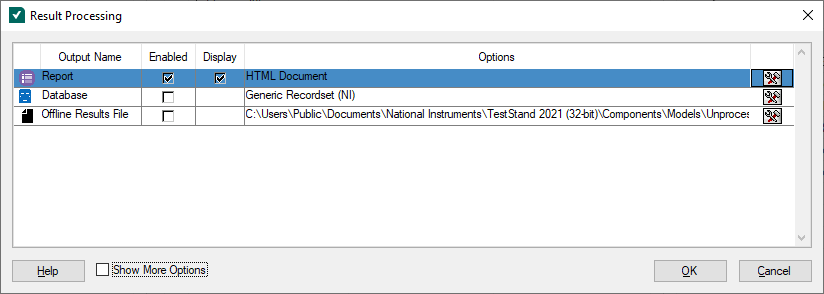
1. Select Configure>>Results Processing from the menu bar, and select the Options... button  from the Report row of the Results Processing window to bring up the Report Options dialog.
2. In the Report Options Dialog, select ASCII Text File from the Report Format pull-down ring menu.
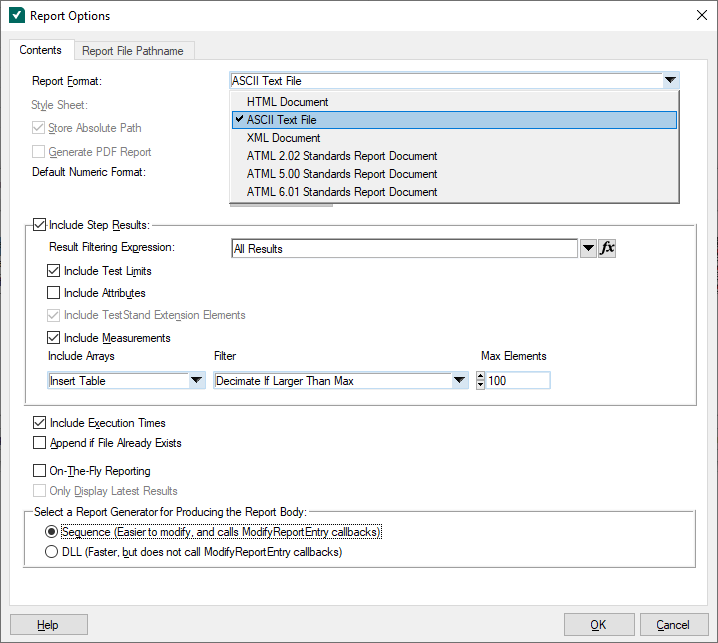
3. In the Select a Report Generator for Producing the Report Body section, select Sequence.
As you may know, the report body may be generated in either a DLL or a sequence, but this tutorial does not discuss modifying the DLL. If you want to ensure that the report body is always generated with a sequence, you may use a ReportOptions callback.
4. Click OK to close the Report Options dialog box.
5. Do not modify the default process model. Make a copy of the default process model and modify the copy. To copy the process model, use Windows Explorer and browse to <TestStand>\Components\Models\. Select and copy the TestStandModels folder. Next, browse to the <TestStand Public>\Components\Models\ directory. Paste the TestStandModels folder that you just copied. If the TestStandModels directory already exists, delete it or move it to a temporary directory. By default, TestStand will use files from the <TestStand Public> directory before those kept in the <TestStand> directory.
6. In the Sequence Editor select File » Open File…, navigate to <TestStand Public>\Components\Models\TestStandModels\, and open the ReportGen_txt.seq file. This sequence file generates the text report.
7. Select the PutOneResultInReport sequence from the Sequences pane.
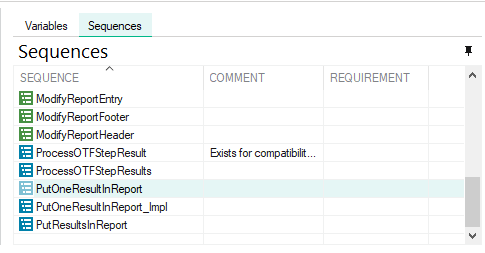
Each time the PutOneResultInReport sequence executes, it adds a single step result entry to the report. For every step result in the main sequence, this sequence is executed.
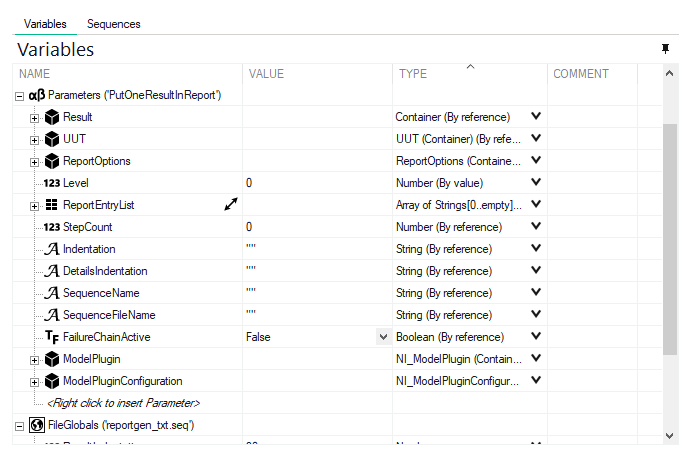
8. Expand the Parameters container in the Variables pane to see that the details of the report are passed in the Result container, as shown below. Data is placed into this container during execution. Each Statement step (e.g. Add Step Name and Status) in this sequence adds a string to the local string variable Locals.ReportEntry. After this sequence executes, the completed ReportEntry is returned to the calling sequence.
9. In the Main step group of the PutOneResultInReport sequence, double click on the sequence call step Call PutOneResultInReport_lmpl. From there, right-click on the Add Flagged Values step, and select Insert Step » Statement to insert a statement step. Name the new step Add RMS Value.
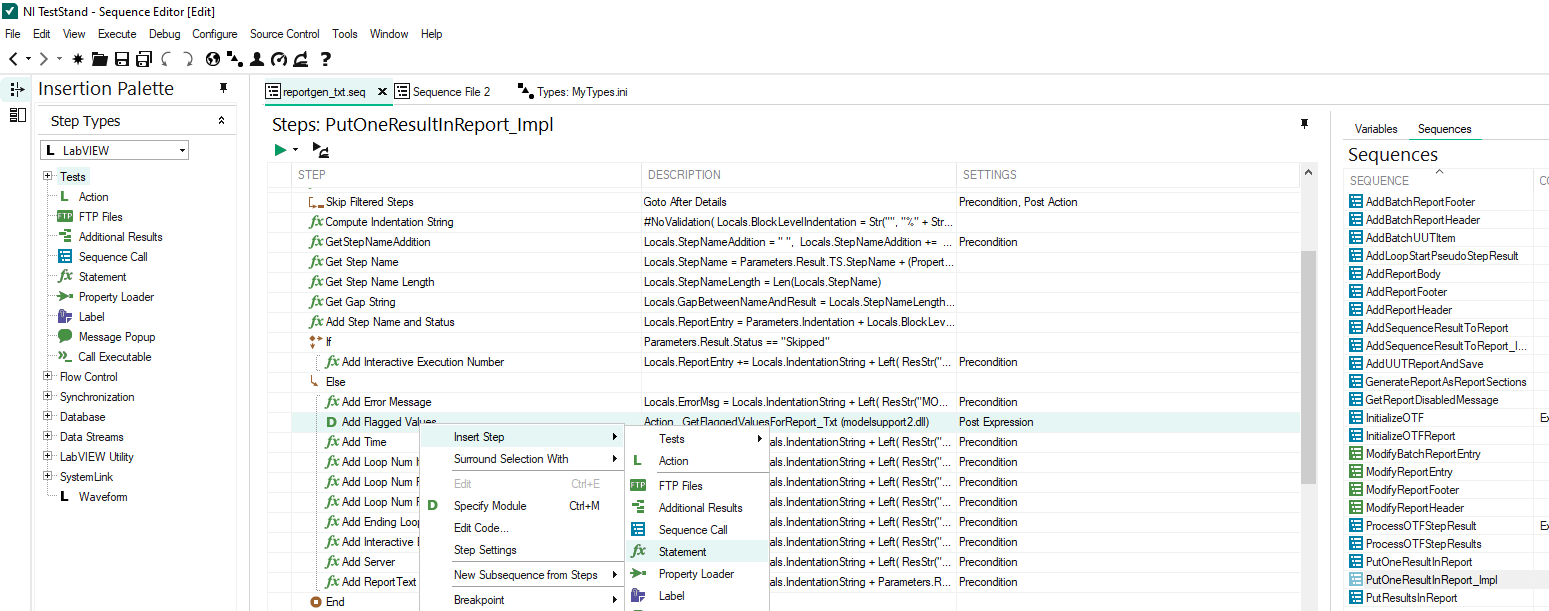
10. In the Step Settings pane for the step, select the Expression tab, and enter the expression for the step as follows:
Locals.ReportEntry += Parameters.DetailsIndentation + "RMS Value: " + Str(Parameters.Result.RMSvalue) + "\n"

11. In the Properties tab of the Step Settings pane for the step, select Preconditions. In the Precondition Expression, enter the expression as shown below:
Parameters.ReportOptions.IncludeMeasurements && PropertyExists("Parameters.Result.RMSvalue")
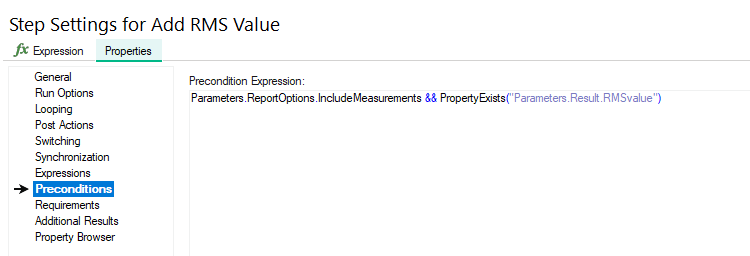
This precondition ensures that this step executes only if Parameters.Result.RMSvalue exists and the user has selected the Include Measurements report option.
Notice that the Preconditions for the Add High Limit and Add Low Limit steps refer to the Comp step property. This is the primary reason that you added the Comp property to the Waveform step type. If you did not add the Comp property, the preconditions for Add High Limit and Add Low Limit would not have allowed these steps to execute and include the limits in the report.
12. Save ReportGen_txt.seq.
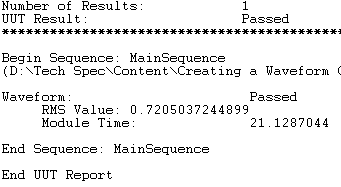
When you run your new sequence file, you should see the RMS Value included in the text report.
Testing
1. Go back to the sequence file you created with the Waveform Step Type, and run the sequence by selecting Execute » Single Pass from the menu bar.
2. When the Get_Waveform.vi front panel appears, configure the waveform to have an amplitude of ~1, and click Done.
3. Observe in the report that the step result is Passed and that the RMS Value included in the report is within the limits that we previously defined (0 .0 to 1.0).
4. Run the sequence again, only this time changing the waveform so that its RMS value is outside of the defined limits, and verify that the result of the step is Failed.