Method 1: Additional Results (recommended for TestStand 4.1 and later)
In this method, you will be adding a step that adds results directly to the database. When this method is used, the result will be stored in the PROP_RESULT table of the database.
Complete the following steps to configure the Main Sequence:
- Add an Additional Results step type to your sequence file.
-
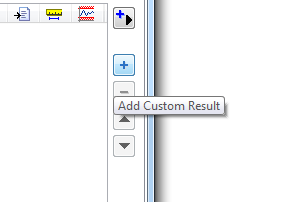
Select Add Custom Result.
-
Populate the Value to Log entry with the piece of data you wish to log to the database.
-
Run the Sequence file.
After running this step, you can view the data in the PROP_RESULT table of the database.
- Select Configure»Result Processing...
-
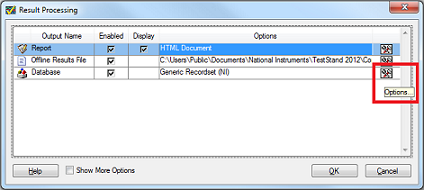
Select the Options button.
-
In the Data Link tab, select View Data.
-
Right click on the PROP_RESULT table and select View Data.
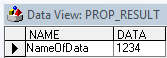
Note: Table has several columns hidden for easier viewing.-
Method 2: Modifying database logging directly
The option to directly modify the database logging is also available. This is a more advanced method that is only recommended for older versions of TestStand, although still possible in later versions. The methods below will log a local variable of type string to a database table called "NAME".
Note: In the following method, you will be modifying the model files in the <TestStand Public> directory. In order to make sure that unaltered files are available, it is recommended that you create a copy of the files first and edit the copies.
TestStand 2012 and later
Complete the following step to configure the MainSequence:
-
Create a Local Variable in your MainSequence of type string and call it Name. Right click on your new local variable and select Allow Propagation from Caller. Make sure that you see a check mark next to this option. The Allow Propagation from Caller option must be enabled so that the value of the local variable will be passed into the process model.
-
Note: You must set the value of the local variable programmatically in your sequence. The default value of this local variable is overwritten by whatever value is present in the process model local variable because the Allow Propagation from Caller option is enabled. (See note in Step 2 of the process model section below)
Complete the following steps to configure the Process Model:
-
Open your process model by selecting File»Open File... and then navigating to your model.
-
For this example, we will be using the Sequential Process Model and the Test UUTs entry point. By default, the Sequential Process Model opens the Test UUTs Entry Point.
-
Right click on the Locals Tab, and insert a local variable of type string and call it Name.
-
Right click on your new local variable and select Allow Propagation from Caller and Propagate to Subsequence. Make sure that you see check marks next to both options.
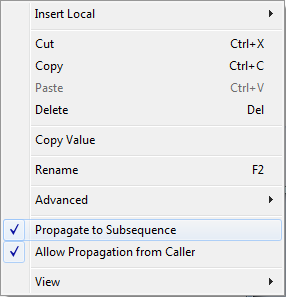
Note: If you want a default value for the local variable, set it here. This value will propagate into the MainSequence of your client sequence. If you do not programmatically change the local variable value in your MainSequence, this default value is the one that will be written to the database.
-
Open the Database Logger Model Plugin.
-
In the Sequences window, select the LogtoDatabase Callback.
-
Click on the Parameters tab, and insert a parameter (not a local) of type string and call it Name.
-
In the Sequences window, select Model Plugin - UUT Done.
-
In the Model Plugin - UUT Done sequence file, select the Log All Results for Non-OTF subsequence step.
-
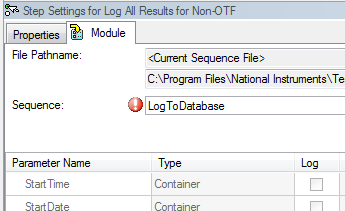
Reload the sequence by clicking on the red exclamation point.
-
Under the Name parameter, add Locals.Name to Value.
Complete the following steps to configure the Database Options:
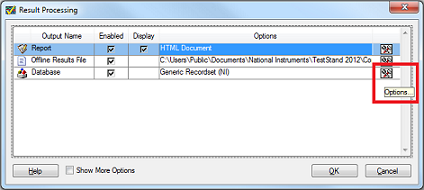
- Click on Configure»Result Processing»Options for Database to open the Database Options dialog box. Make sure database logging is enabled by selecting the Enabled option.
-
Click on the Schemas Tab and select Generic Recordset (NI). Click on the Duplicate button. This will create a copy of the Generic Recordset schema. Make sure there is a check mark next to Copy of Generic Recordset. Check the Allow Editing of Schema option.
-
Click on the Statements Tab and create a new table by clicking New. The properties of the new table should look like this:
|
Parameter
|
Value
|
|
Name
|
NAME
|
|
Type
|
Recordset
|
|
Command Text
|
"SELECT * FROM NAME"
|
|
Apply To
|
UUT Result
|
|
Expected Properties
|
|
|
Precondition
|
|
|
Cursor Type
|
Forward Only
|
|
Cursor Location
|
Server
|
|
Lock Type
|
Optimistic
|
-
Click on the Columns/Parameters Tab and create a new column by clicking New. The properties of the new column should look like this:
|
Parameter
|
Value
|
|
Name
|
NAME
|
|
Type
|
String(VarChar)
|
|
Size
|
255
|
|
Expected Properties
|
|
|
Precondition
|
|
|
Expression
|
Logging.Name
|
-
Create another new column by clicking New. The properties of the new column should look like this:
|
Parameter
|
Value
|
|
Name
|
ID
|
|
Type
|
Integer
|
|
Size
|
0
|
|
Expected Properties
|
|
|
Precondition
|
|
|
Expression
|
|
|
Primary Key Type*
|
Auto Generated/Counter
|
*Primary Key needs to be checked in order to enter in Type
-
Click on the Schemas tab and select Validate.
-
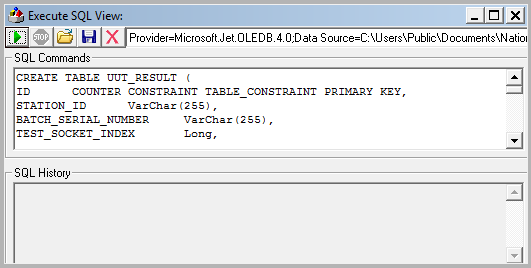
For the SQL Tools, with Add Missing Items selected, select Generate SQL.
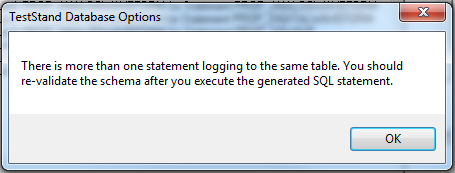
Note: A dialog box may pop up stating that there are more than one statement logging to the same table, select OK.
-
Run the SQL query in the Database Utility.
-
Click Done to close the Schema Validation dialog box.
-
Click OK to close the Configure Database Options dialog box.
-
Click OK to close the Result Processing dialog box.
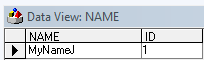
After running the sequence file, you can view the data in the NAME table of the database.
-
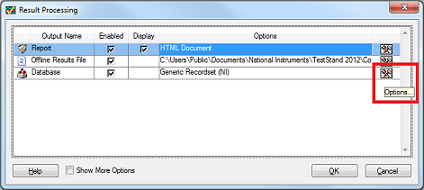
Select Configure»Result Processing...
-
In the Data Link tab, select View Data
-
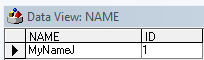
Right click on the NAME table and select View Data
TestStand 2010 SP1 and earlier
Complete the following steps to configure the Main Sequence:
-
Create a Local Variable in your MainSequence of type string and call it Name. Right click on your new local variable and select Allow Propagation from Caller. Make sure that you see a check mark next to this option. The Allow Propagation from Caller option must be enabled so that the value of the local variable will be passed into the process model.
-
Note: You must set the value of the local variable programmatically in your sequence. The default value of this local variable is overwritten by whatever value is present in the process model local variable because the Allow Propagation from Caller option is enabled. (See note in Step 2 of the process model section below)
Complete the following steps to configure the Process Model:
-
Open your process model. For this example, we will be using the Sequential Process Model and the Test UUTs entry point. By default, the Sequential Process Model opens the Test UUTs Entry Point. Click on the Locals Tab, and insert a local variable of type string and call it Name.
-
Right click on your new local variable and select Allow Propagation from Caller and Propagate to Subsequence. Make sure that you see check marks next to both options.
Note: If you want a default value for the local variable, set it here. This value will propagate into the MainSequence of your client sequence. If you do not programmatically change the local variable value in your MainSequence, this default value is the one that will be written to the database.
-
Select the LogToDatabase Callback in the View control of the process model. Click on the Parameters tab, and insert a parameter (not a local) of type string and call it Name.
-
Go back to the Main tab of the LogToDatabase Callback. Right Click on the Log To Database Sequence Call, and select Open Sequence…
-
Go to the Parameters tab of the Log To Database Sequence, and insert a parameter (not a local) of type string and call it Name.
Complete the following steps to configure the Database Options:
-
Click on Configure»Database Options in TestStand to open the Database Options dialog box. Make sure database logging is enabled by deselecting the Disable Database Logging option.
-
Click on the Schemas Tab and select Generic Recordset (NI). Click on the Duplicate button. This will create a copy of the Generic Recordset schema. Make sure there is a check mark next to Copy of Generic Recordset. Check the Allow Editing of Schema option.
-
Click on the Statements Tab and create a new table by clicking New. The properties of the new table should look like this:
|
Parameter
|
Value
|
|
Name
|
NAME
|
|
Type
|
Recordset
|
|
Command Text
|
"SELECT * FROM NAME"
|
|
Apply To
|
UUT Result
|
|
Expected Properties
|
|
|
Precondition
|
|
|
Cursor Type
|
Forward Only
|
|
Cursor Location
|
Server
|
|
Lock Type
|
Optimistic
|
-
Click on the Columns/Parameters Tab and create a new column by clicking New. The properties of the new column should look like this:
|
Parameter
|
Value
|
|
Name
|
NAME
|
|
Type
|
String(VarChar)
|
|
Size
|
256
|
|
Expected Properties
|
|
|
Precondition
|
|
|
Expression
|
Logging.Name
|
-
Click OK to close the Configure Database Options dialog box.
After running the sequence file, you can view the data in the NAME table of the database.
-
Select Configure»Database Options...
-
In the Data Link tab, select View Data
-
Right click on the NAME table and select View Data
-