1. 在 <Program Files (x86)>\National Instruments\LabVIEW (version)\examples\Automotive Diagnostic Command Set\crio\CAN Bridge (FPGA) 中開啟 CAN 橋接 LabVIEW 專案。
2. 參考 CAN Bridge(FPGA).vi 前面板上的「說明」,配置您的專案。

3. 將位元檔傳輸到 CompactRIO 目標的 C 資料夾。參考
Using WebDAV to Transfer Files to Real-Time Target 或
Tools Available for File Transfer/Access on NI Linux Real-Time Targets。

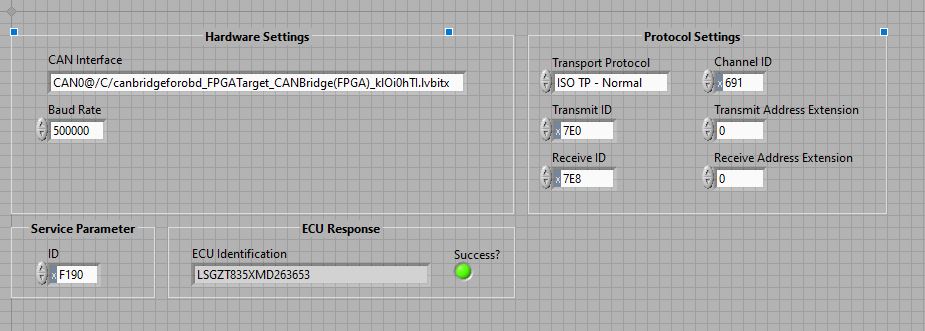
4. 在 <Program Files (x86)>\National Instruments\LabVIEW (version)\examples\Automotive Diagnostic Command Set\crio\UDS Read ECU Identification (cRIO) 中開啟 UDS Read ECU Identification (cRIO) LabVIEW 專案。通常,如果我們使用 PXI、PCI 或 USB CAN 卡進行 UDS 測試,輸入的 CAN 介面是 CAN1(如果使用了 CAN1),但對於使用 NI-985x 的 CompactRIO 應用程式,輸入的 CAN 介面應該是 CAN0@/C/canbridgeforobd_FPGATarget_CANBridge (FPGA)_klOi0hTI.lvbitx(端口名稱為 CAN0,因為 CAN 橋接 (FPGA).vi 通過 Mod1/CAN0 進行通訊)。。
5. 配置 Hardware Settings、Protocol Settings 和 Service Parameter 以配合您的 ECU,然後執行 VI。