Solution
To fix this issue, you will need to run the attached VI to correct the flash memory content on the module. Please follow these steps:
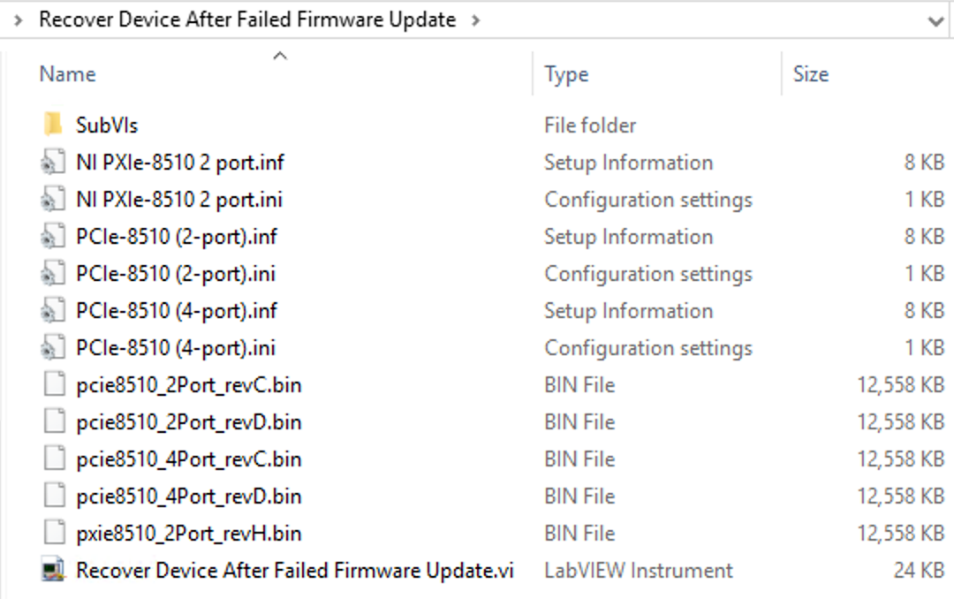
- Download and extract the attached file “Recover Device After Failed Firmware Update.zip” to the Desktop on your PC.

- Confirm the latest version of NI-VISA is installed on your system. If not download and install it, then restart the PC.
- Setup the NI-VISA driver for the PCIe-8510 or PXIe-8510:
- Enable installing unsigned drivers in Windows (You might need to look for additional Microsoft documentation for your specific version of Windows)
- From the extracted files resulting from step 1, right-click the .inf file corresponding to your module and select Install from the menu. You might need to identify the revision of your module.
- Open the Windows Device Manager. From the list of devices:
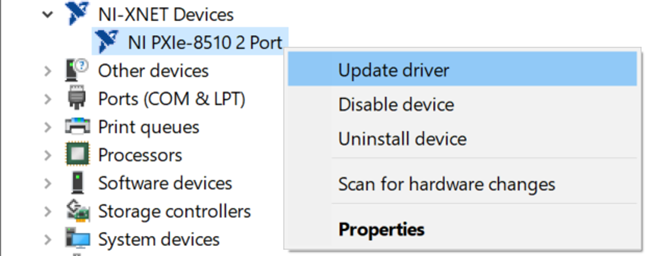
- Find the PCIe-8510 or PXIe-8510 under “NI-XNET Devices”, right-click on it and select “Update Driver”.

-
- Select “Browse my computer for drivers.”
- Select “Let me pick from a list of available drivers on my computer.”
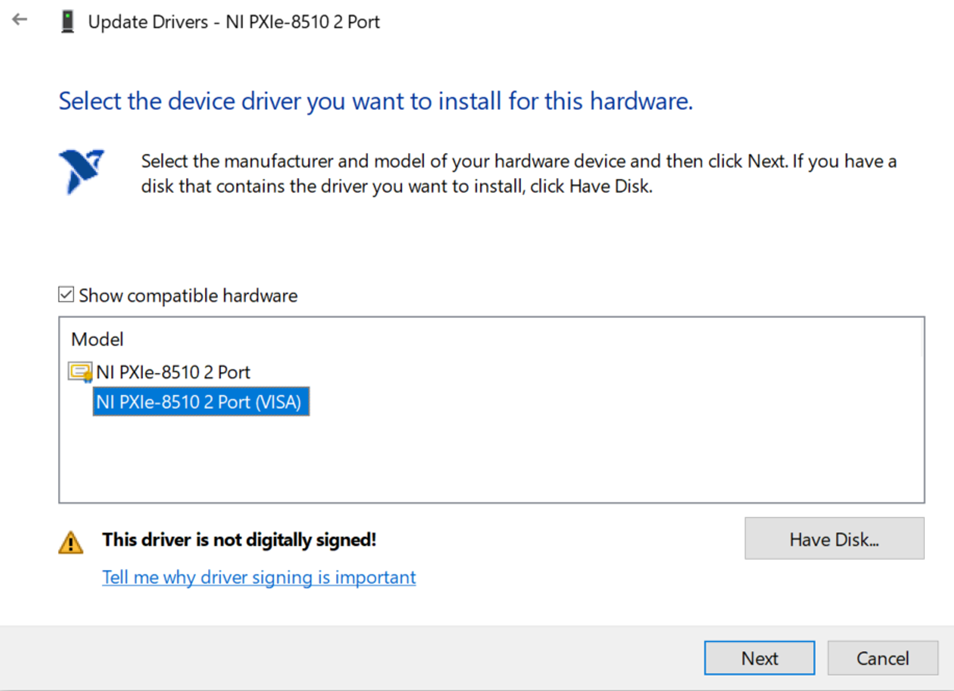
- Select the VISA driver corresponding to your module, e.g. “NI PXIe-8510 2-port (VISA)”, the name for the driver will change depending on the number of ports and whether your module is PCIe or PXIe.

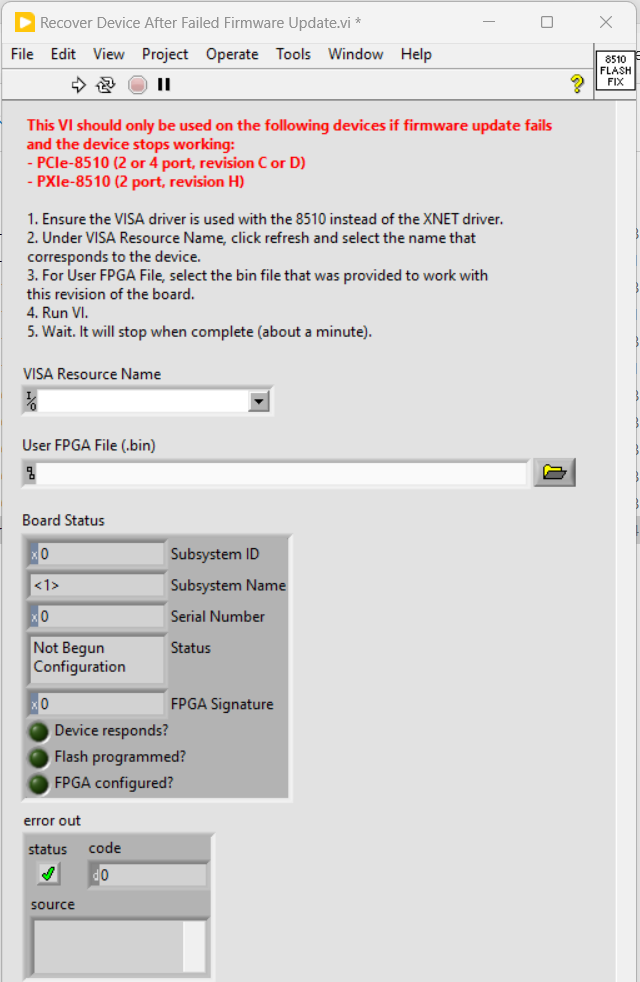
- From the extracted files, open “Recover Device After Failed Firmware Update.vi” and follow the instructions on the front panel (repeated below). For the .bin file, from the extracted files choose the one corresponding to the version and revision of your module.
- Ensure the VISA driver is used with the 8510 instead of the XNET driver.
- Under VISA Resource Name, click refresh and select the name that corresponds to the device.
- For User FPGA File, select the bin file that was provided to work with the revision of the board.
- Run the VI.
- Wait. It will stop when complete (about a minute).

- Open the Windows Device Manager again. From the list of devices:
- Find the appropriate PCIe-8510 or PXIe-8510 under “NI-XNET Devices”, right-click on it and select “Update Driver”.
- Select “Browse my computer for drivers.”
- Select “Let me pick from a list of available drivers on my computer.”
- This time, select the XNET driver, e.g “NI PXIe-8510 2-port “, the name for the driver will change depending on the number of ports and whether your module is PCIe or PXIe.
- Restart your PC.
- Your device should now be working properly.
Note: If you need assistance with this procedure, please contact NI Technical Support.