Step 1: Mounting and Connection
- At delivery, recover the MP300 motherboard and the daughterboard attached to it
and insert them in the desired slot of your rack.
- Fix the board by screwing it to the rack.
- Plug the power supply cable at the back of the rack and connect the other side of the cable to the mains.
- Plug the serial connector of the USB-serial cable to the remote port of the slot that will be used.
- Plug the USB connector of the USB-serial cable to a laptop.
- Power on the rack
Step 2: Download and install MPTerm application
Click on the link available at the bottom of the page and download MPTerm application.
MPTerm is a terminal emulator that will open a serial communication with MP300 device with the following serial settings:
- data bits: 8
- stop bits: 2
- No parity
- No flow control
Note: it is possible to use other Terminal emulation application.
After having downloaded MPTerm, install it and launch it.
Tick "RS232" and select the communication port attributed to the MP300 device. 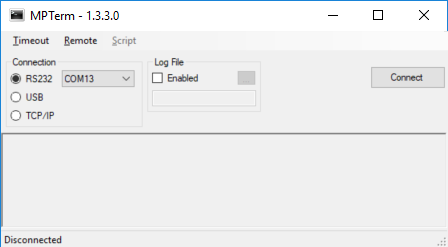
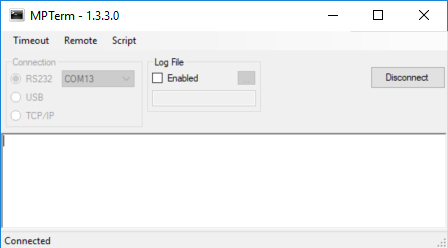
Then click on "Connect".
"Connected" message should appear at the bottom left of the window, indicating that the serial communication is operational.
Tape "HELO" remote command and press "Enter".
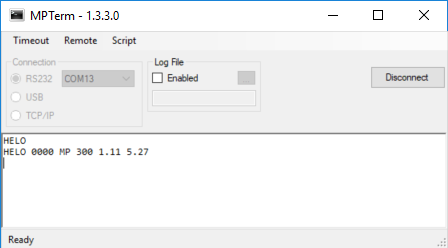
The device should return an answer formatted in this way:
HELO XX1 S2 S3 S4 S5
- XX1 : 0 or error code.
- S2: Device family.
- S3: Device reference within the family.
- S4: Resident software version.
- S5: System Software version.
Step 3: Retrieve IP configuration
By default MP300 rackable devices are delivered with rack mode enabled and there IP address is:
192.168.107.80.
The "Rack mode" is very useful when several MP300 devices are located in a rack.
It allows the automatic adjustment of the IP address depending on the slot number where the MP300 are located.
After power-up, the MP300 reads the slot number (1 to 16) and replaces the last digit of the IP address (in hexadecimal) with the slot number.
eg: if 16x MP300 devices are inserted into a 16x slot rack.
The base IP address will be 192.168.107.80.
The IP addresses of the MP300 devices will be the following at power up.
- slot 1: 192.168.107.81.
- slot 2: 192.168.107.82.
- slot 3: 192.168.107.83.
- .....
- slot 16: 192.168.107.96
To check that the rack mode is enabled and retrieve the IP address of the MP300 inserted in a rack,
follow the instruction below:
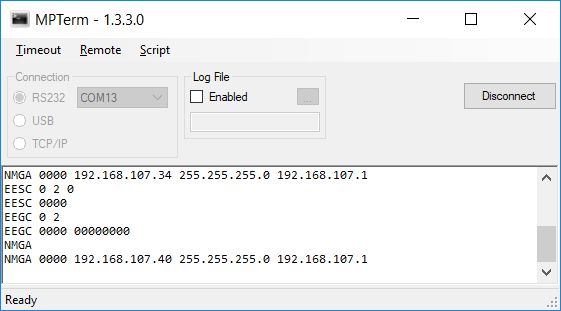
Tape: "EEGC 0 2" and then press "Enter".
Tape: "NMPA" and then press "Enter"
using MPTerm.
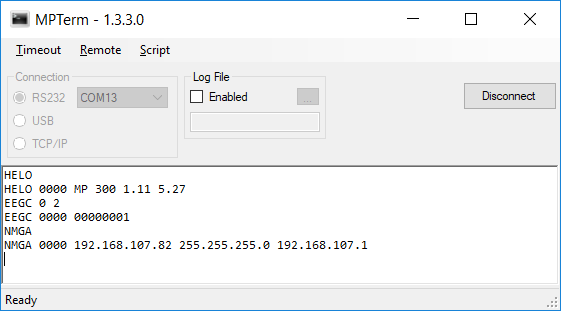
The answer to the first command:
EEGC 0000 00000001
indicates that the rack mode is enabled.
The answer to the second command
NMGA 0000 192.168.107.82 255.255.255.0 192.168.107.1
provides the IP address of the device.
Note: the MP300 is inserted in the second slot of a rack and thus the IP address returned is 192.168.107.82
Step 4: IP address modification
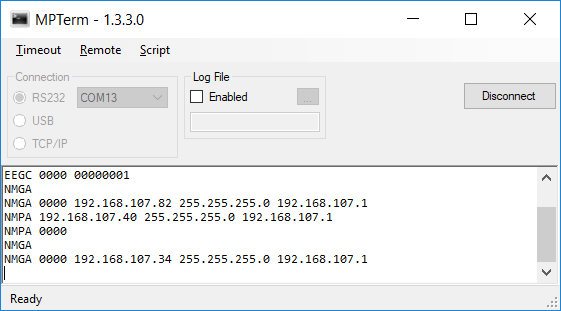
To change the IP address using MPTerm application use the remote command NMPA.
eg: NMPA 192.168.107.40 255.255.255.0 192.168.107.1
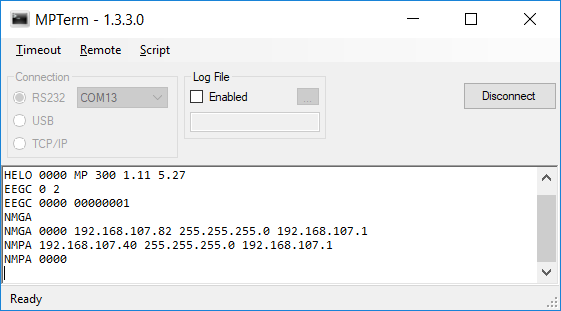
Note: Since the rack mode is enabled, the base IP address will become 192.168.107.32.
The decimal value 40 corresponds to the value 0x28 in hexadecimal.
Removing the last digit of the IP address, we then have 0x20 and thus 32 in decimal value.
The new IP address will be taken into account, after the reboot of the rack,
Using NMGA remote command we now have: 192.168.107.34 since the MP300 is inserted in the second slot of the rack.
Step 5: Disable Rack mode
To disable the rack mode and be able to configure the IP address manually use the remote command
EESC.
Tape the following remote command in MPTerm "EESC 0 2 0" and press "Enter".
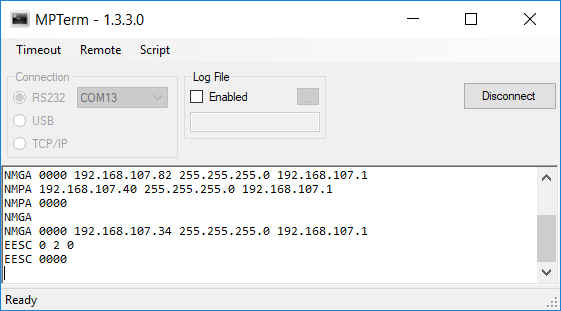
The modification will be taken into account after the rack has been power cycle.
To check that the rack mode has been disabled and that the IP address of the MP300 inserted in the second slot of the rack is now 192.168.107.40, we can use MPTerm application and the remote commands previously used:
EEGC 0 2
and NMGA.