- After installing and activating LabVIEW NXG (or G Web Deveolpment Software) and LabVIEW Web Module, launch LabVIEW NXG (or GWeb Development Software).
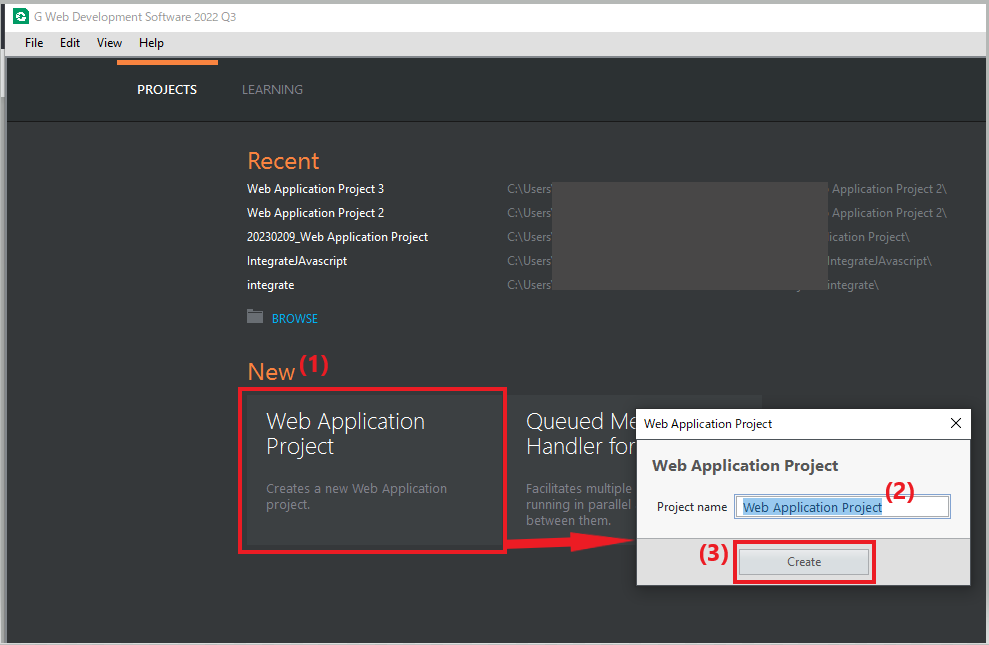
- Select Web Application Project on the PROJECT tab to open a web application template.
- Name your project and click Create.
(In this example, will create a Web VI with slider values plotted on a chart.)
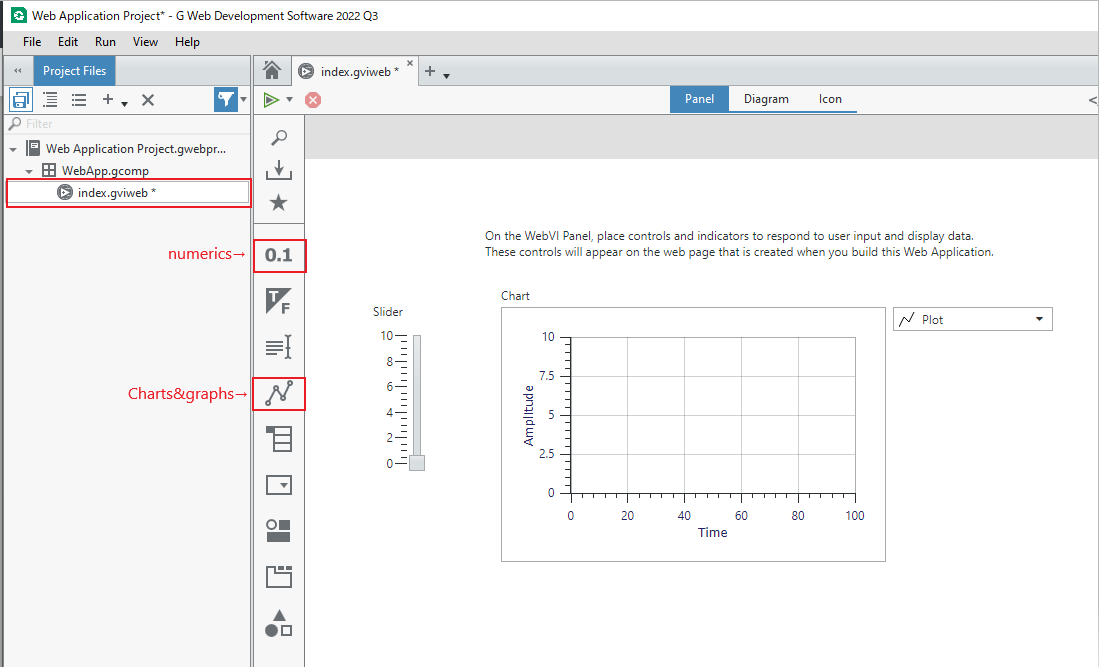
- Select Index.gviweb and, on the Panel place a Slide control( from the Numerics tab) and a chart indicator (from the Chart&Graph tab).
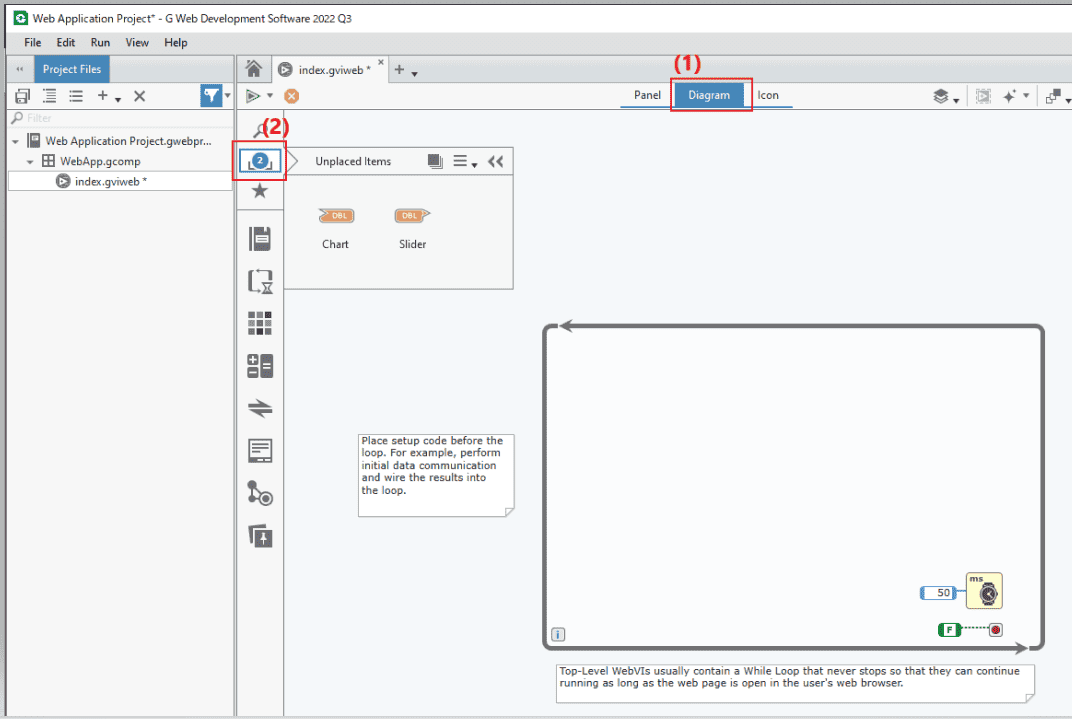
- On the Web VI Diagram, drop the slider and chart you previously placed on the Panel (access them from Unplaced Items tab) in the While Loop, and connect them.

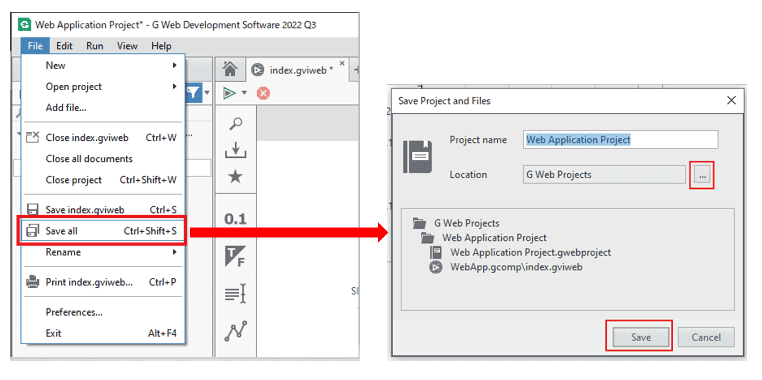
- Select File>> Save all to save project.
- In the pop up window, edit the Location where you want the project to be saved (optional), and click Save.
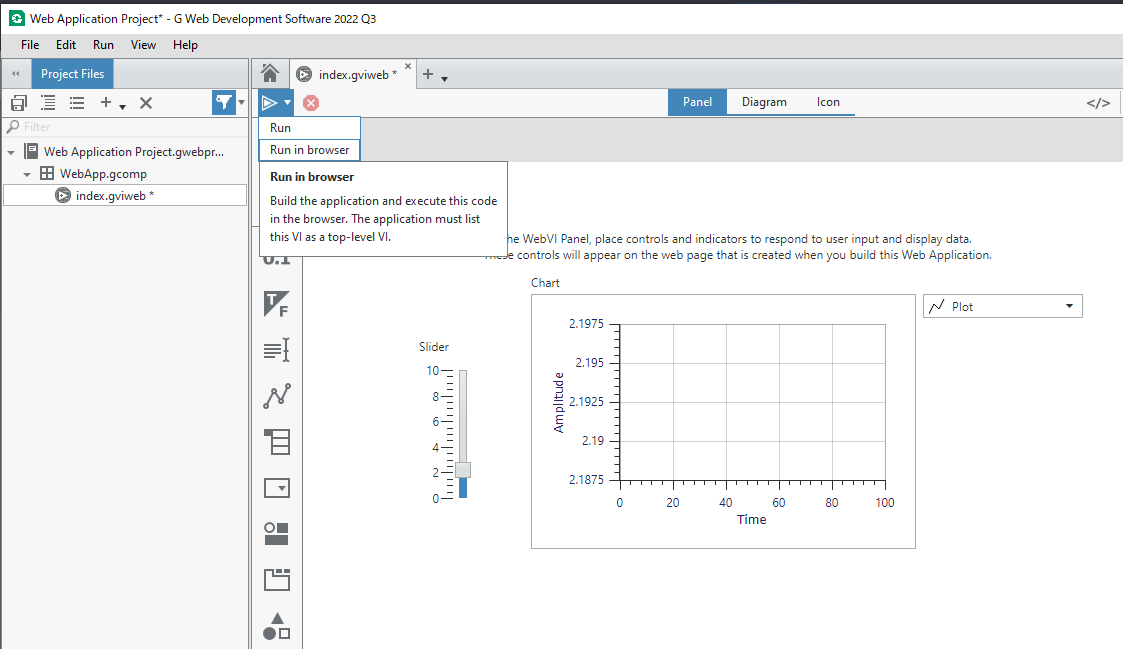
- (Optional) You can check your WebVI operation on a web browser by selecting Run in browser from the pull-down menu of the run button.
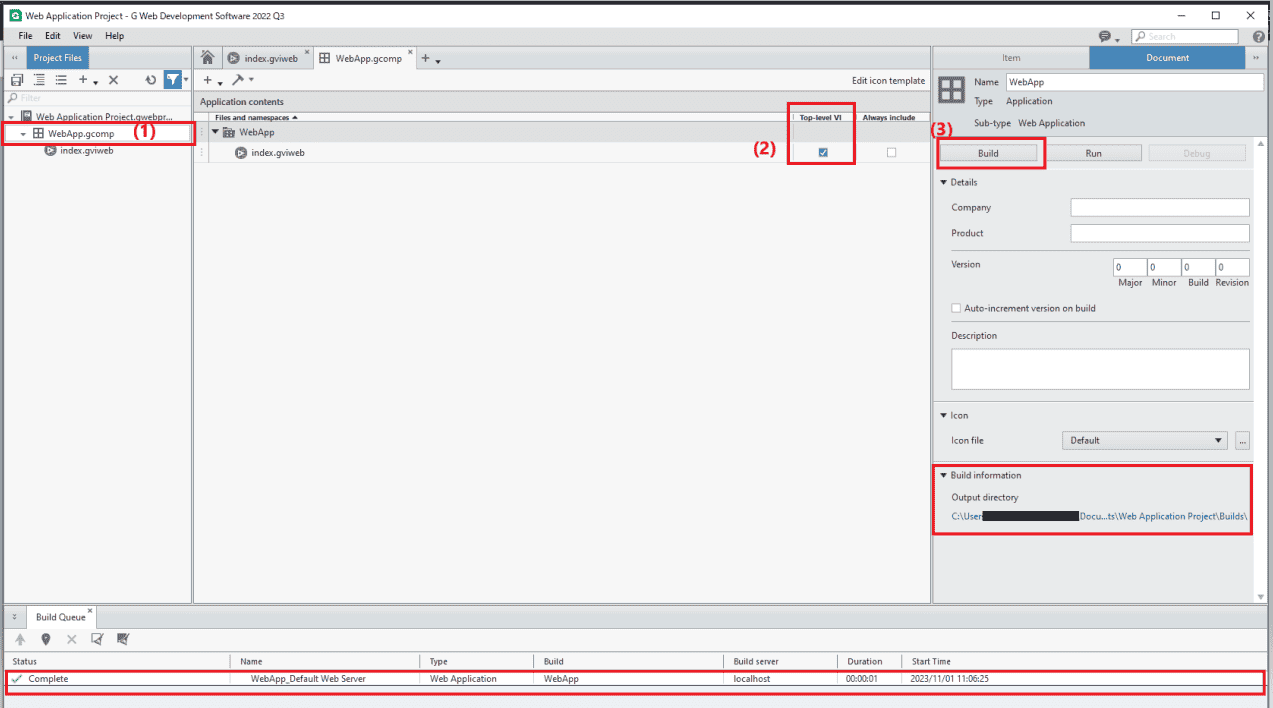
- To build the created WebVI, double click WebApp.gcomp, make sure the index.gviweb you just created is selected as the Top level VI, and click Build. If the build is successful, the Build Queue will show the completion Status and the web application will be created in the output directory specified in the Build Information section.
- To host the created web application on NI web server, move the folder containing the created web application ( WebApp_Web Server in this example) to the following folder.
C: \ Program Files \ National Instruments \ Shared \ Web Server \ htdocs \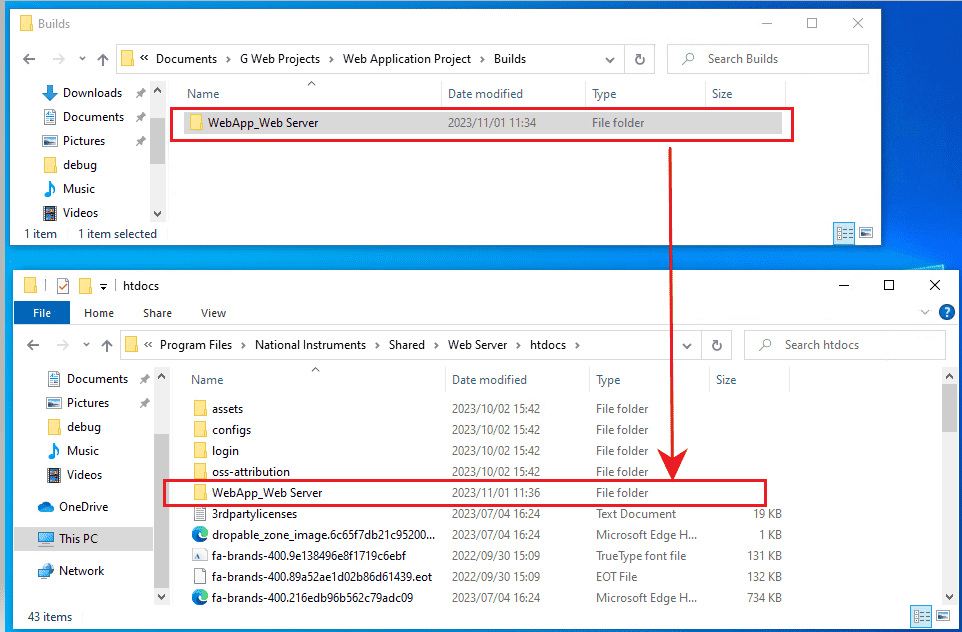
- To access the web application from a browser, enter the URL below into your browser.
http: //localhost/WebApp_Web%20Server/main.htmlHere, you can enter the IP of the PC hosting the web application in the
localhost part, and specify the name of the WebVI specified in the Top level VI in the
main.html part.
When accessing the web application from the browser of the PC hosting it, the IP part can be accessed as
localhost .
For this example, the name of the WebVI is index.gviweb, so the
main.html part is
index.html, and you can access it by entering the URL below.
http: //localhost/WebApp_Web%20Server/index.html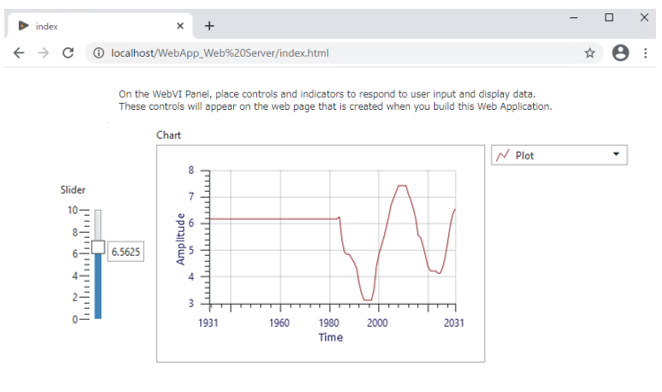
If the IPv4 address of the PC hosting the web application is 10.128.10.152 and the settings of the NI web server and sample VI are left as default, you can access the PC hosting the web application by using the URL below. You can access the web application from the web browser of the PC or smartphone connected to the same network.
http://10.128.10.152:9090/WebVI/Index.html