Hardware:
X310 x1
Host PC with Windows10 x1
Intel X520 network adaptor* x1
Local network or directly connecting the devices above.
* Only for X310 with XG/XA image, because its SFP+ port0 is 10 Gigabit ethernet. Intel X710 or any other alternative adaptor should be ok.
Software:
LabVIEW2015f1 on Windows10
Steps:
Make sure you know the IP address of the X310 and the host PC is in the same IP domain. In this case, X310 address is 192.168.10.2 for HG (192.168.30.2 for XG).
-
Open NI-USRP Configuration Utility from host PC.
Start >> National Instruments >> NI-USRP Configuration Utility
-
Switch to tab N2xx/NI-29xx Image Updater, then press the button Find Devices to find the correct X310 you want to modify and choose it with right click of the mouse. See figure 1 for details.
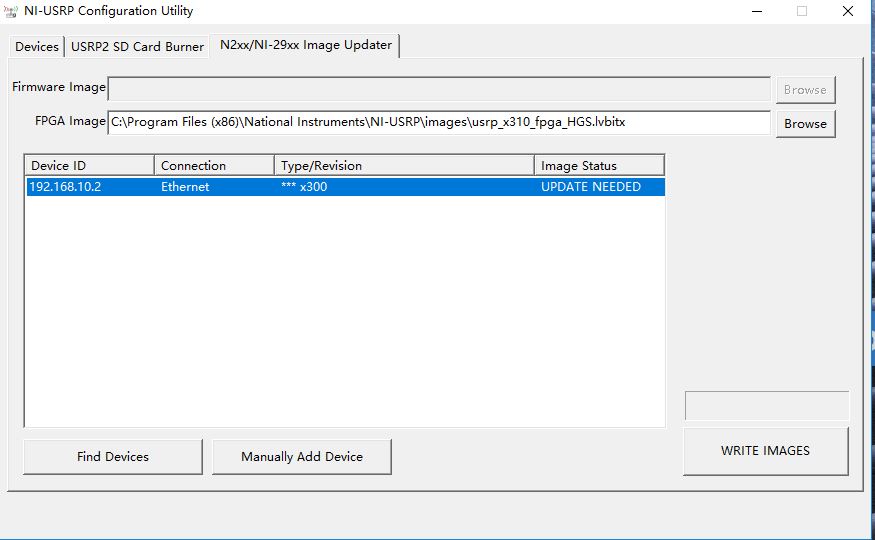
Figure 1. NI-USRP Configuration Utility
-
Press button WRITE IMAGES to start the burning process.
There will be prompted 3 windows in order. Just press OK.
-
After less than 5 mins the writing will be accomplished with a successfully window prompted.
The NI-USRP Configuration Utility will be not responding during the WRITE IMAGES process until it’s done. See figure 2 for details.
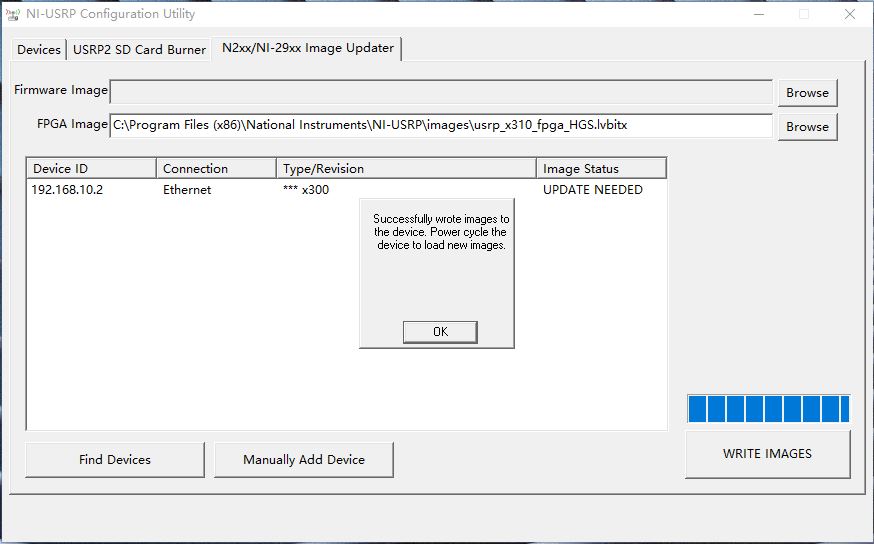
Figure 2. Successfully Wrote Image
-
Power cycle the device and change the host PC IP address to 192.168.10.1 if needed.
-
Check the results with NI-USRP Configuration Utility.
In the Devices tab, press Refresh Devices List and then you can find the NI USRP-2954R displayed. See figure 3 for details.
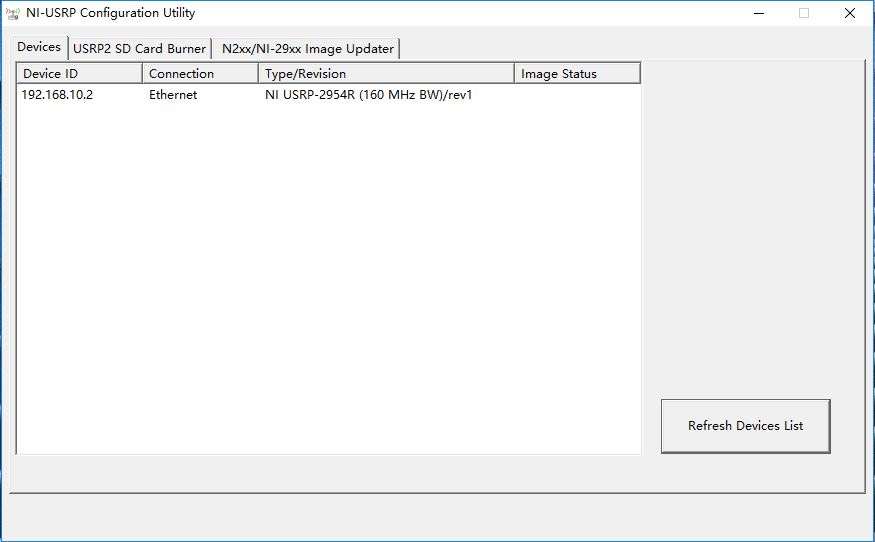
Figure 3. Check the result