Creating a Tag
Firstly, log in to the SystemLink Web Application and open Tag Viewer on Data Visualization. Then, create a tag. In this example, a tag named
test is created.
Double-click the created Tag, enter an arbitrary number in the
Value field, and save it.
Select the HTTP API from the question mark in the upper right corner of the Tag Viewer.

Getting a Tag Value
On the Swagger UI page for SystemLink
Tag Service, go to the section for
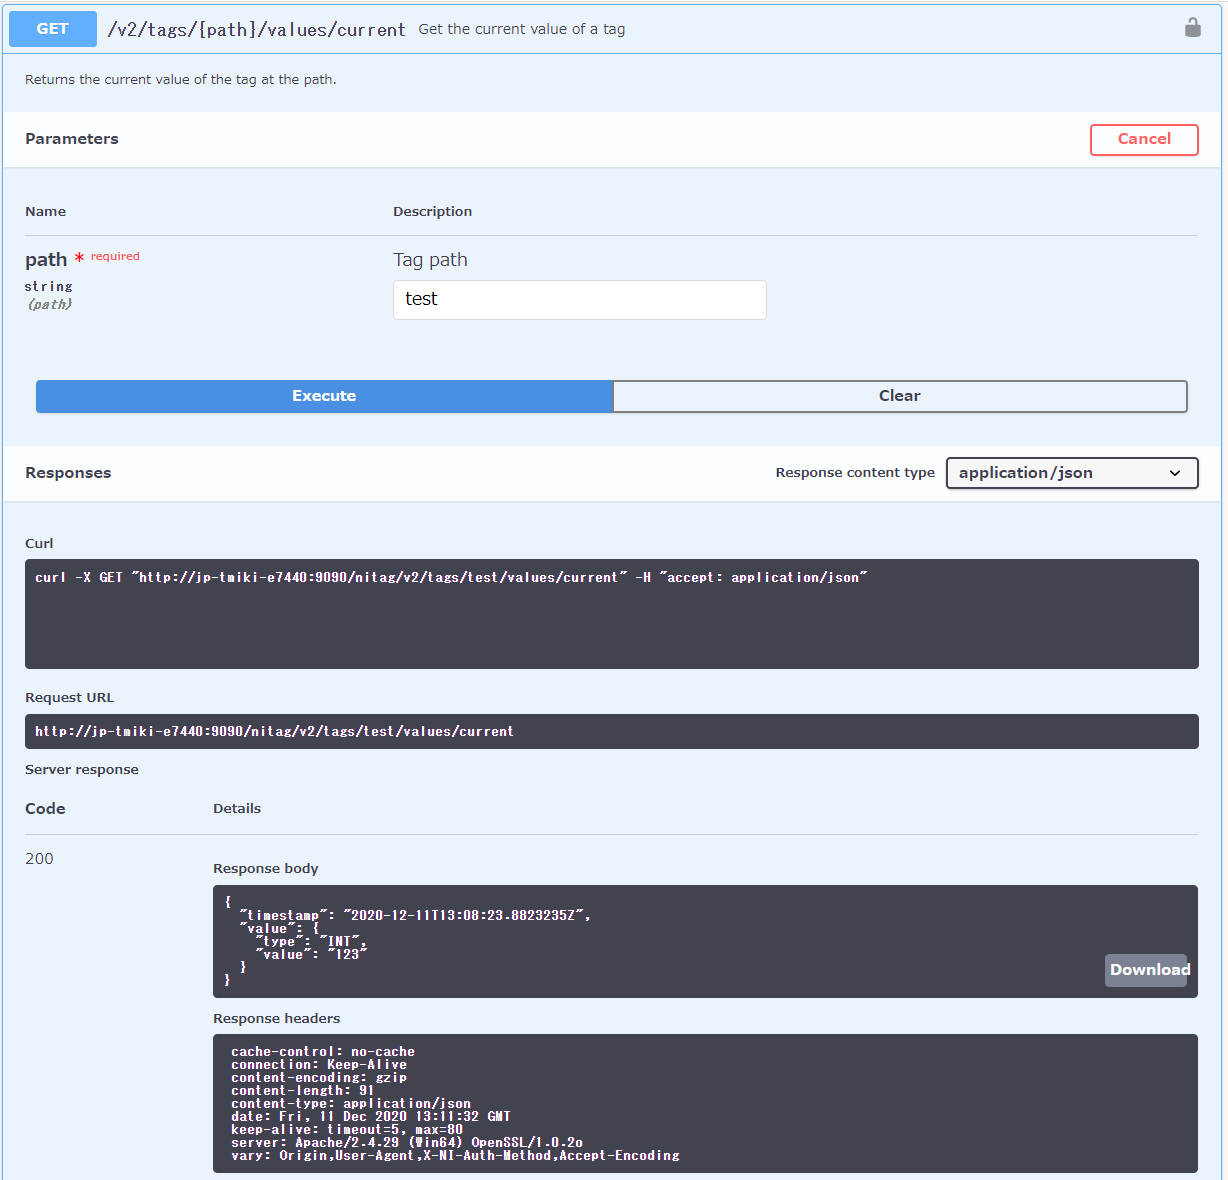
GET/v2/tags/{path}/values/current command.
You can test this HTTP API by clicking
Try it Out. To get the value of the Tag named "test" created in this example earlier, set as follows and execute.

If the HTTP API is executed normally, Code
200 for
Response body and
Response headers will be returned as described above.
Setting a Tag Value
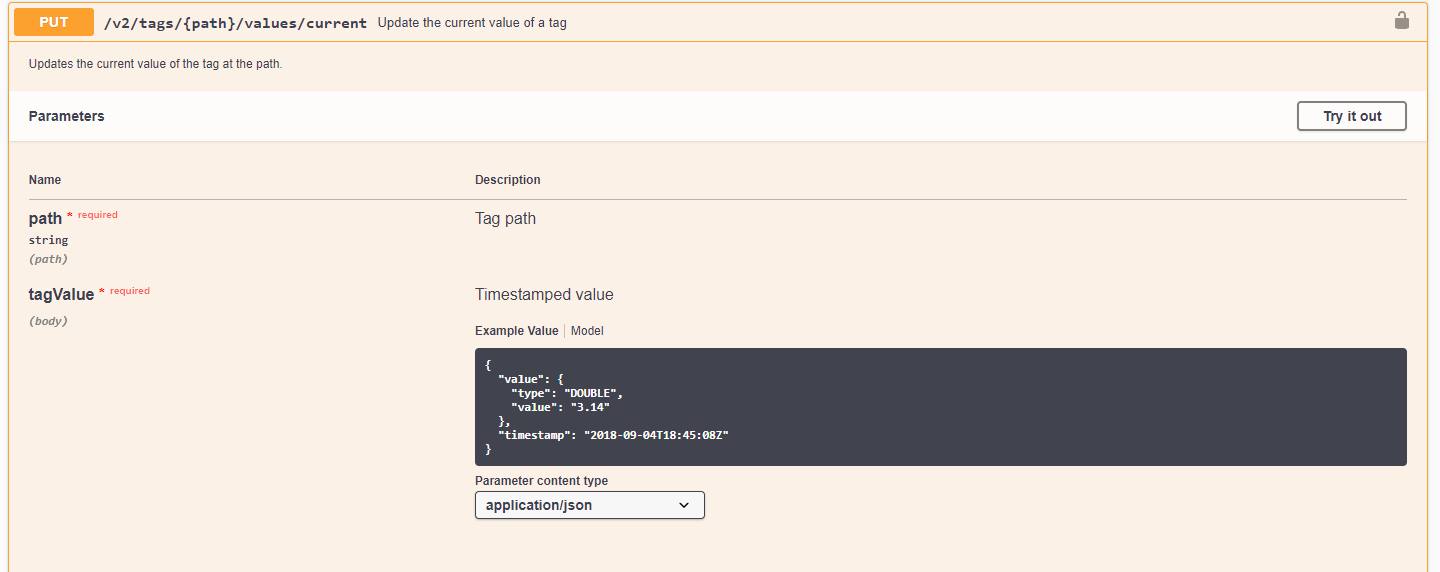
On the Swagger UI page for SystemLink Tag Service, go to the section for
PUT/v2/tags/{path}/values/current command.

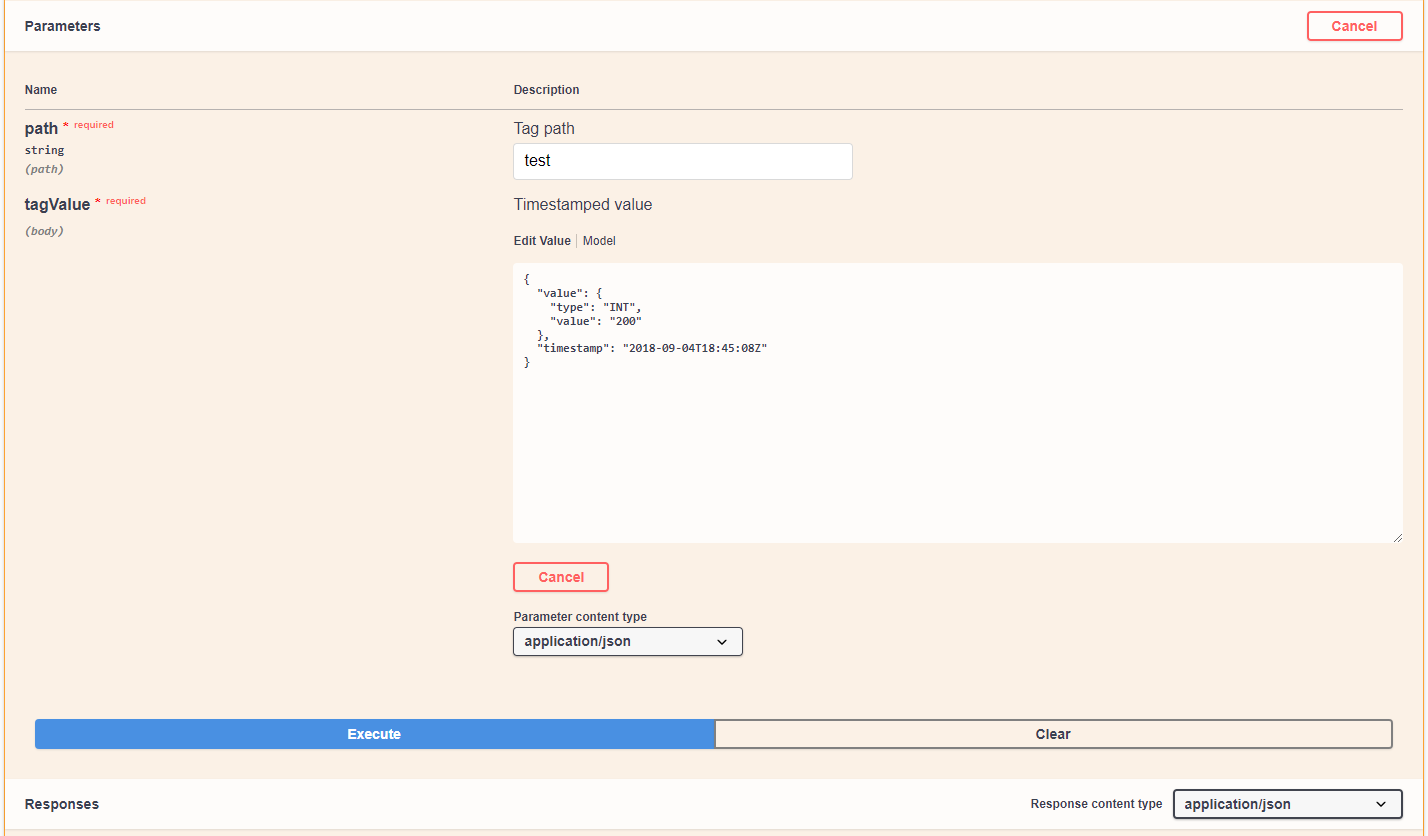
You can test this HTTP API by clicking
Try it Out. To get the value of the Tag named "test" created in this example earlier, set as follows and execute.


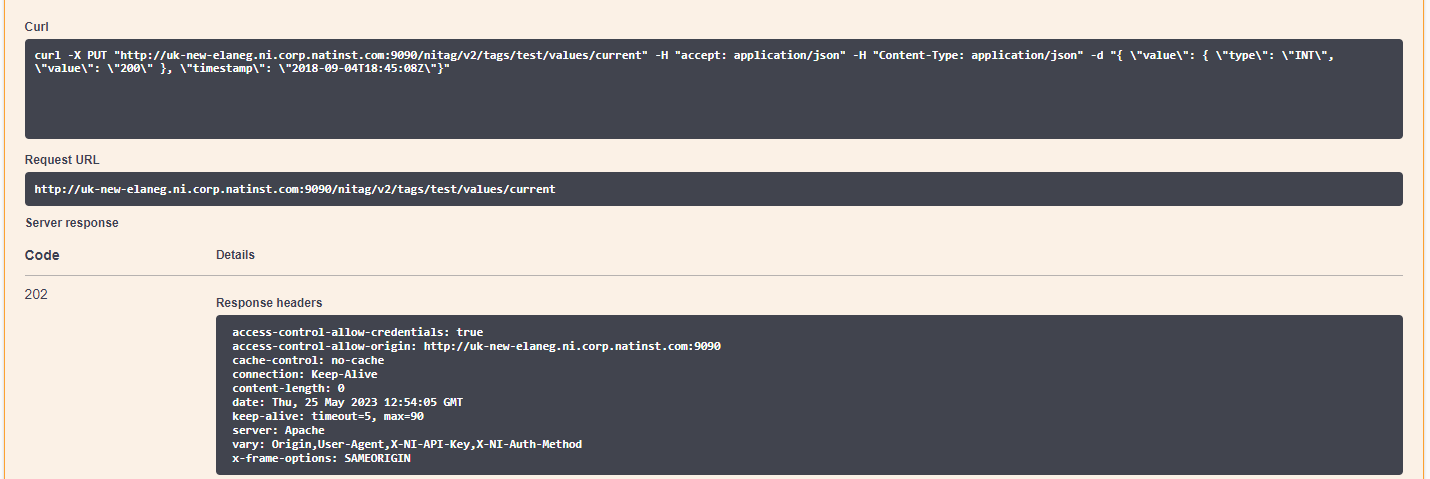
If the HTTP API is executed normally, Code
202 for
Response body and
Response headers will be returned as described above.
Note: The Swagger UI HTTP API will only get or set Tags that reside in the Default Workspace. For Tags in other Workspaces, refer to
Finding a SystemLink Workspace ID.