Build a While Loop
- Launch LabVIEW and open a new VI. You can open a blank VI by selecting File»New VI
-
Right-click on the block diagram to display a temporary version of the Functions palette.
-
Navigate to Structures and select the While Loop.
-
To place the loop on the block diagram, left-click and drag the mouse until the loop is your desired size.
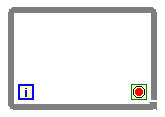
- Add a Stop button to the front panel. You can find this under Controls Palette»Boolean»Stop.
- On the block diagram, drag the Stop button icon into the while loop.
- Wire the Stop button to the conditional terminal so that you can control the execution of the while loop.
- By default, when the Stop button is pressed, a true value is passed to the conditional terminal causing the while loop to stop execution.
- Note: Instead of just a Stop button, you can wire any Boolean data to the conditional terminal to control the execution of a while loop.

- Configure the conditional terminal. To switch the conditional terminal between Stop if True and Continue if True, right-click on the conditional terminal and select the desired setting.
- The conditional terminal defines when the loop stops. There are two settings for the conditional terminal: Stop if True (
 ) and Continue if True (
 ).
).
- If the conditional terminal is set to Stop if True, and a Boolean value of true is sent to the conditional terminal, the loop halts execution. This is the default setting.
- When set to Continue if True, the while loop runs only if a Boolean value of true is sent to the terminal.
- (Optional) Monitor the number of iterations the loop has undergone by right-clicking on the iteration terminal and selecting Create Indicator.
Add Structure Tunnels to Your While Loop
Use structure tunnels to feed data into and out of structures like the while loop. If you want to send data into your while loop, you need to create structure tunnels.
- Data sent into the While Loop is sent only on the first iteration
- Data sent out of the while loop is sent only after the last iteration.
- If you want your front panel data to be continuously updated, their indicators should be located inside of the while loop
Example: Determine Iterations Completed
- Complete steps to build a while loop (above).
- Create a numeric indicator on the front panel (Controls >> Numeric >> Numeric Indicator).
- (Optional) To avoid coercion of data types, change the numeric representation to I32 by right-clicking on the indicator and selecting Representation >> I32.
- On the block diagram, wire the iteration counter to the numeric indicator icon
- The structure tunnel appears as a solid block on the border of the while loop. The block is the color of the data type wired to the tunnel.
- Data passes out of a loop after the loop terminates.
In the following block diagram, the iteration terminal is connected to a tunnel. The value in the tunnel does not get passed to the iteration indicator until the while loop finishes executing. Bring the snippet into your LabVIEW code and notice:
- The Random Number indicator is placed inside the while loop. Data for this indicator updates with each iteration.
- The Iteration Count indicator has a value of zero while the code is running. This is because the tunnel does not pass information to the indicator until the while loop has stopped execution.
- When you press stop, the iteration count indicator will now update.

Setting Stop Conditions
By using Boolean functions, you can implement multiple conditions to affect your while loop conditional terminal. You can use an “or” function to compare an error wire status and a Stop button control so that if either is TRUE, the conditional terminal receives a TRUE signal, and the while loop stops.
- Complete steps to build a while loop (above).
- Place an Error In 3D.ctl control on the front panel (Controls Palette»Data Containers»Error In 3D.ctl)
- On the block diagram, make sure the Error In 3D.ctl icon is outside of the while loop.
- Remove the connection wire between the Stop button and the conditional terminal.
- Place a Simple Error Handler outside of the while loop (Functions Palette»Dialog & User Interface»Simple Error Handler.vi). This function reports any errors encountered when called.
- Link the error in control with the Simple Error Handler through the while loop via structure tunnels.
- Wire the output of the error in control to the border of the while loop. Click on the border to create a tunnel.
- Continue the error wire from the tunnel to the opposite border of the while loop and into the input of the Simple Error Handler.
- Place an Unbundle By Name function inside of the while loop (Functions Palette»Programming»Cluster, Class, & Variant»Unbundle by Name). You can use this function to separate the Boolean portion of the error data wire.
- Connect the error wire to the Unbundle by Name function.
- Left-click on the Unbundle function and select status to present the boolean portion of the error data.
- Place an or function inside of the while loop (Functions Palette»Programming»Boolean»Or).
- Link the data wires.
- Into the Or function, wire both the Stop button control and the Unbundle by Name status.
- Connect the output of the Or function into the conditional terminal.
The snippet below stops execution of the while loop if either the Stop button is pressed or an error is detected inside of the while loop.
Other Stop Condition Considerations
The situation described above (stop on user input
or on error) is a very common use case for setting the conditional stop input. But this is not the only way to add complexity into your stop conditions:
- If you would like to compare three or more Boolean conditions, use the Compound Arithmetic function. This would be useful if you would like to monitor error states, user inputs, and measurement data values simultaneously and stop running code if a threshold or state has occurred.
- When comparing error wires using Or, Compound Arithmetic, or other Boolean comparison functions, you can wire the error bundle directly into the arithmetic function. The error status Boolean will automatically be parsed out.
- This may not be true for all versions of LabVIEW. The process described in Setting Stop Conditions section is applicable in all versions of LabVIEW and a correct process to follow.