In order to use Counters on your myDAQ device, you will need to install a compatible version of
NI-DAQmx Driver (review the version readme) as well as review the information under
Digital I/O (DIO) and Counters/Timers in the
NI myDAQ User Guide and Specifications .
Use an NI myDAQ Counter Shipping Example:
- Open LabVIEW and navigate to Help >> Find Examples..., this will open the NI Example Finder
- Navigate to the Hardware section at the bottom left of the window
- Expand the drop-down and either click on NI myDAQ and skip to step 8. If NI myDAQ is not available, click Add device...
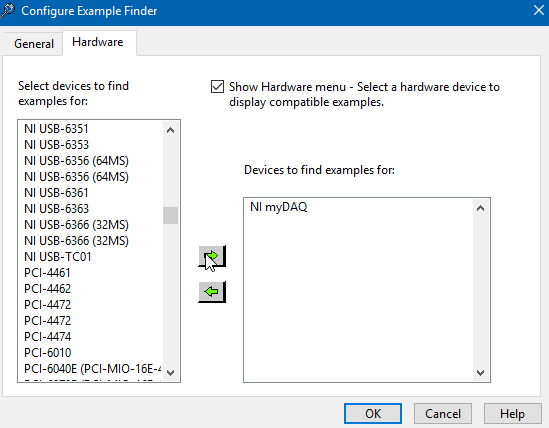
- Once the Configure Example Finder window is open, confirm you are in the Hardware tab
- Navigate the left list until you find NI-myDAQ. Highlight this device and click the arrow pointing right. This will populate the section for Devices to find examples for:

- Click OK
- Once again, navigate to the Hardware section on the bottom left of the NI Example Finder. Expand the drop-down and click NI myDAQ.
- Check the box next to Limit result to hardware. This will limit the Browse tab's options to everything that can be used with the NI myDAQ.
- Expand Hardware Input and Output >> DAQmx by double clicking on the respective folders
- You can expand either the Counter Input or Counter Output folder depending on your needs.
- Double click on the VI you want to use. This will open up a completed VI Front Panel to use with your NI myDAQ.
Additional Information
The NI myDAQ counter can be used for nine different counter tasks. These tasks include:
- Taking an edge count
- Measuring frequency
- Measuring period
- Measuring pulse width
- Measuring two-edge separation
- Measuring position from a linear encoder
- Measuring position from an angular encoder
- Generating a pulse output
Each of these different tasks will require different inputs to be connected to the three counter terminals of the NI myDAQ.