In order to create a wireless network directly between your cDAQ-9191 and your computer without using a wireless router, you will need to create an ad hoc network. The following steps will walk you through setting up your cDAQ-9191 and creating an ad hoc network.
- Place the cDAQ module into the cDAQ-9191. Attach the power cord and plug in to power on the cDAQ-9191.
- Open Measurement & Automation Explorer (MAX). On the left, navigate to Devices and Interfaces»Network Devices.
- Connect the cDAQ-9191 to the computer using the Ethernet cable. Your cDAQ-9191 should appear under Network Devices with a white icon next to it.
- If the device does not show up, try refreshing MAX by pressing F5.
- If it still does not show up, try resetting the cDAQ-9191 by pressing the reset button on back of the chassis. Hold the button for five seconds or longer in order to reboot the chassis into factory default modes. Note that pressing the reset button for less than five seconds reboots the chassis with the current configuration.

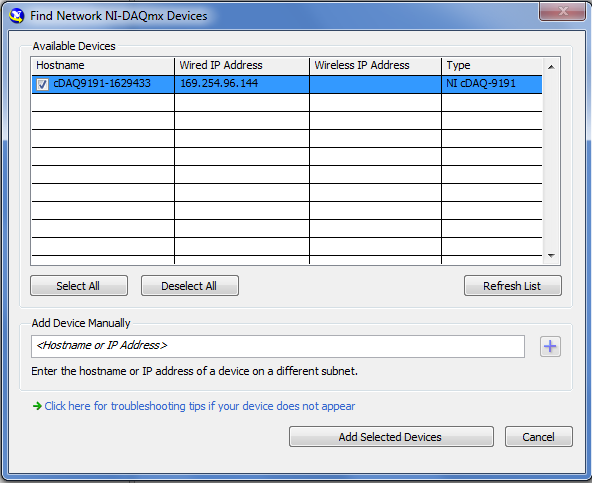
- Right-click Network Devices and select Find Network NI-DAQmx Devices.

- A window will pop up titled Find Network NI-DAQmx Devices. It may take a moment to search for the device.
- If the device does not show up, click the button labeled Refresh List in the middle right of the window.
- If it still does not show up, try resetting the cDAQ-9191 by pressing the reset button on back of the chassis and begin back at step 3. Hold the button for five seconds or longer in order to reboot the chassis into factory default mode.

- Select the device by clicking on the box to the left of the device name and then press Add Selected Devices. The device will now display in MAX with a colored icon on the left to indicate it has been added. The module inside will populate automatically.

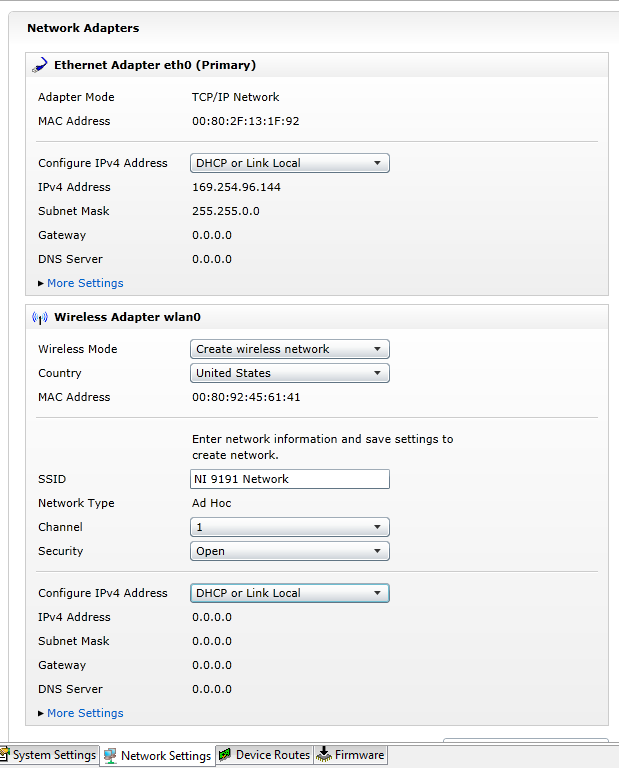
- Click on the cDAQ-9191 and then select the Network Settings tab at the bottom of the window. Change Wireless Mode to Create wireless network and SSID to any text you wish.

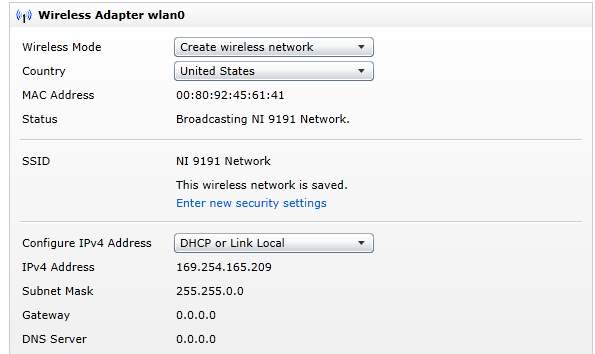
- Click Save. The status should change to say that it is broadcasting the network. Wait for it to find the IP address.

- If you want the IP to be static, change Configure IPv4 Address to Static and change the value of IPv4 Address and click Save. If you are using Windows 10, stop at this step and refer to the section titled "Connecting to an ad hoc Network using Windows 10" in the Additional Information section below.
- Unplug the Ethernet cable from the cDAQ-9191 and the computer. On the computer, connect to the wireless network you created.
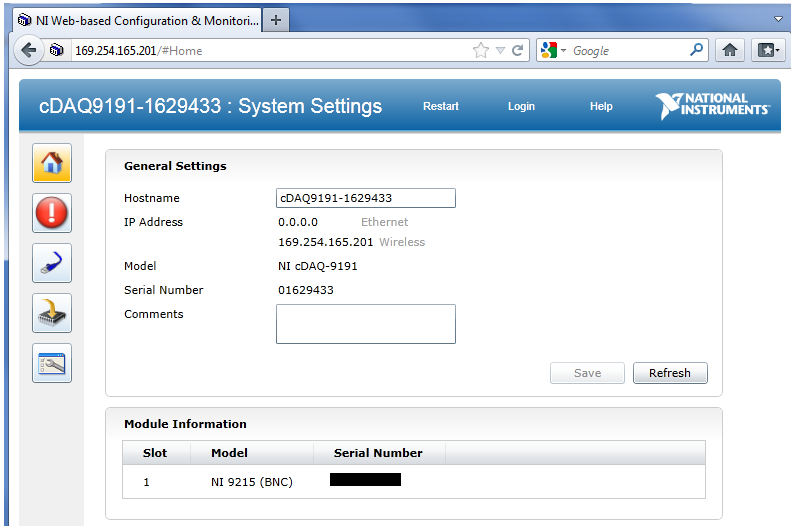
- To verify the connection, copy the IP address into a browser in order to view the NI Web-based Configuration and Monitoring page. You can also use test panels for the device to verify the connection.

Additional Information
After you set up your wireless network, if you have trouble getting your device to connect via a wired connection, please see
What Link Does a cDAQ-9191 Prefer when Both Wireless and Wired Are Connected?Connecting to an ad hoc Network using Windows 10:Note: If your wireless network adapter in the Windows 10 computer is not IBSS enabled, you will not be able to connect to the cDAQ-9191 ad hoc network. You can check the IBSS capability of your network card in Windows 10 by opening a Command Prompt window and entering the following command:
netsh wlan show wirelesscapabilities
If the IBSS field in the displayed results does not indicate that the wireless network adapter is IBSS enabled, the following steps will not work and you will not be able to connect to the cDAQ-9191 wirelessly with that Windows 10 computer. This is a result of the Windows 10 WLAN Device Driver Interface.To learn more about this Windows 10 driver, read
Why are Soft AP (Hosted network) and IBSS (Ad-Hoc Network) Not Working on Windows® 10?If your network adapter does not support IBSS, an alternative approach can be to
connect to a PC hosted WLAN.
Compared to earlier Windows operating systems, Windows 10 can have difficulty connecting to ad hoc networks. A workaround for this is to manually connect to the wireless network and then configure its connection type as ad hoc. To manually connect to a wireless network, follow these steps:
- Open the Network and Sharing Center
- Click on Set up a new connection or network
- Select Manually connect to a wireless network from the list and then click Next
- Enter the network name that you picked as the SSID when the ad hoc network was created on the NI-9191
Next, open up a Command Prompt window and enter the following command:
netsh wlan set profileparameter name=%name% ConnectionType=IBSS
where %name% is the SSID. For example, %name% could look like “cDAQ-9191 Network”. Make sure to include the quotation marks around the SSID name in your command prompt input. Next, open up Notepad and copy the following:
ECHO OFF
netsh wlan connect name=%name%
ECHO ON
Again, change %name% to the SSID. Save this file with an extension of .bat. Now whenever you want to connect to the ad hoc network, run the .bat file and your Wi-Fi will connect to the cDAQ-9191.
If still these don't work, set a static IP for the chassis and open up again the Command Prompt window and enter the following command:
netsh wlan set profileparameter name="ni2" ConnectionType=IBSS
netsh wlan connect name="ni2"
where
ni2 is the SSID of the Wi-Fi network.