In order to install software on your real-time target, following these steps:
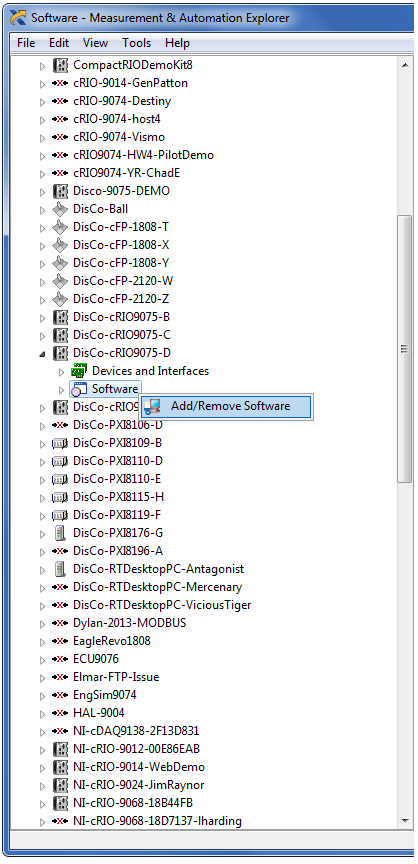
- Open Measurement & Automation Explorer (MAX).
- Click the Remote Systems tab to display all remote hardware.
- Click on your hardware to display the options for your hardware.
- Right-click on Software and select Add/Remove Software.

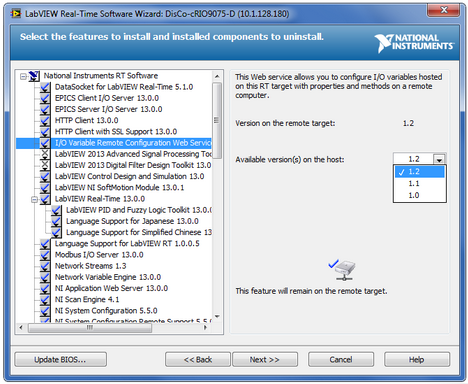
5. Once the LabVIEW Real-Time Software Wizard loads, select Custom software installation and click Next and then Yes when prompted by the recommendation to install a recommended software set instead. This will bring you to the Software Selection screen.
6. In the Features window, select the software that you want to install and the version as seen below.

7. After you have selected the version of the software you want to install, click Next. At the Review Installation window, click Next and your software will be uploaded to your real-time target.
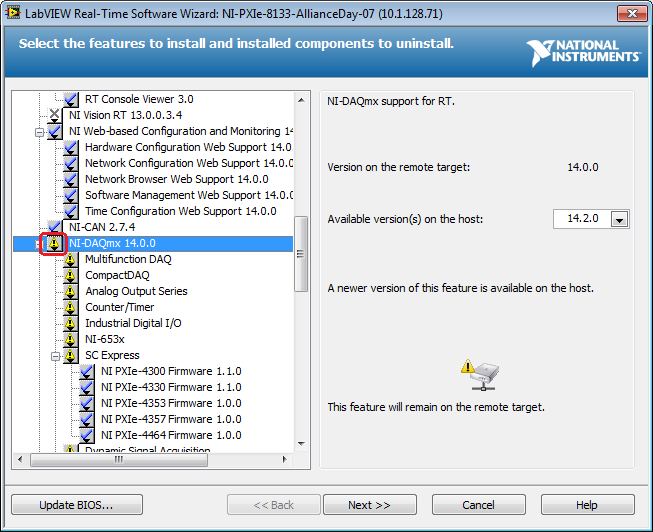
Note that if there is software already installed on the target and a different version is available on the host computer, the default behavior is that the previously installed software will remain unchanged on the target. Those installations will be clearly marked with a yellow caution symbol, as shown below.

In order to upgrade the version, click the icon next to the software and in the drop-down menu select Reinstall the Feature.