Creating and calling .DLLs correctly is important to avoid causing errors in your program and potential crashes in LabVIEW. The correct steps for creating and calling .DLLs to pass strings, or an array of strings, are listed below.
Build the .DLL:
- Create a Project with the VI that contains Indicators of the strings, or array of strings, that you want to pass through your .DLL.
- You must link your Indicators as Outputs of your VI or else these instructions will not be called properly by your .DLL.
- Create a Shared Library (DLL), by in the Project explorer right clicking Build Specifications >> New >> Shared Library (DLL) as shown in Figure 1.

Figure 1: Creating the Shared Library (DLL)
- Under the Information tab, enter a name for the Build Specification Name and Target Filename.
- Under the Source Files tab, select the VI’s in your project that contains the strings you want to pass and include them in the Exported VIs section by clicking the arrow to move them over as shown in Figure 2.

Figure 2: Adding Exported VI's
- To define the settings of each VI that you are exporting in the DLL, select each VI individually and click Define Prototype.
- If you are passing a single String, change the Pass By parameter to String Handle Pointer as shown in Figure 3. If passing an Array of Strings, there should be no edits that you have to make.
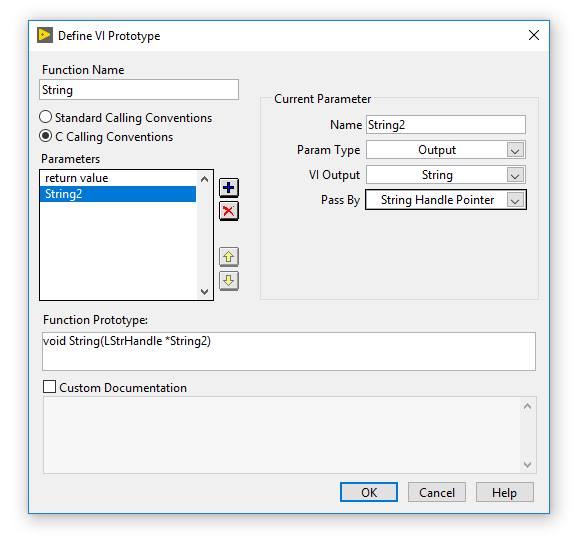
Figure 3: VI Property Definition
- Click OK on the Define VI Prototype dialogue box.
- Click Build in the My DLL Properties dialogue box.
For more information on building .DLLs refer to:
Generate a DLL from a LabVIEW Project .
Call the .DLL:
- Create a new VI that will call your .DLL.
- Place a Call Library Function Node in the block diagram of your calling VI for each function you want to call. Each Call Library Function Node can only be tied to one function at a time.
- Double click the Call Library Function Node to open the Configuration Window.
- Locate the .DLL you created with the Library Name or Path
- Select the appropriate Function Name, an example of this is shown in Figure 4.
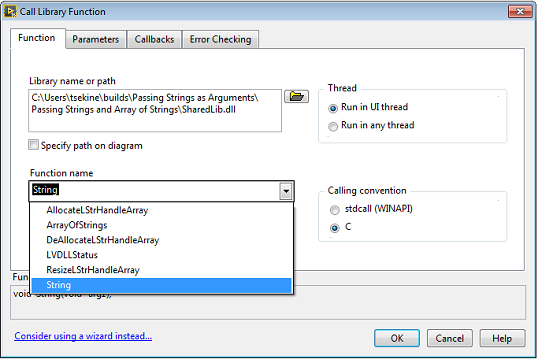
Figure 4: Selecting Proper Function Name
- In the Parameters Tab, click the Plus sign to Add a Parameter.
- Configure the new parameter to have the following settings so it matches our created .DLL as shown in Figure 5.
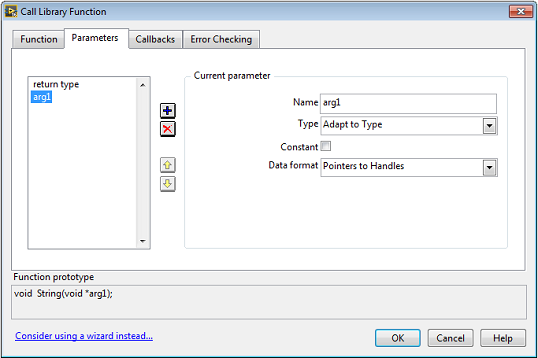
Figure 5: Configuring Parameter Settings
- On the block diagram of your VI, wire an empty String Constant into the Input and a String Indicator to the Output.
- Run the caller VI and the Indicator should now show the Output defined by the DLL’s function.