Both options serve a purpose. In general, it's fewer clicks to deploy to a RT target using
Run as startup.
Set as startup may require more steps, but is a better option if you don't want your application to begin running on your target device without having to force a reboot manually. Directions for both methods and a detailed description can be found below.
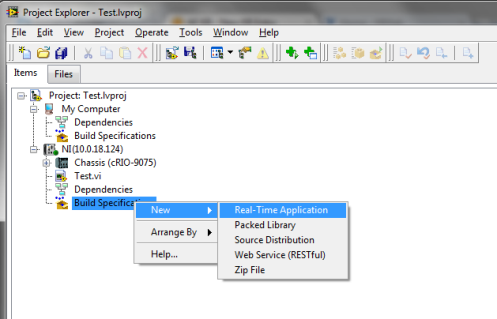
Regardless of which option you select for deploying and running your application, you must first
create an RT build specification, as seen in the image below.
 Figure 1. How to Build a Real-Time Application in LabVIEW
Set As Startup
Once you have created a
Real-Time Application Build Specification,
- Right-click on the build and left-click on Set as Startup.
- Right-click on the Real-Time Application again and choose Deploy. At this point, the application is laying dormant in your RT controller.
- To run the application, either:
- Use your host computer to reboot the device in MAX or your LabVIEW project
- Manually reset the RT target using the built-in reset button.
While this method does take more steps than
Run as Startup, it is more effective in applications where the code must be deployed in one location and run in a different location. For example, you may program and deploy the software to the RT target in an office, but wait to reboot and run the executable after the target is physically connected in a control or test system on the factory floor.
Run As Startup
Once you have created a
Real-Time Application Build Specification,
- Right-click on the Build Specification and left-click the Run as Startup option.
- The project will deploy according to your build specification.
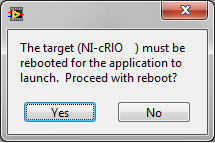
- When asked if you want to reboot the RT Target, as seen in the figure below, select Yes. The target will reboot and run the application at Startup.
 Figure 2. LabVIEW Prompt Window upon deploying a Build to the target.