NI-VISA 5.1 and Later To write hex characters using
VISA Test Panel with NI-VISA 5.1 and later you simply need to add a
\ before each byte of hex information which translates to two hex characters, as seen below.
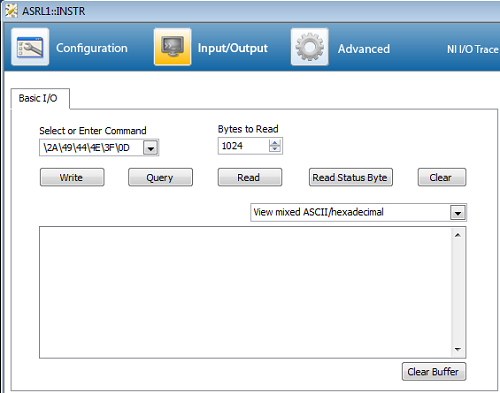
After entering hex commands in the
Select or Enter Command control, the values will translate to their
ASCII equivalent characters.
Note: If the command requires a two character input such as ESC+P, enter the hex command plus the given letter, such as
/1BP. A hex command for P is not needed in this case.
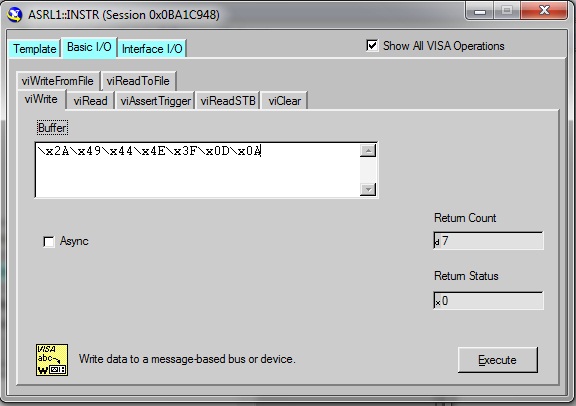
Earlier Versions of NI-VISA To use these hex commands within the
VISA Test Panel for versions of NI-VISA earlier than 5.1 simply add a
\x before each hex character, as seen below.
Additional Information
Both figures above show how to send a *IDN? query in hex using the
VISA Test Panel. The first five bytes of hex information are mapped exactly from the characters *IDN?.
The final two bytes of hex characters
\x0D\x0A are the "
end command" sequence in hex. Some devices require an "
end command" sequence or a "
checksum" at the end of each command sent. Refer to the device manual for these details.