To use NTP on a Linux Real-Time target, you will need to install and configure the NTP software on the target using a secure shell (SSH) session to the target. These instructions should apply to all Linux Real-Time targets, but if you are using a TSN-enabled target, such as a cRIO-904x or cRIO-905x, please read the note in the Additional Information section below.
- Make sure that the Linux Real-Time target is connected to the internet. A simple way to do this is to connect both the host PC and the target to a network switch that is connected to the internet.
- Open an SSH session to the Linux Real-Time target using a terminal program, such as PuTTY.
- Enter the username and password when prompted to log into the target.
- Once the SSH session is open to the Linux Real-Time target, enter the following command lines to install the NTP software:
- The NTP software should now be installed and running in the background. If the above commands fails to update or install, make sure that the device is connected to the internet.
- You now need to setup the NTP configuration file to point to the NTP server of your choice. You can use an NTP server on your local network or use a publicly available NTP server. This example will show how to connect to the time.natinst.gov server.
- Open a new SSH session to the target if your session is no longer open.
- Run the following command to open the NTP configuration file:
- The ntp.conf file should now be open in the Linux vi text editor.
- Press i to enter edit mode.
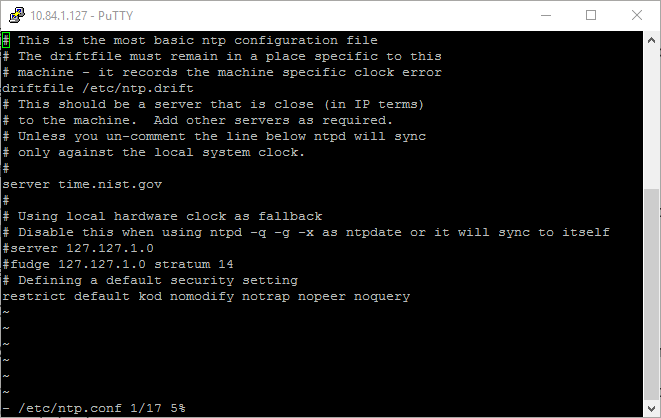
- Move the cursor with keyboard arrows. Add a line with server name in the format server <server URL or IP address>. You can add multiple servers in this file by placing each on their own line. If you need additional help configuring /etc/ntp.conf, there are many guides available on the internet.
- The file should now look like this:
- Exit the edit mode of the file by pressing the ESC key.
- Save and exit the NTP configuration file by entering:
- Reboot the Linux Real-Time target and the time server. Your target should start synchronizing to the server you specified in the configuration file. Please be aware that NTP will adjust the time slowly, so it may take some time for the skew between the target system time and the NTP server time to be minimized.
- You can test the connection to the NTP server by running the following command to query the server:
Additional Information
- This solution should work on Linux Real Time Targets with Real Time module 14.0 or newer. For this solution to work on Real Time module 13.1 and older, you need to configure third party installation sources as mentioned in Installing and Configuring NTP on NI Linux Real-Time Devices community post.
- The configuration file works on the OS level, thus the NTP server setup will be included in the RT image, should it be copied with the Replication and Deployment (RAD) Utility .
- To use NTP with TSN-enabled targets, such as the cRIO-904x and 905x, the Linux OS time needs to be desynchronized with the network time. Otherwise, time will be driven from two sources and synchronization quality will be poor or unusable. NI-Sync 20.1 is required to desynchronize Linux OS time from network time. For more information and instructions on how to turn off the synchronization, follow the instructions in this documentation.
- As of NI-Sync 19.0, NI-TimeSync features have been incorporated in the NI-Sync driver and all configuration should be done via property nodes. The methods in Using NI-TimeSync to Configure IEEE 1588 and 802.1AS Time References have been retained for customers who are using older versions of NI-TimeSync.