LabVIEW 8.5 and later:1. Create a new project or open an existing one. To create a new project from the block diagram or front panel, select
File»New»Project»Empty Project. To create a new project from the LabVIEW Getting Started screen, select
Empty Project.
2. Add a VI to the project by right-clicking
My Computer»New»File.
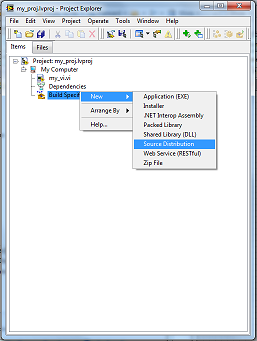
3. Right click on
Build Specifications»New»Source Distribution.
4. Select
Source Files under the category list on the left of the source distributions properties window.
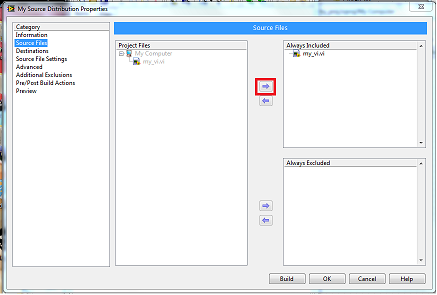
5. Select a VI from the Project Files window and click the right arrow button to always include the VI in the LLB build.
6. Select
Destinations under the category list on the left of the source distribution properties window.
7. Click the
LLB radio button under the Destination type options.
 For LabVIEW 8.0 and 8.2:
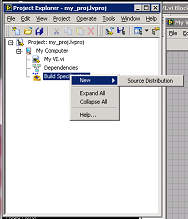
1.Right click on
Build Specifications»New»Source Distribution.
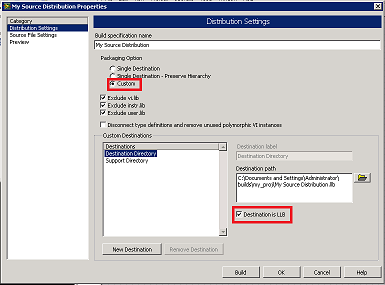
2. Click the
Custom radio button.
3. Click the check box
Destination is LLB and click
Yes on the pop-up window.
4. Click
Build.
Another way to put an existing VI in a new LLB file is as follows:
1. Select
Save As from the File menu.
2. Select
Substitute Copy for Original (the original VI will remain unchanged and a copy of it will be saved in a different location).
3. Click the
Continue button.
4. Click on the
New LLB button in the lower right corner. Choose a name and a location for the new LLB file.
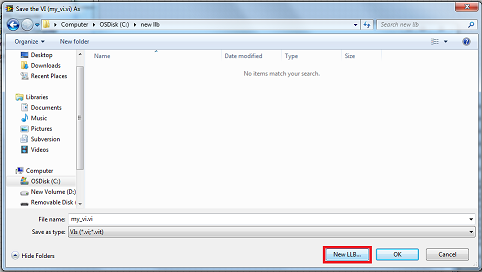
5. Save your VI inside of the new LLB file.
To create a new VI and save it in a new LLB, open a blank vi and select
Save from the File menu and follow steps 4 and 5.
Note: This method will not automatically include subVIs in the LLB. If you need to have dependents included in the LLB follow the instructions in the following article:
How Do I Create a LabVIEW VI Library that Automatically Includes All SubVIs?Yet another way to handle an LLB is to use the LLB Manager (LabVIEW 8.5 and later):
1. Go to the menu
Tools»LLB Manager...2. Navigate to the folder where you want to save the new LLB
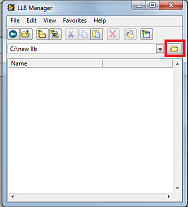
3. Select
File»New LLB and enter the LLB's name.
4. To add VIs to the created LLB, navigate to the VI and copy it from
LLB Manager.
5. Navigate to the LLB file, open it, and paste the VI.
Additional InformationThis article is a basic guide of how to create a LLB, any custom or specific requirements to be included in a LLB are not supported by NI.