The FPGA image for the USRP devices are stored in the device internal memory. You can program the device over the network to update or change the FPGA image by using:
- NI-USRP Configuration Utility
- NI MAX
- Digilent Adept
There are two kinds of USRP RIO which is distinguished by which environment you are using it, NI USRP RIO and Ettus USRP X310.
Using NI-USRP Configuration Utility
1. Ensure the PC has installed
LabVIEW and
NI-USRP driver.
2. Connect USRP RIO's eth0 port to PC through Ethernet cable. The left LED of eth0 will turn
green.
3. Open Internet and Sharing Center of PC and change the IPv4 address to be 192.168.10.1.
4. Or connect the USRP device to the host computer via MXIe x4 as
this article said.
5. Select
Start»All Programs»National Instruments»NI-USRP»NI-USRP Configuration Utility to open the NI-USRP Configuration Utility.
6. Select the
N2xx/NI-292x Image Updater tab. The utility should automatically populate the
Firmware Image and
FPGA Image fields with the paths to the default firmware and FPGA image files.
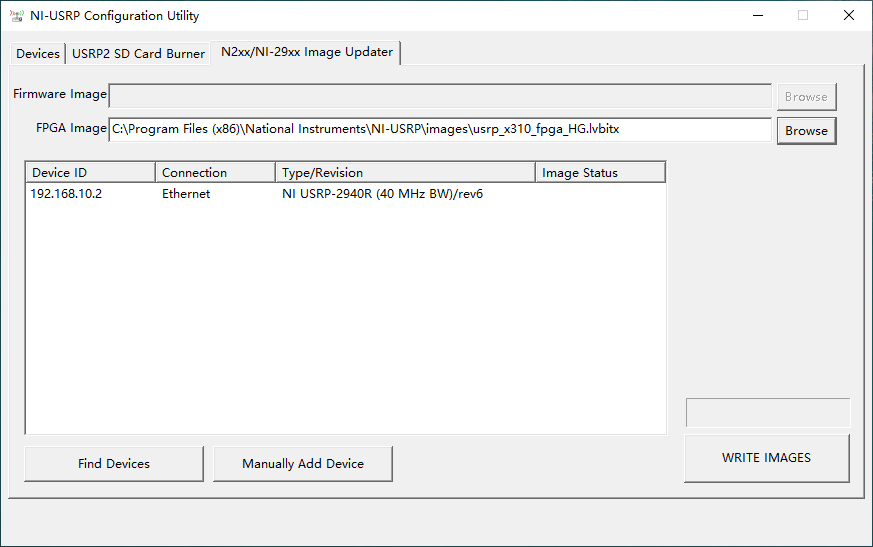
7. Select the device to update from the device list, and verify that you selected the correct device. Then click the
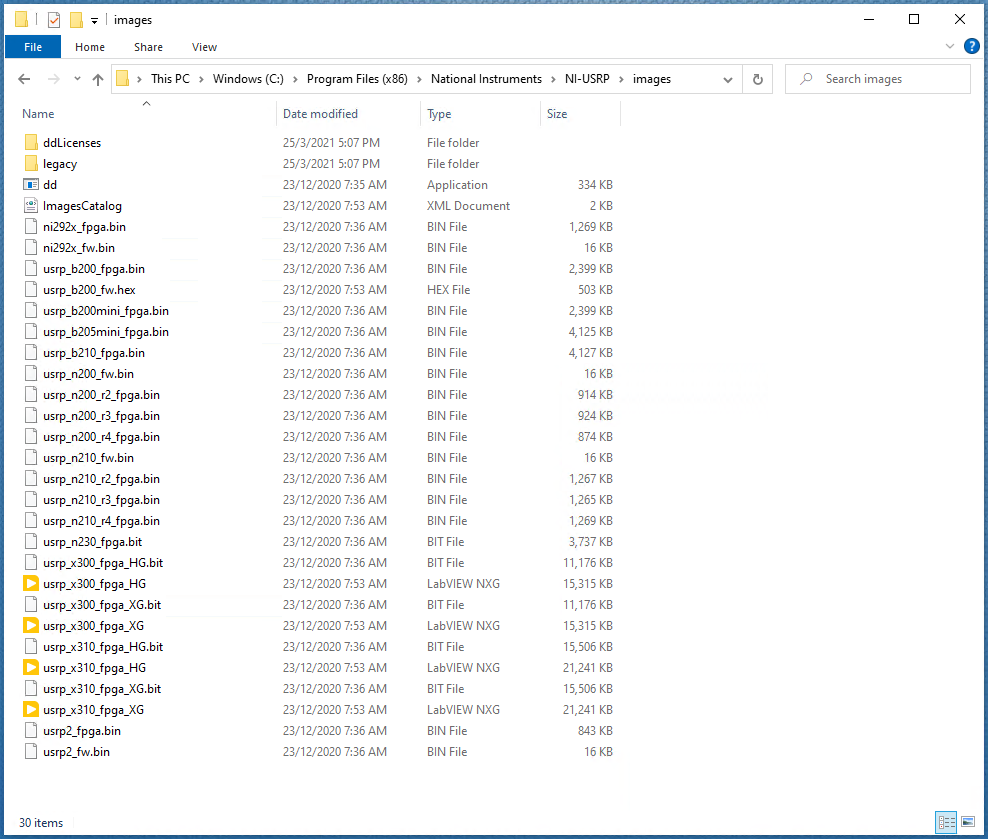
Browse button next to the file you want to change, and navigate to the file you want to use. The image files are stored in
C:\Program Files (x86)\National Instruments\NI-USRP\images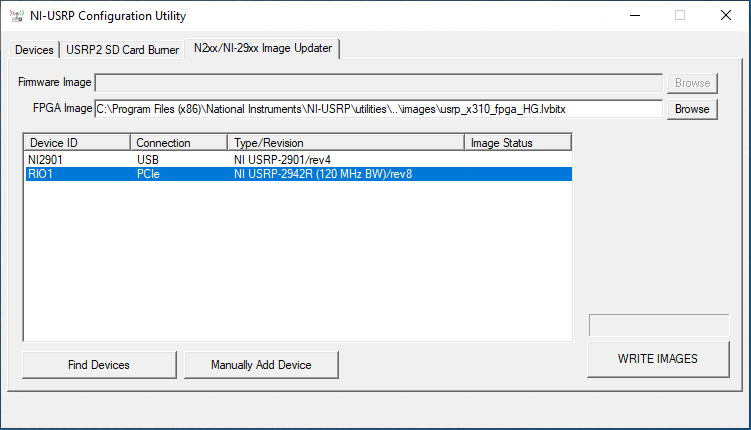
8. Verify that the version of the FPGA image file matches the board revision for the device you are updating. The file with filename extension of
.bit is the FPGA image for open source environment while the filename extension with
.lvbit is for National Instruments environment.
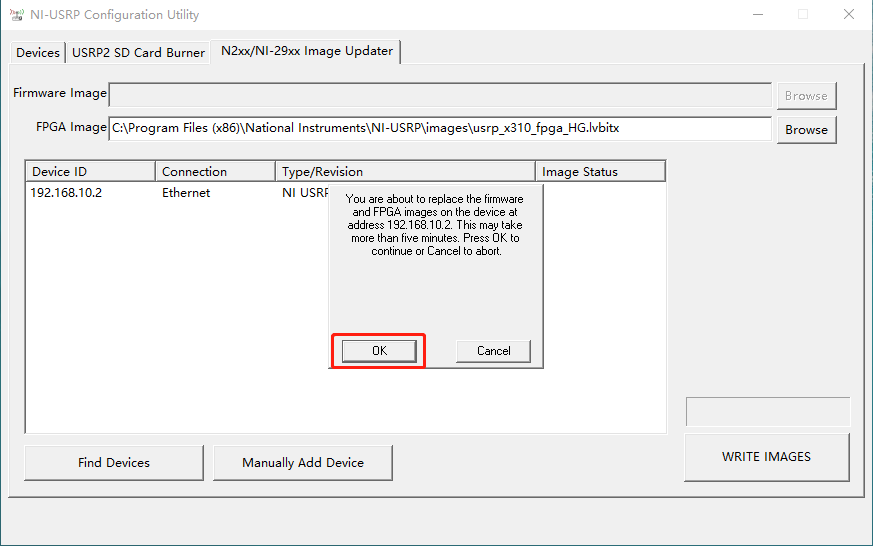
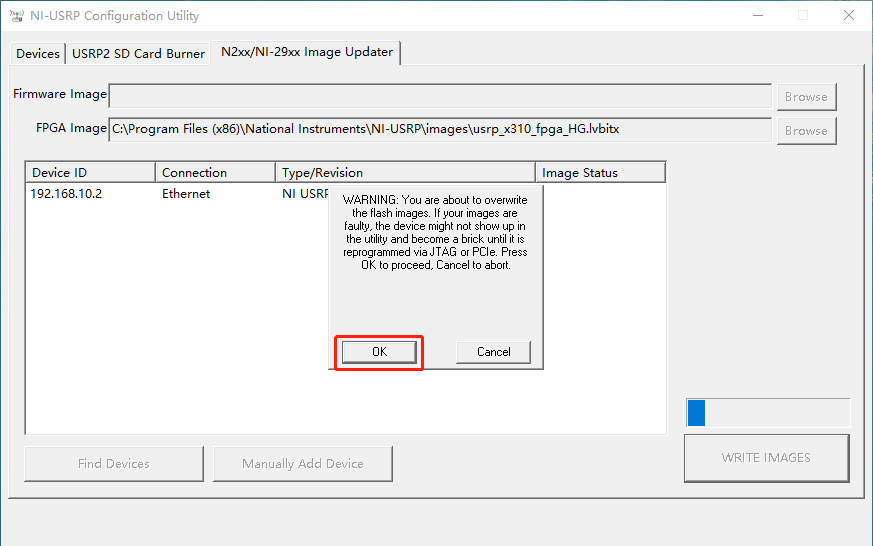
9. To update the device, click the
WRITE IMAGES button. A confirmation and a warning dialog box display will appear. Confirm your selections, and click
OK to continue.
10. A progress bar indicates the status of the update. During this time, the right LED of eth0 will turn amber and the Utility software will appear "no response". Just ignore it and keep waiting.
Note: This process is very important and please keep the device powered on and have a stable connection with PC.
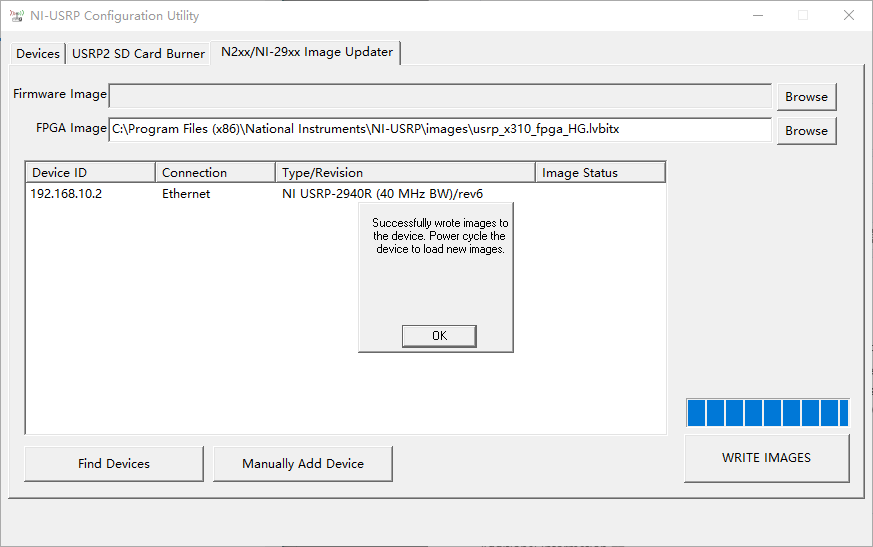
11. When the update completes, a dialog box prompts you to reset the device. A device reset applies the new images to the device. Click
OK to reset the device. Power cycle means rebooting the USRP hardware.
12. Close the Utility and reboot or power cycle the USRP RIO device.
Using NI MAX
1. Ensure the host PC has already installed the LabVIEW and NI-USRP driver.
2. Connect USRP device to the host computer via MXIe x4 as
this article said.
3. Open NI MAX (Measurement & Automation Explorer) and find USRP RIO device through My System >> Device and Interface.
4. Click the
Update Firmware button and select the file you want to use. The image files are stored in
C:\Program Files (x86)\National Instruments\NI-USRP\images.Note: The NI MAX software will automatically filter the
.bit file, so this method is only used for those who want to use USRP RIO under LabVIEW environment.

Using Digilent Adept
1. This is a method only for those who want to use USRP RIO under open source environment.
2. To know the full process of this method, you can refer to
this article.