There are four different methods to upgrade or downgrade a device's software:
- Through NI MAX.
- Using the Web Configuration.
- Using LabVIEW.
- Using NI Hardware Configuration Utility
To downgrade firmware, you will need to download older versions of the driver to be able to do so. Then you can perform the change following the methods below.
Update with NI MAX:
- Open NI MAX.
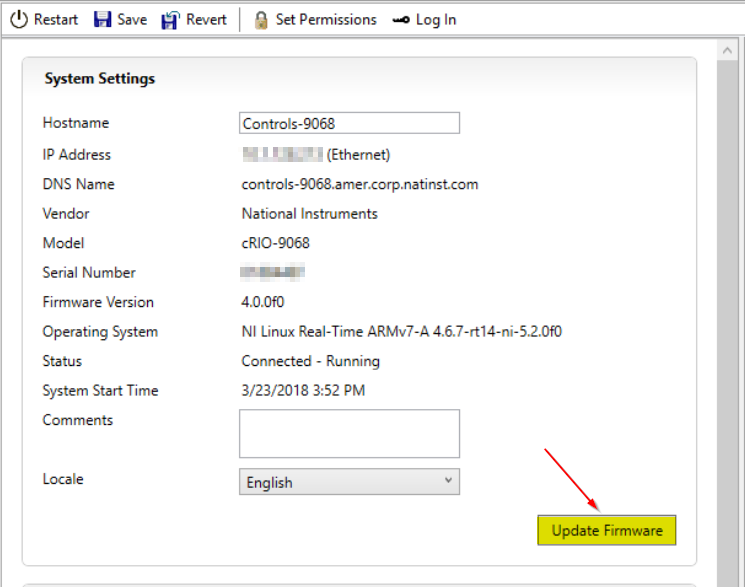
- Under Remote Systems, select the device you want to update. On its System Settings tab, click the Update Firmware button.
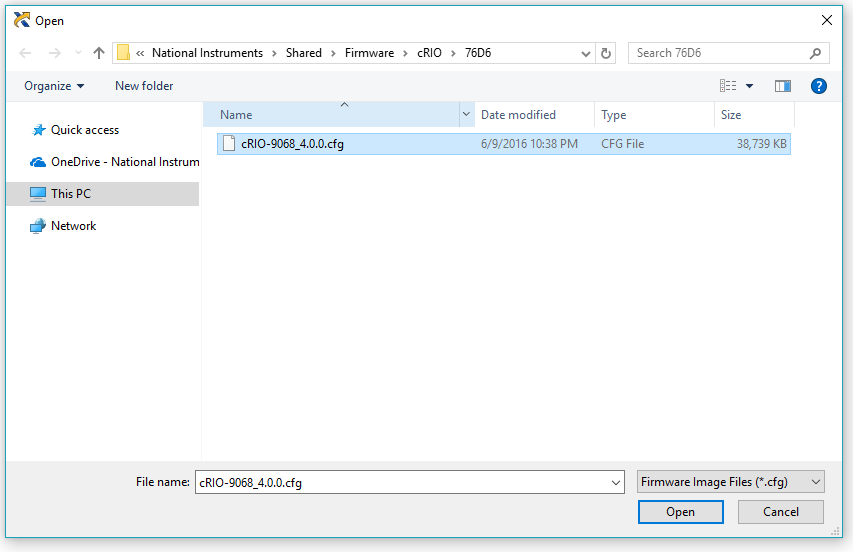
- By default, the window should load to the correct location as shown below. Select the firmware version you want to update and click Open. The location for all firmware files is <Program Files>\National Instruments\Shared\Firmware\. From there, navigate to the Device Family such as the Ethernet cRIO folder, of your device and the folder corresponding to the target if the location is not already loaded correctly. Find a supplementary table in the section Additional Information below showing which folder belongs to which device.
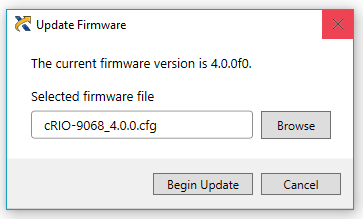
- The above window will close and the below window will pop up. Click Begin Update.
Update with Web Configuration:
- Open Internet Explorer (Microsoft Silverlight is required).
- Navigate to the IP address of the LinuxRT Target.
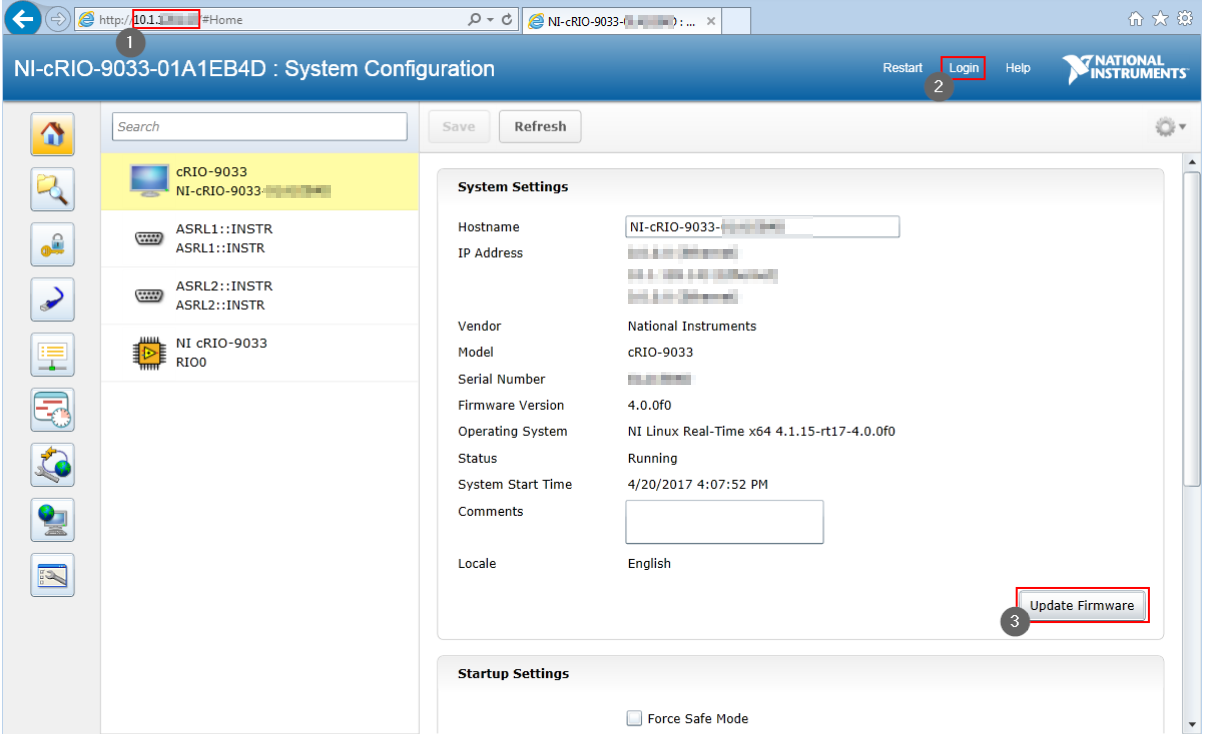
- Log in with an administrator account. By default the username is admin and the password is left blank.
- Click on Update Firmware.
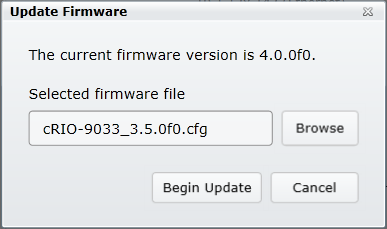
- A window will pop up where you need to browse the firmware file. The location for all firmware files is <Program Files>\National Instruments\Shared\Firmware\. From there, navigate to the Device Family of your device and the folder corresponding to the target. Select the firmware version you want to update and click Open. Find a supplementary table in the section Additional Information below showing which folder belongs to which device.

- The above window will close and another will appear. Click Begin Update.
Update Programmatically:
Firmware can be updated using the Upgrade Firmware VI. You can find more information in this example program.
Update with NI Hardware Configuration Utility
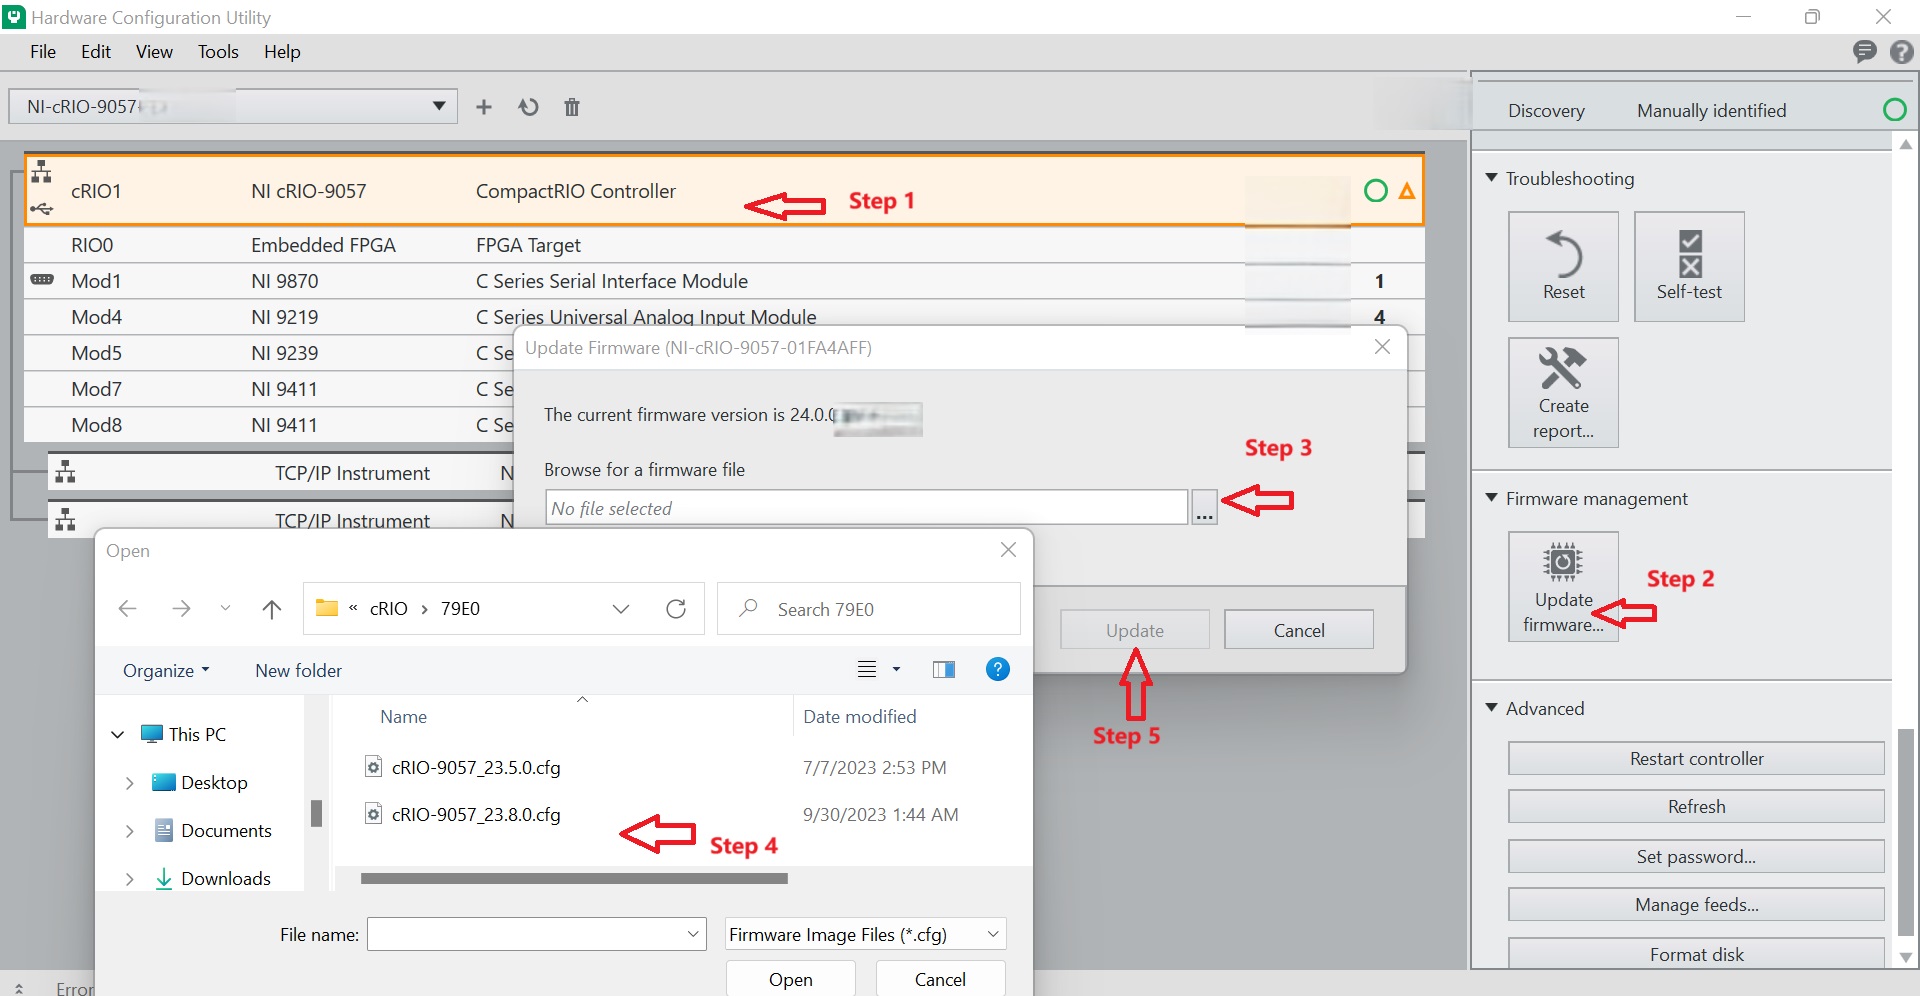
- After launching NI Hardware Configuration Utility, choose the cRIO controller you need to update firmware.
- On the right side, under Firmware Management, locate and click on "Update firmware".
- In the new window that appears, click on the "..." button to browse for the firmware file. Another window will pop up for you to select the firmware file.
- Choose the corresponding .cfg firmware file and click "Open"
- Click "Update" to apply the firmware update with the selected file.
Additional Information:
In general, NI recommends updating to the latest firmware version available. However, in most cases, firmware versions other than the latest one will work just fine. Currently, firmware updates are distributed to your PC with the specific device driver. For example, firmware updates for a cRIO will be provided to your computer when installing the NI CompactRIO Driver. It is recommended that you upgrade the firmware of your target after you upgraded your driver version.
See the below table for a list of devices and their associated firmware folder names.
| Target | Folder Name |
| cRIO-9058 | 7A2A |
| cRIO-9055 | 7A2B |
| cRIO-9628 | 7A3A |
| cRIO-9638 | 7A3B |
| cRIO-9603 | 7A38 |
| cRIO-9608 | 7A39 |
| cRIO-9609 | 7A41 |
| cRIO-9629 | 7A43 |
| myRIO-1950 | 76D3 |
| cRIO-9068 | 76D6 |
| roboRIO | 76F2 |
| cRIO-9038 | 77B9 |
| sbRIO-9637 | 77D4 |
| sbRIO-9627 | 77D5 |
| sbRIO-9607 | 77D6 |
| cRIO-9035 | 77DB |
| cRIO-9036 | 77DC |
| cRIO-9039 | 77DD |
| cRIO-9048 | 78B7 |
| cRIO-9040 | 78E3 |
| cRIO-9045 | 78E4 |
| cRIO-9043 | 78E5 |
| cRIO-9048 | 78E7 |
| cRIO-9042 | 78E8 |
| cRIO-9047 | 78E9 |
| cRIO-9049 | 78EA |
| cRIO-9046 | 79CE |
| cRIO-9041 | 79D0 |
| cRIO-9053 | 79DD |
| cRIO-9054 | 79DE |
| cRIO-9056 | 79DF |
| cRIO-9057 | 79E0 |
| myRIO-1900 | 762F |
| cRIO-9031 | 774B |
| cRIO-9034 | 774D |
| sbRIO-9651 | 775E |
| ELVISIII | 793C |
| cRIO-9033 | 7735 |
| cRIO-9063 | 7740 |
| cRIO-9064 | 7741 |
| cRIO-9065 | 7742 |
| cRIO-9066 | 7743 |
| cRIO-9067 | 7744 |
| cRIO-9030 | 7755 |
| cRIO-9037 | 7840 |
| cRIO-9032 | 7841 |
| cRIO-9035 | 7875 |
| cRIO-9039 | 7878 |
| ELVISRIOCM | 7885 |
| cDAQ-9135 | 77BC |
| cDAQ-9133 | 77BD |
| cDAQ-9132 | 773B |
| cDAQ-9134 | 7773 |
| cDAQ-9136 | 7833 |
| cDAQ-9137 | 7835 |
| NI-7931 | 77B1 |
| NI-7932 | 77B2 |
| NI-7935 | 77AC |
Updating myRIOs
NI myRIOs feature a third way of upgrading the firmware. Find a description of this process here: Upgrading Firmware on My myRIO NI Linux Real-Time Device.