The best way to do this is to create a custom control and choose an image to replace the default look of the boolean button. To create a custom image on a button control follow these steps:
1. Create two image files with the desired look you want for the True/False positions of the button.
2. Add a boolean button to the front panel in LabVIEW. (something like an OK Button or Push Button)
3. Right click on the button and select
Advanced » Customize... 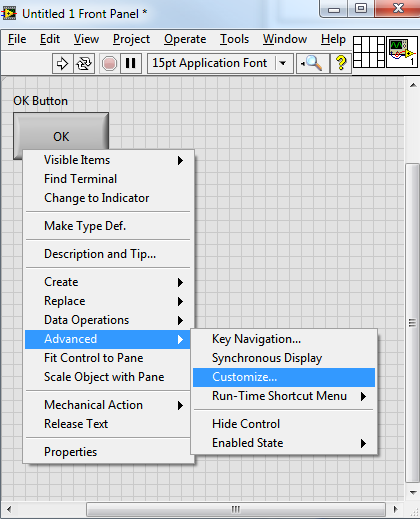
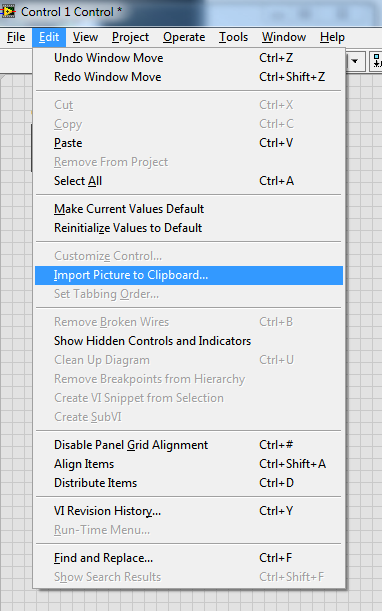
4. On the new window select
Edit » Import Picture to Clipboard... to select the first image you want to place on the button.
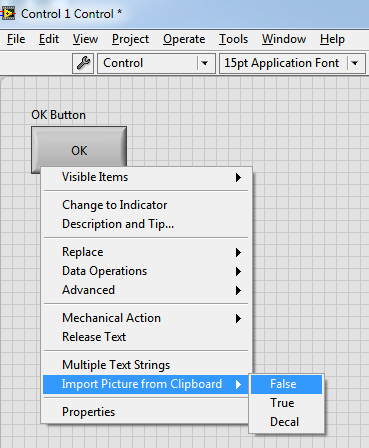
5. Now select the True/False state you want the image associated with by right clicking on the button and going to
Import Picture from Clipboard » False. This will place the selected image for the False state of the button.
6. If you want to select a different image for the True case, then start by selecting a picture as explained in Step 4 and select the True case in Step 5.
7. Save the modified button as a .ctl file.
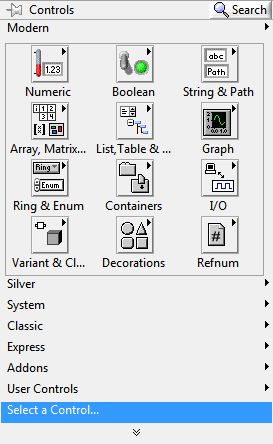
8. To insert the modified button on your main VI you can go to the Controls Palette, browse to Select a Control... and select the .ctl you created.
For more information on editing controls, please see the
LabVIEW Help: LabVIEW Custom Controls, Indicators, and Type Definitions.