-
Shut down all ODBC applications, such as databases, spreadsheets, word processors, and Microsoft Query, before you run the ODBC applet.
-
Click the Windows Start button and select Control Panel.
-
Run the ODBC Administrator applet by navigating to Administrative Tools » Data Sources (ODBC). The exact path may vary depending on your operating system and current configurations.
-
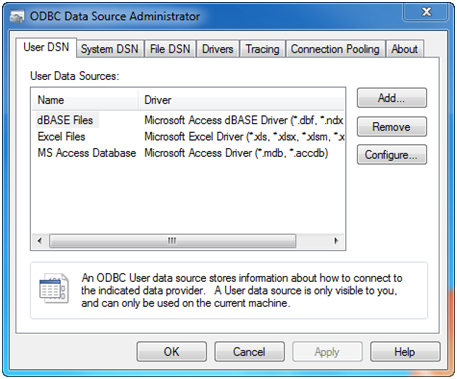
Select the User DSN tab or the System DSN tab, depending on which type of data source you want to create. User DSNs are only visible to the user who created them on the current machine. System DSNs are available to all users on the current machine.
5. Click on the Add button. The following dialog box appears.
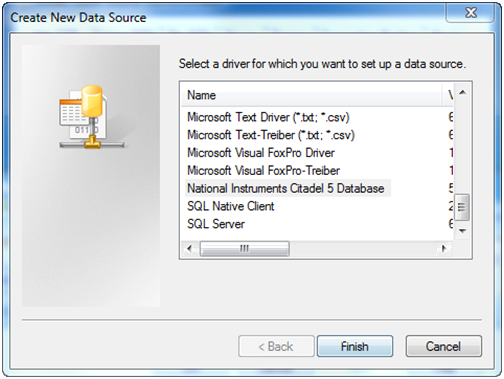
6. Select National Instruments Citadel 5 Database, then click Finish.
7. In the National Instruments Citadel 5 ODBC Setup dialog box, fill in the Data Source Name, Description, and Database Path fields.
a. The Data Source Name is the name that ODBC applications use to select your data source.
b. Description is a free-form text string you can enter to describe the data source.
c. Database Path should match the location of the Citadel database you intend to access. Use a fully qualified path to a remote computer if you are accessing the Citadel database on a remote computer, such as \\MyComputer\c:\dsc\database.
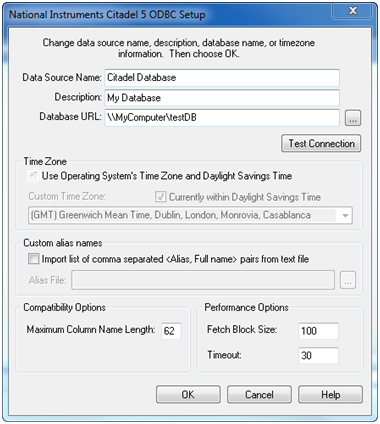
The Data Source Name must be different from any other ODBC data source name. The Description is arbitrary. The Database Path gives the location of the folder where the data for this source is stored.
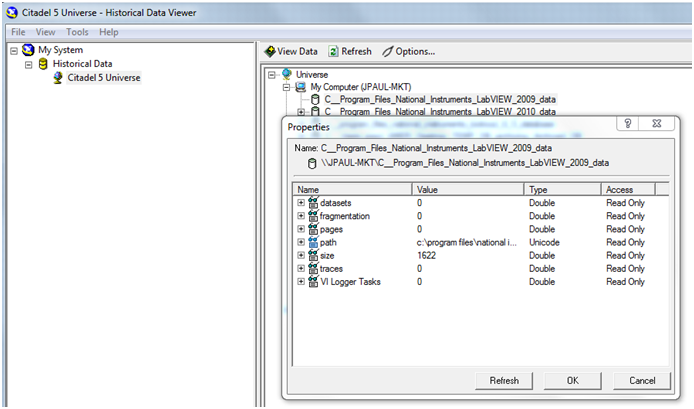
In the LabVIEW Datalogging & Supervisory Control (DSC) Module the default database path is the data folder under LabVIEW. Verify the database location at Tools » DSC Module » View Historical Data... When Measurement & Automation Explorer (MAX) opens, expand the left-hand historical data tree and highlight your Citadel database. Right-click on the database and select Properties… The resulting dialog box will display the current path to the database.
8. Click on OK in the Setup dialog box, then click on OK in the ODBC Data Source Administrator dialog box.
Note:
Some applications are not completely ODBC compliant. If you plan to use Microsoft Query, Microsoft Access, or Visual Basic, make sure Maximum Column Name Length does not exceed 62 characters. These applications cannot handle longer names. Applications that are completely ODBC compliant can handle names up to 126 characters long. All traces whose names exceed the Maximum Column Name Length are excluded from queries.
If you plan to use Microsoft Access or Visual Basic, select Convert special characters to force Lookout names into an accepted format by replacing characters within the names with the characters in the following table. The special characters changed in Lookout 4. If you are converting Lookout processes from a version earlier than Lookout 4, you might need to rewrite any SQL queries you set up in your processes.
Special Access SQL Characters
|
Special Character
|
Converted Character
|
|
period ( . )
|
at sign ( @ )
|