First, you must specify the desired default values for your Front Panel Controls by manually setting them and then left clicking on each and selecting Data Operations >> Make Current Value Default. Alternatively, you can manually set all Front Panel Controls to desired values and set all Controls as default at once by navigating to the Edit toolbar and selecting Make Current Values Default. Then, you'll be able to configure your VI to programmatically reset to these values at the beginning of each VI run.
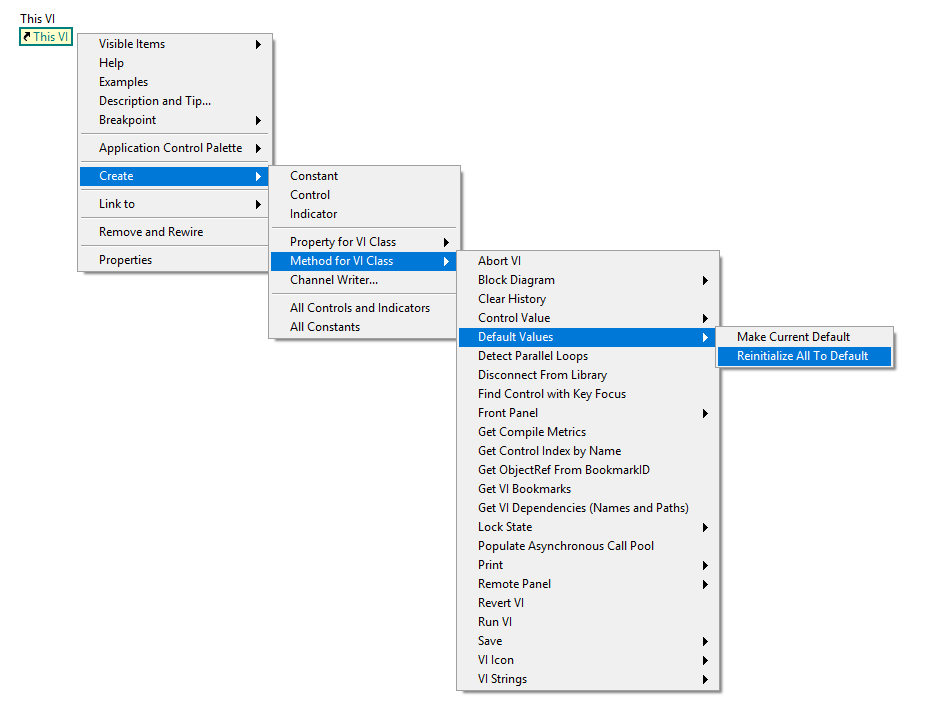
If you are using LabVIEW version 8.0 or later, there is a VI Class Method called Default Values.Reinitialize All to Default. This method is identical to the menu option Edit>>Reinitialize All Values to Default. To call this method programmatically, follow the steps outlined below:
- Select the Block Diagram window.
- Bring up the Quick Drop (Press CTRL + SPACE).
- Type VI Server Reference and double click the top result.
- Place the ‘This VI’ box on the Block Diagram by left clicking.
- Hover over the right hand side until the wiring tool appears.
- Right click and select Create >> Method for VI Class >> Default Values >> Reinitialize default Values.
- Wire the output of the ‘VI Server Reference’ to the top left input of the Invoke Method.
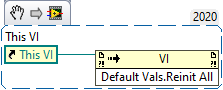
Note: This image is a LabVIEW snippet, which includes LabVIEW code that you can reuse in your project. To use a snippet, right-click the image, save it to your computer, and drag the file onto your LabVIEW diagram.
In versions of LabVIEW prior to 8.0, you will need to use the Control Class Method Control.Reinitialize To Default to set the default value of each Front Panel Control individually. To implement this, follow the below steps for each Control:
- Select the Block Diagram window.
- Bring up the Quick Drop (Press CTRL + SPACE).
- Type VI Server Reference and double click the top result.
- Place the ‘This VI’ box on the Block Diagram by left clicking.
- Hover over the right hand side until the wiring tool appears.
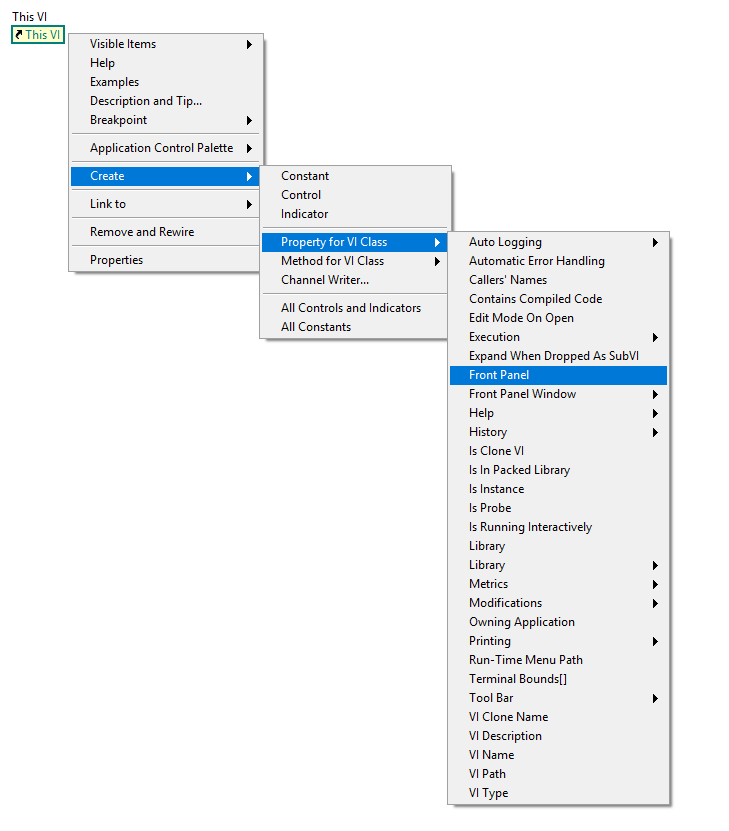
- Right click and select Create >> Property for VI Class >> Front Panel.
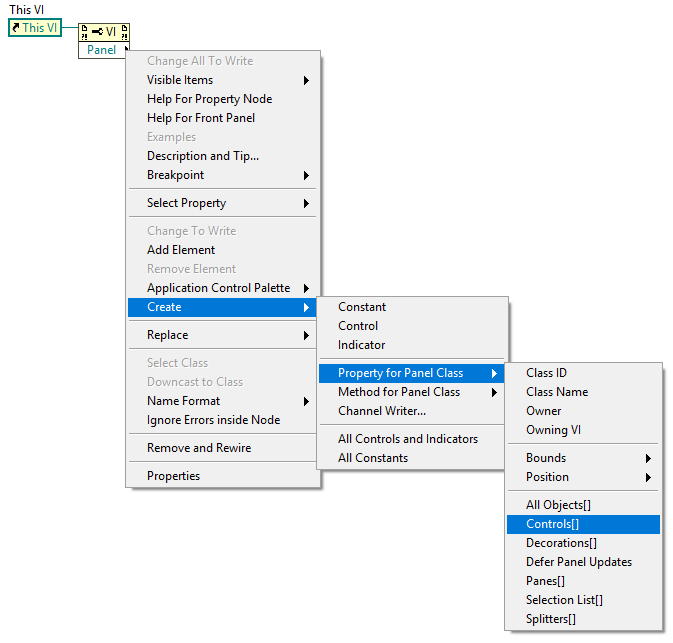
- Right click the Panel output of the newly created Property Node and select Create >> Property for Panel Class >> Control[].
- Bring up the Quick Drop (Press CTRL + SPACE).
- Type For Loop and double click the top result.
- Place the For loop down by clicking and dragging.
- Bring up the Quick Drop (Press CTRL + SPACE).
- Type Invoke Node and double click the top result.
- Place the Invoke Node in the For Loop.
- Wire together these elements following the image below.
 Note
Note: This image is a LabVIEW snippet, which includes LabVIEW code that you can reuse in your project. To use a snippet, right-click the image, save it to your computer, and drag the file onto your LabVIEW diagram.
-
Click on the method in your Invoke Node and select Reinitialize to Default.