The NI-XNET Compatibility Library for NI-CAN is included with the NI-XNET device driver. You can choose to install the library either at the time of initial driver installation or at a later time. The installation steps below assume that the NI-XNET driver is already installed on your system.
For NI-XNET 18.5 and prior
1. Navigate to the National Instruments Software application. This can be found by navigating the following path: Control Panel » Add / Remove Programs (Windows XP) or Programs and Features (Windows 7 / Vista) » National Instruments Software. Once you double-click NI Software, a new window will open – as pictured below.
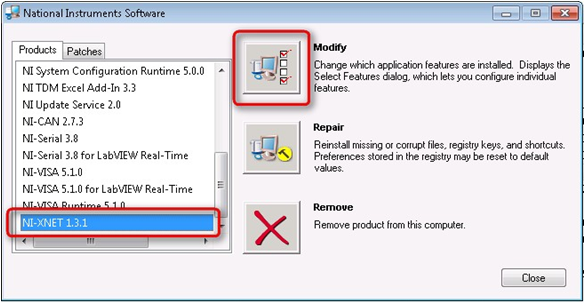
2. In the left panel of the window is a list of all NI Software installed on your system. Browse through the list until you locate the NI-XNET driver. Please note that your version of NI-XNET may be different from what’s pictured above. Once you have selected the NI-XNET driver, left-click the Modify button. Doing so will cause the window shown below to display.
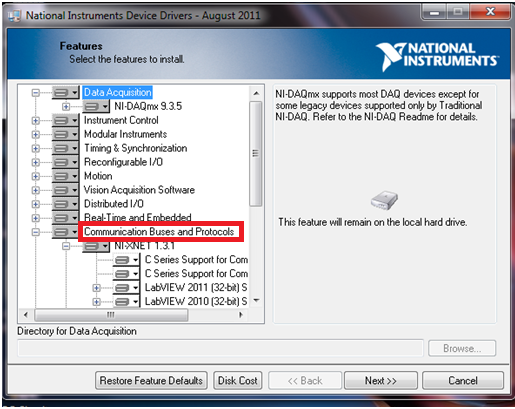
3. Once you arrive at the screen shown above, locate and expand the listing for Communication Buses and Protocols. This is where you will find the NI-XNET driver installation. When you expand the NI-XNET driver, you will find the NI-XNET Compatibility Library for NI-CAN, as shown in the following image.
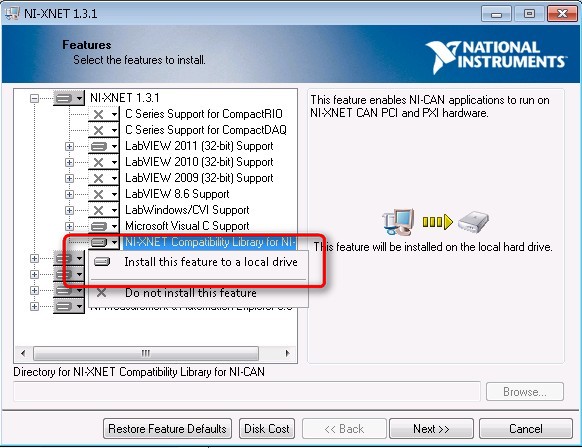
If there is a picture of a drive to the left of the NI-XNET Compatibility Library for NI-CAN, as in the picture below, then the library is already installed on your system and you can select Cancel to exit the installer.
If, however, there is an X to the left of the library, then the NI-XNET Compatibility Library for NI-CAN is currently not installed on your system. To install the library, left-click the X and select Install this feature to a local drive as indicated below. Clicking Next will then initiate the installation process of the library onto your developments system.
Installation on a Real-Time Operating System:
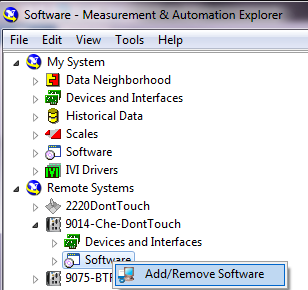
1. Open Measurement & Automation Explorer and locate your Real-Time target under the section titled Remote Systems.
2. Once you have located your system, expand the hierarchy under the controller, right-click on Software, and select Add/ Remove Software as pictured below.
3. Once you select Add/Remove Software, the LabVIEW Real-Time Software Wizard will open as pictured below. Select the version of NI-RIO that you currently have installed and click Next.
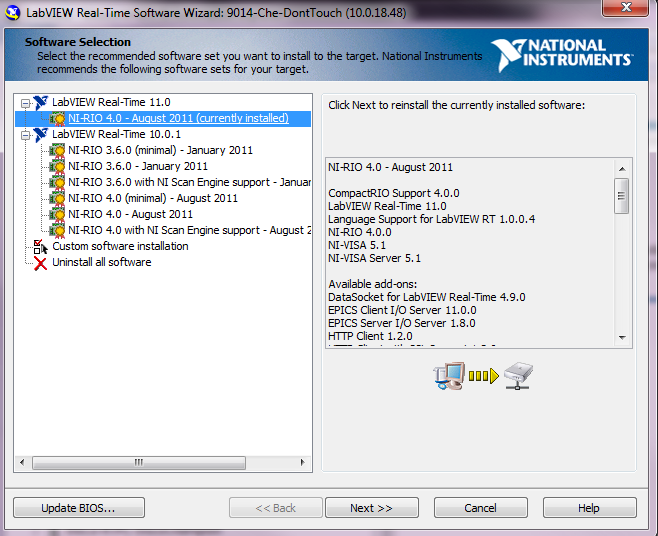
4. Browse the list of software and locate the NI-XNET driver. If you select the Check Mark, you will also find the NI-XNET Compatibility Library for NI-CAN. When you left-click on the NI-XNET Compatibility Library for NI-CAN, it will be selected for installation as pictured in the image below.
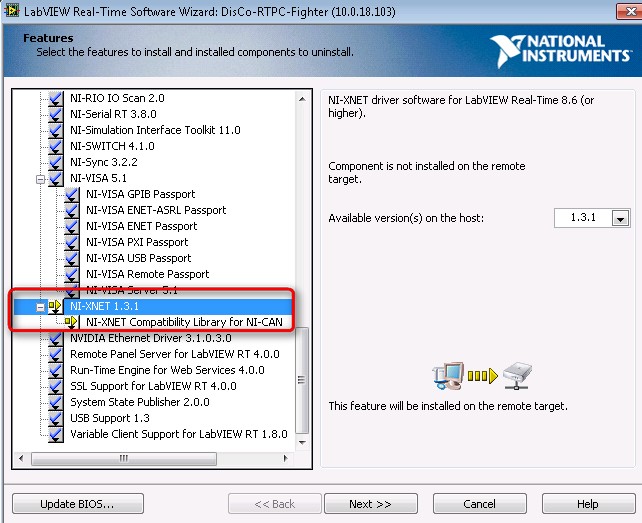
5. After selecting Next, the software installation process to the Real-Time target should begin.
For NI-XNET 19 and later:
In the newest version of our software, installation is done through NI Package Manager. To install the NI-XNET Compatibility Library for NI-CAN you will need to open NI Package Manager and go to the click wheel on the top right corner of the window and enable the option that says Show available packages and feed management tool as shown in the following picture
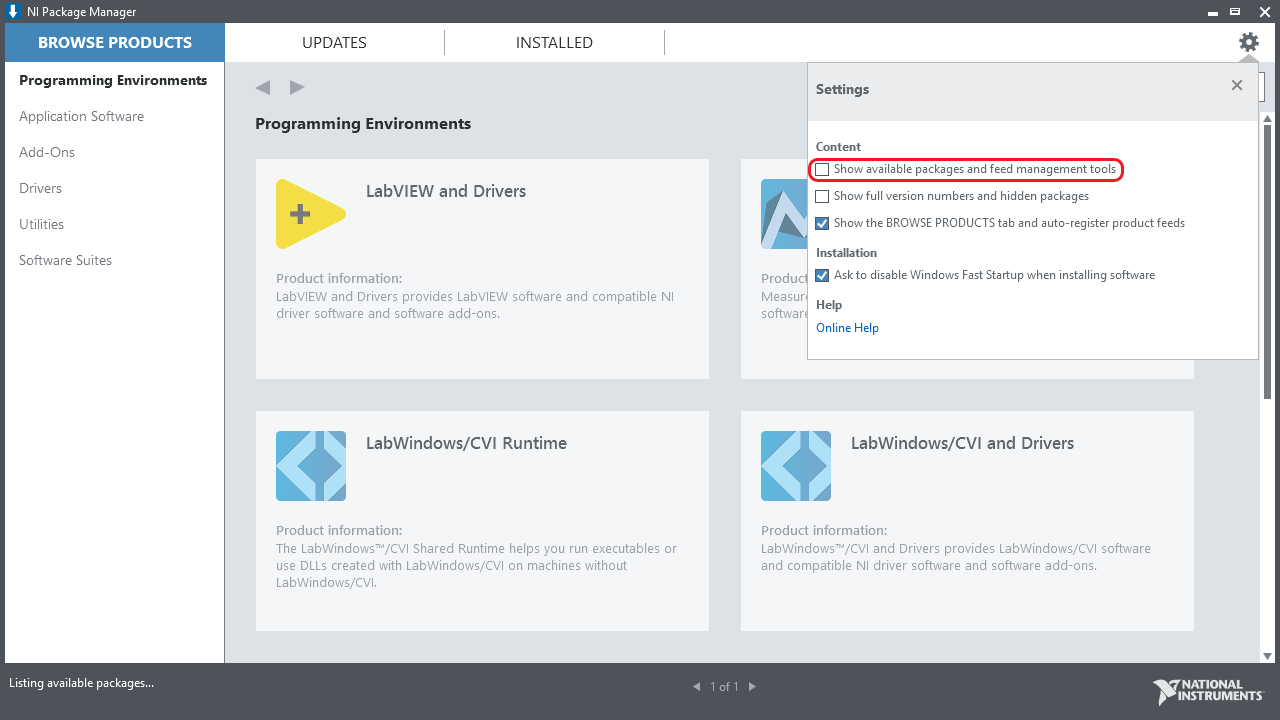
This will enable a new tab next to INSTALLED on the top of the window, called PACKAGES. Select this tab and filter the results with the search tab on the right-hand side of the window as shown below.

Select the NI-XNET Compatibility Library for NI-CAN and click INSTALL. Once the installation is completed, you will need to reboot your computer.
Alternative Method
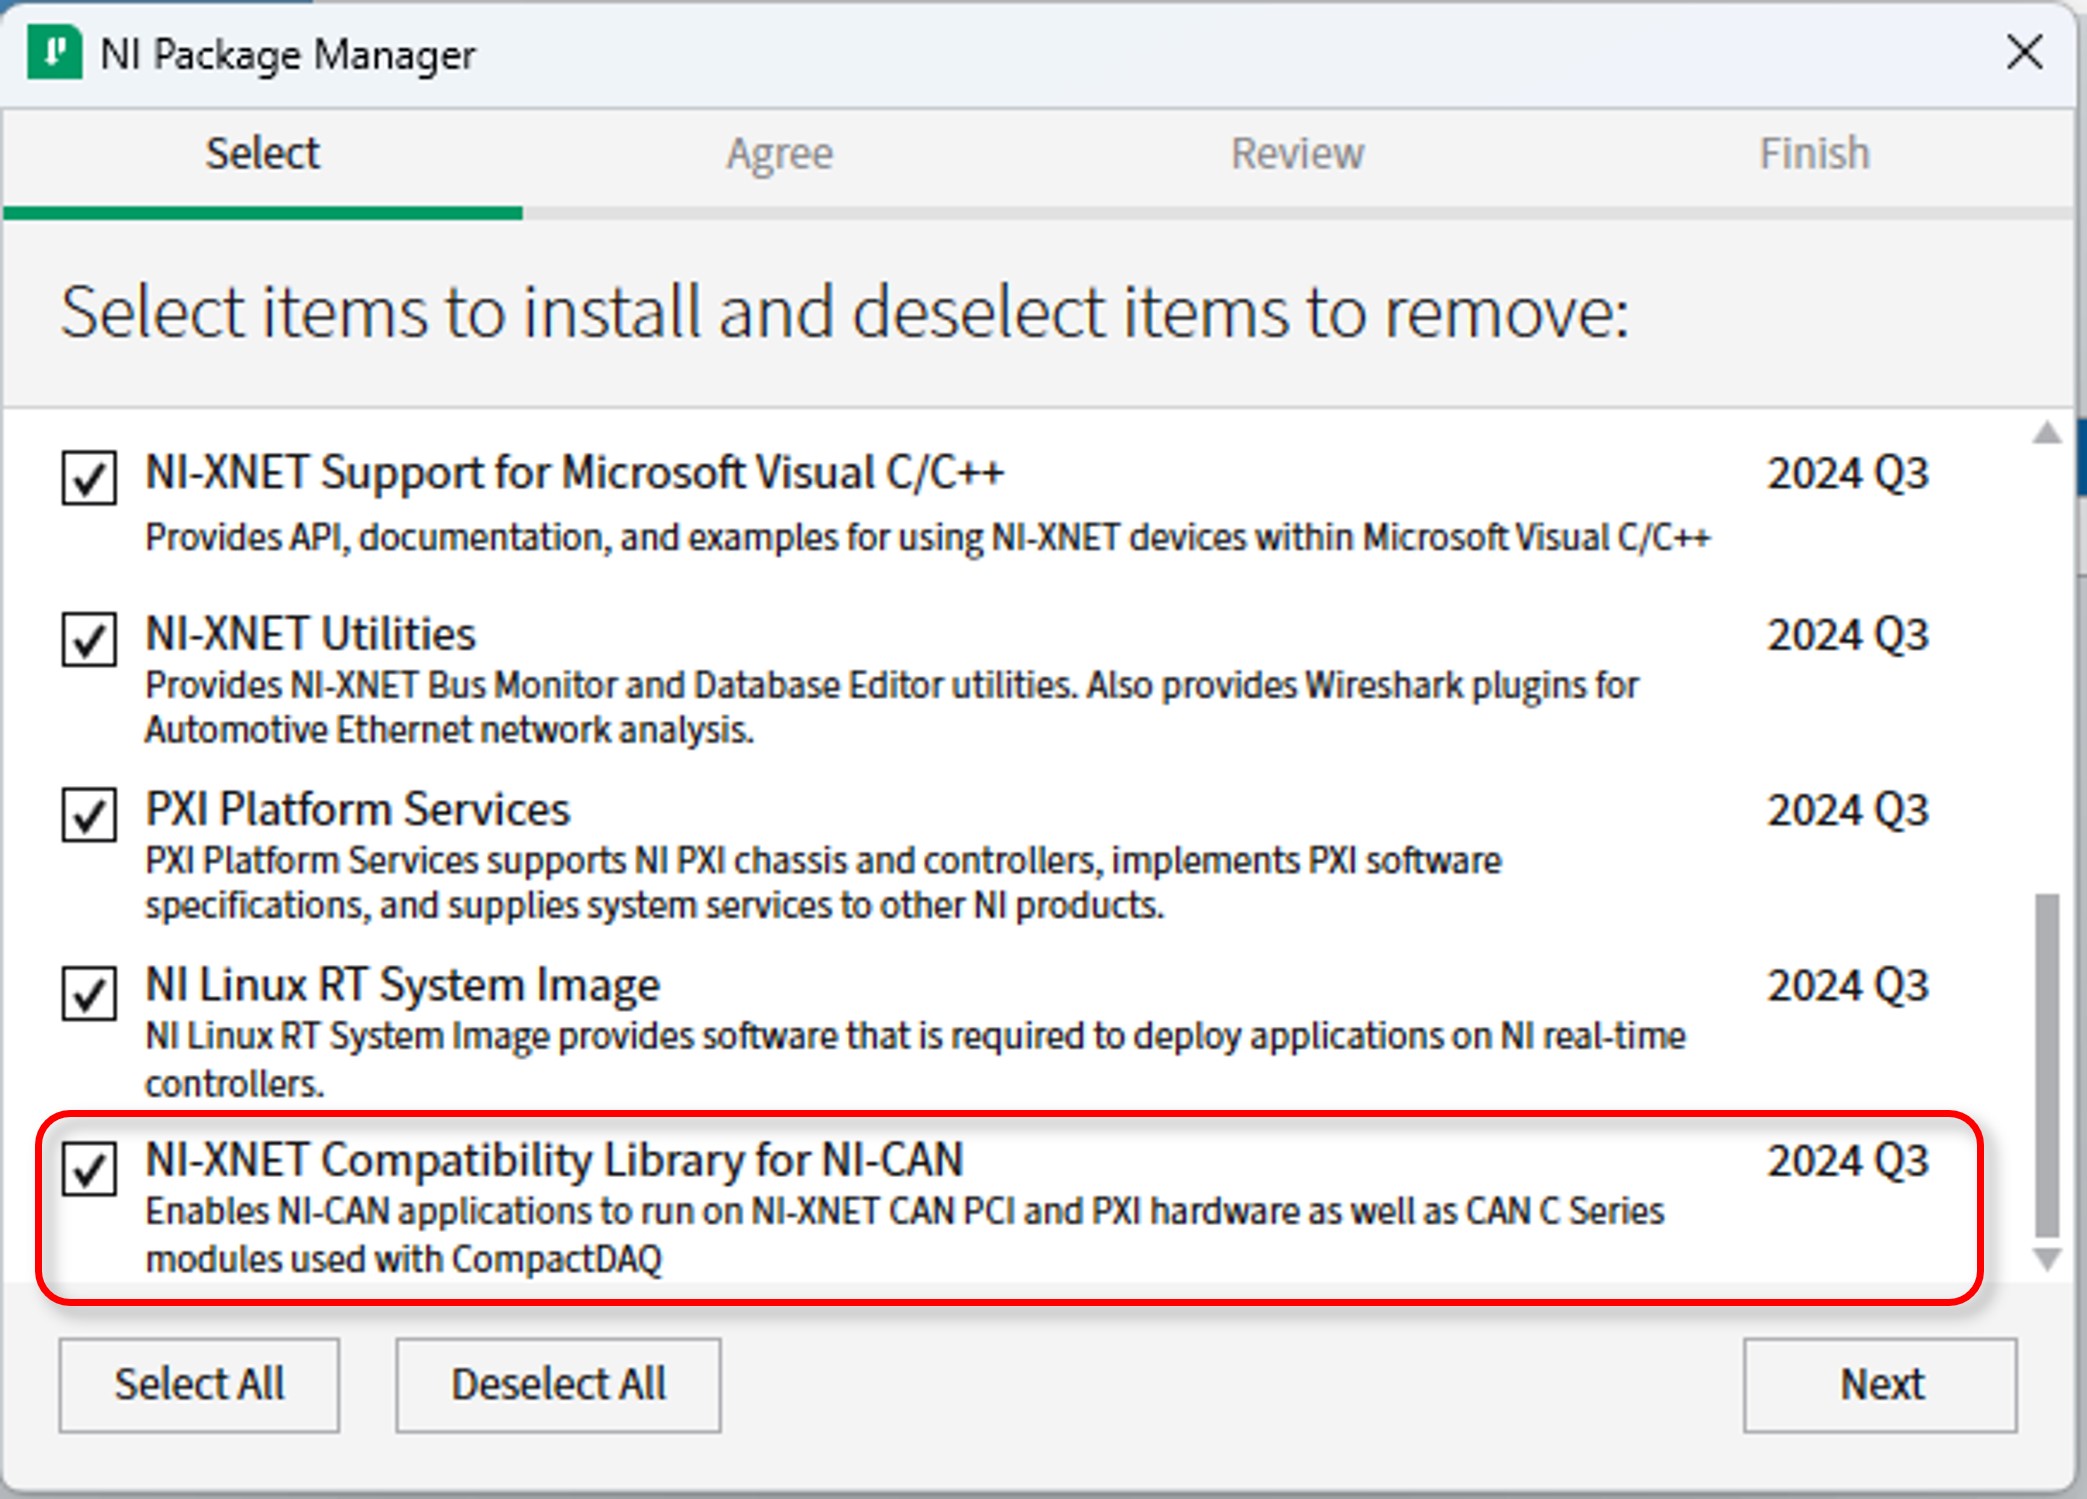
1.Click the gear icon at the right side of NI-XNET to open install selection dialog box.

2. Place checkmark at NI-XNET Compatibility Library for NI-CAN and click Next to install the library.
Additional Information
The compatibility layer is not able to be installed through a custom LabVIEW installer. To distribute the compatibility layer you will need to follow the steps above.
If your new NI-XNET hardware has a USB connection it will not support CAN Objects and the Frame API functions will have the same limitations that NI USB-847x devices, as described in this KB: Which NI-CAN Frame API Functions does the NI USB-847x Device Support?