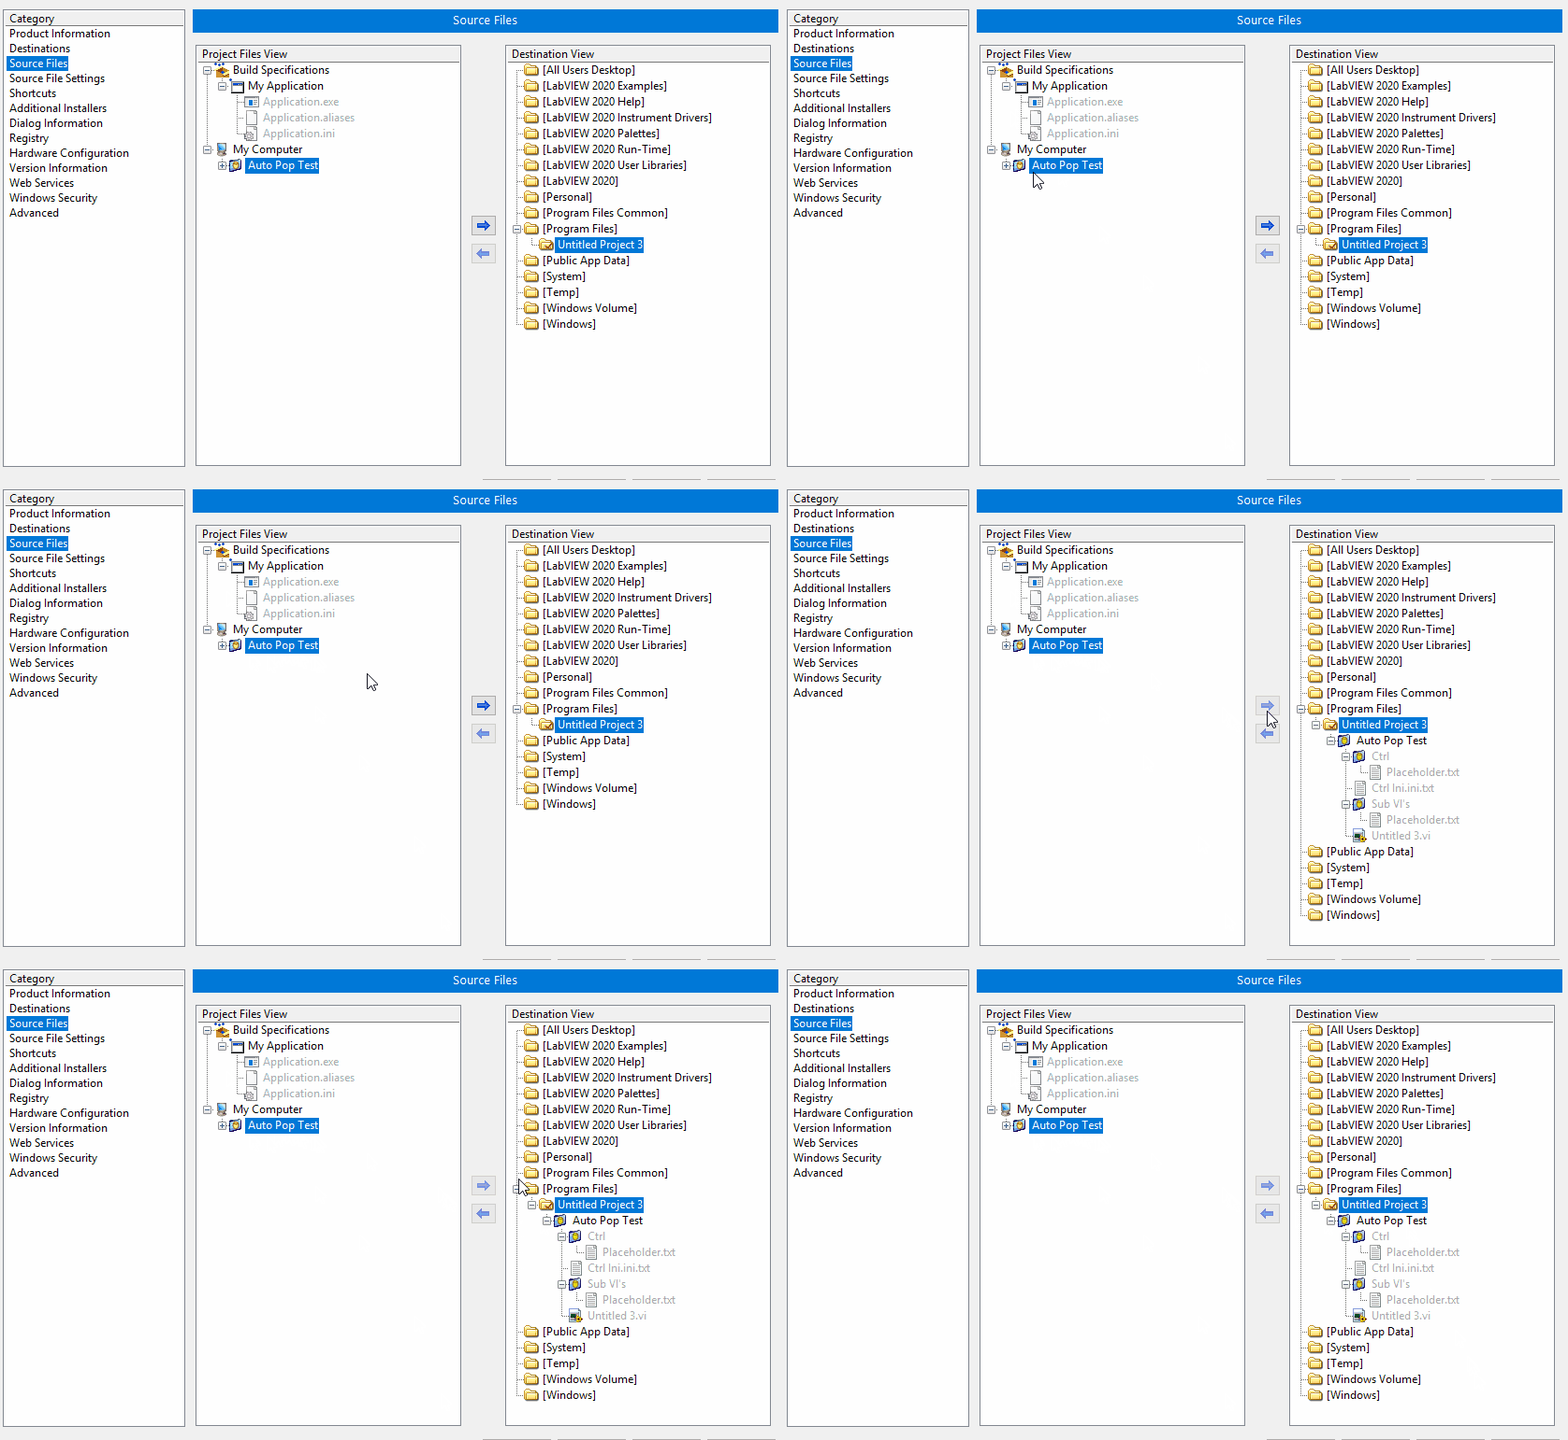
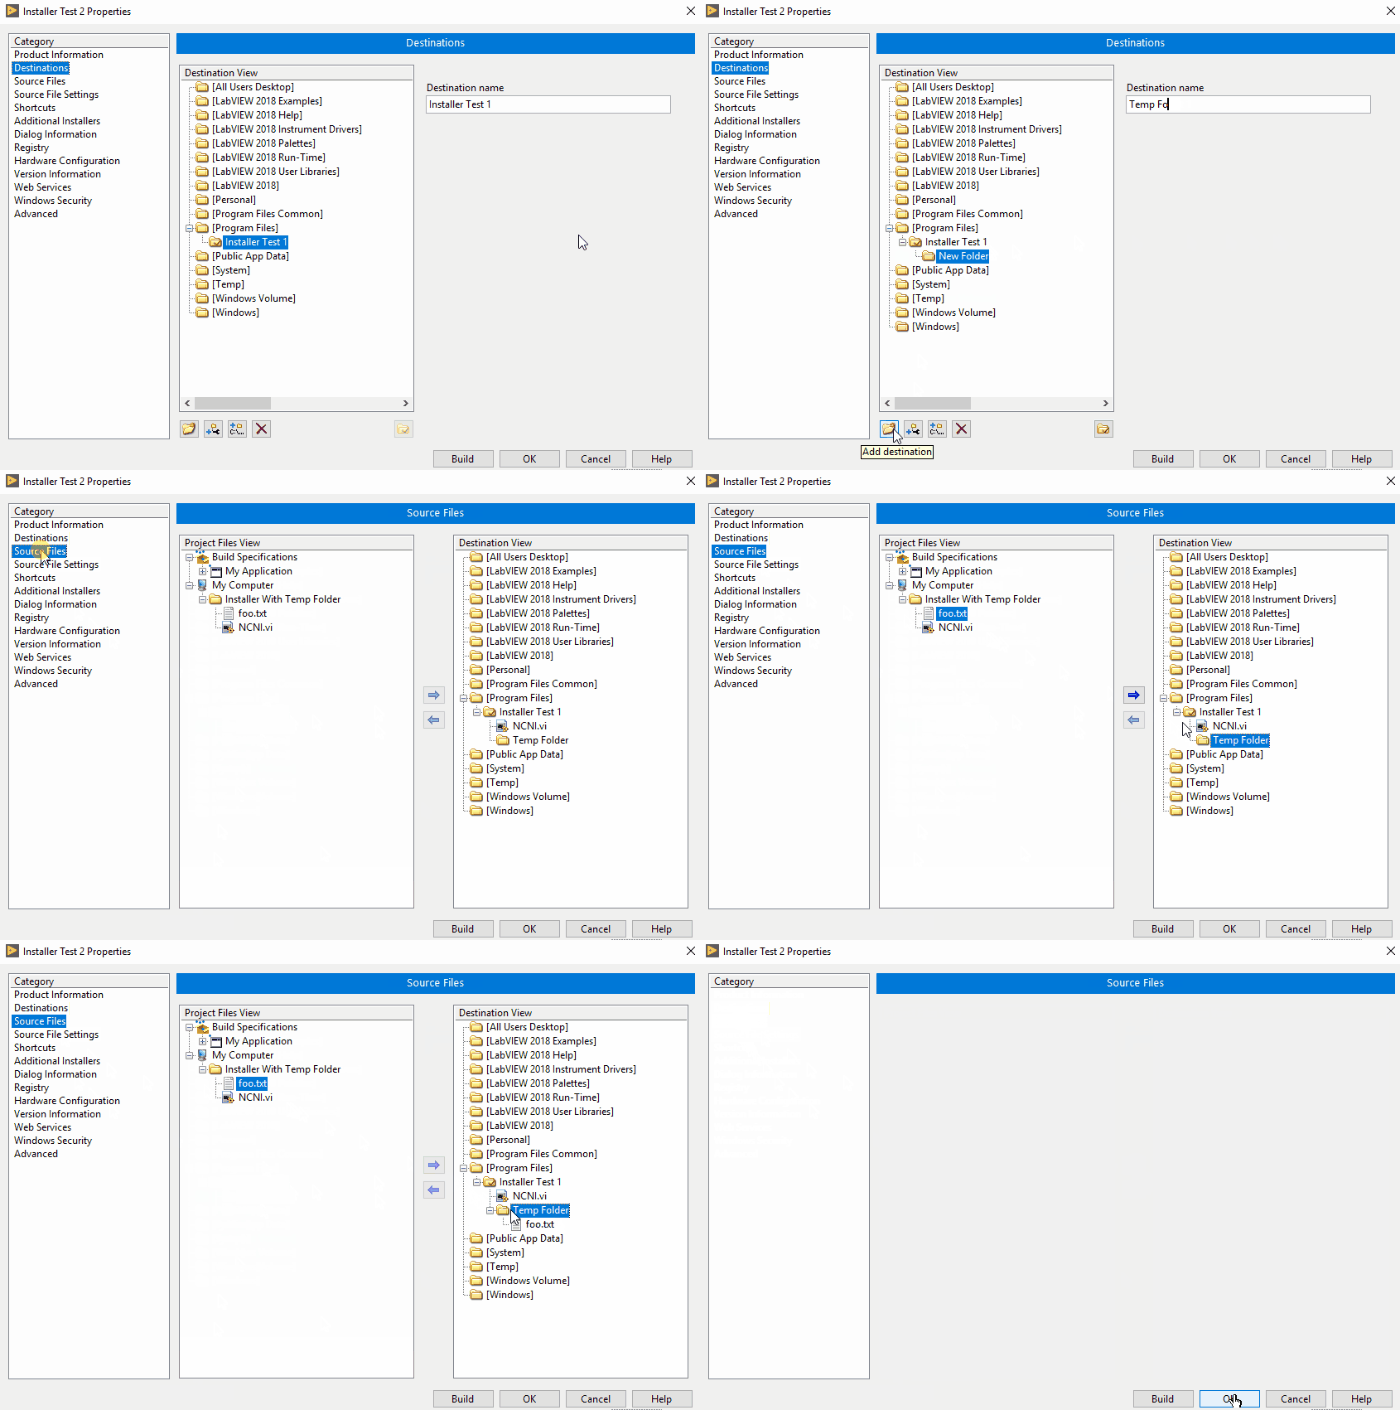
There are two ways to accomplish this, you can specify a top level Auto-populating folder which will automatically add everything within it, or you can manually specify the installation destination sub directory for each of your supporting files.
The two different approaches are detailed below.
Auto-populating folders:
- Add the relevant Auto-populating folders to the Project Explorer under My Computer.
- Right Click on Build Specifications and select New»Installer.
- Open the Source Files category to add the folders to any predefined locations based on the users settings. This will automatically add the hierarchy and it's contents.

Selective addition:
- Add support files and folders to the Project Explorer under My Computer.
- Right Click on Build Specifications and select New»Installer.
- Open the Destinations category to add folders to any predefined locations based on the users settings. To create a new folder click the Add Destination button. You can also specify absolute paths by clicking the Add Absolute Path button.
- Then Click the Source Files category and move the support files from the Project Files View using the Add/Remove Buttons into the directories in the Destinations View. (the same file can be placed into multiple locations if desired). Note: If you don't have or use support files but you still want to create the folder, you may create a blank dummy VI or .txt file and include it under the desired destination folder.

Additional Information
LabVIEW 8.0 through 2009
- Add support files and folders to the Project Explorer under My Computer.
- Create a new installer by right-clicking on Build Specifications.
- In the Source Files category, select your support files in the Project View and select where you would like it to install in the Destination View (If you would like to create additional sub-folders there is an add folder icon at the bottom of the dialog box).
LabVIEW 6.1/7.x
- Open Application Builder from the Tools menu.
- Specify the destination directory and support file directory on the Target tab.
(The support file directory is used to hold the support files for the installer. It won't be visible in the installation directory unless specified). - On the Source Files tab, include your top-level VI and any other supporting files.
- On the Installer Settings tab, select create installer and click on the Files... button.
(You will see all the source files that you have added in the Files in Installation box). - Highlight the first support file for which you would like to create a sub-folder.
- In the Installation destination subdirectory box, specify the name of the sub-folder where you would like the support file to be found.
- Repeat step six for each of the support files that you have.