Creating a Model DLL in LabWindows/CVI
-
Launch LabWindows/CVI.
-
Download the attached ModelInterface.zip and open the example project rand.prj provided in the Software Required section.
-
You have access to the following LabWindows/CVI environment features (also see Figure 1):
-
Project Tree (1)—Contains the list of files in each project in the workspace. Right-click the different elements to see the list of available actions.
-
Library Tree (2)—Contains a tree view of the built-in functions in LabWindows/CVI libraries and instruments.
-
Window Confinement Region (3)—Contains Source, User Interface Editor, Function Tree Editor, and Function Panel windows.
-
Status Bar (4)—Displays the status of the file, such as line and column number, save status, messages, and so on.
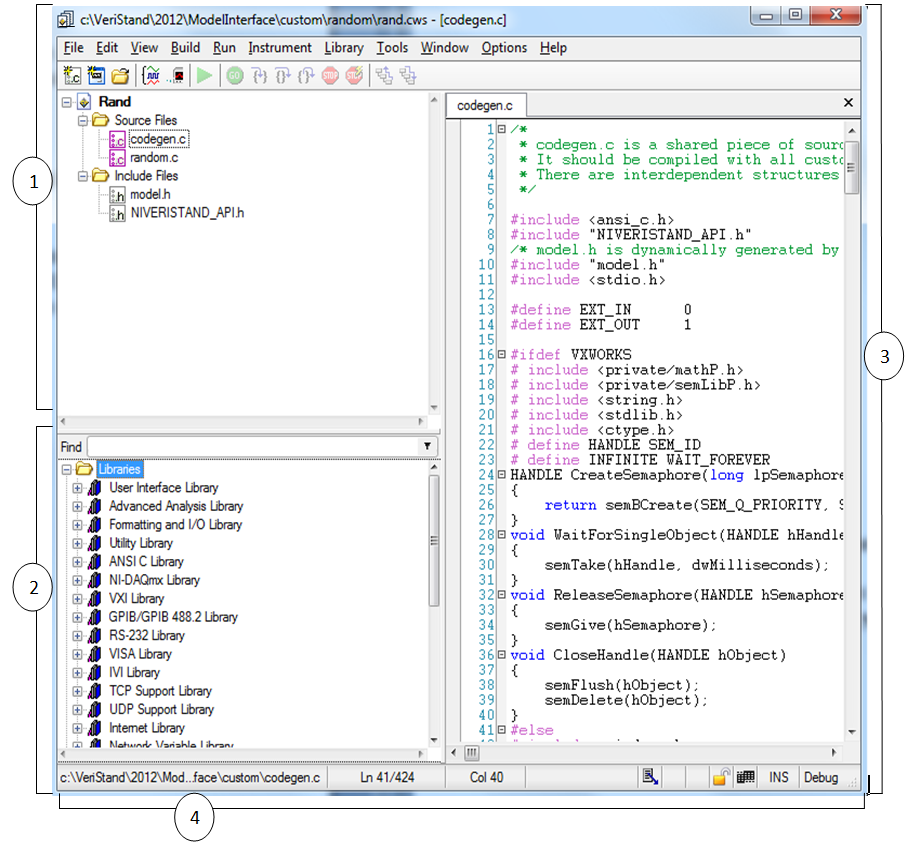
Figure 1. LabWindows/CVI Environment Features
-
The project contains the following preconfigured files required for any model to be used in NI VeriStand. Add these files to any new project that you create. For more information about these files and the NI VeriStand Model Framework, refer to NI_VStand_Model_Framework_Guide.pdf in <RootDrive>:\ NI VeriStand\ 20xx\ ModelInterface\custom.
-
Model.h—This header file contains the parameter type definitions for your model and must include all the user-visible parameters in your model. The NI VeriStand Model Framework instantiates the parameter type definitions you create in model.h as rtParameter, so your model code needs only import this symbol.
-
NI VERISTAND_API.h—This header file for the NI VeriStand Model Framework, includes type definitions that your model code can use to define properties of outward-facing components of your model, such as parameters, signals, and external I/O.
-
Codegen.c—This source file is a shared piece of source code that essentially represents the engine of a DLL that is compatible with NI VeriStand. It should be compiled with all custom DLL produced to work with NI VeriStand. There are interdependent structures between the user code (template.c) and the engine (codegen.c). To build your model with the NI VeriStand Model Framework, compile codegen.c.
-
Template.c—Refer to this source file, located in the \xxx\ModelInterface\custom directory, for a list of all the code you must add to your model code before you build your model against the NI VeriStand Model Framework.
-
Sinewave.c, random.c, engine.c, and delay.c—These source files are for an example of model code you can compile with the NI VeriStand Model Framework to create a model DLL.
-
Sinewave.c—This creates sine wave, gain, and sum of the two where it runs at real time. These signals can be seen in the graphs as well. You can change attributes of the signal, such as amplitude, bias, and frequency, while running.
-
Random.c—This generates a random value that can be changed based on amplitude and bias parameters.
-
Engine.c—This is a very basic model of a car’s engine regarding to revolution per minute for speed of motor. It takes input commands and outputs engine temperature and RPM. While viewing these values on real time, we can change the constant attributes such as environment temperature, idle speed, and so on
- Delay.c—This uses timestamp, current time, and base rate parameters to delay the function output.
- Select Build»Configuration»Debug.
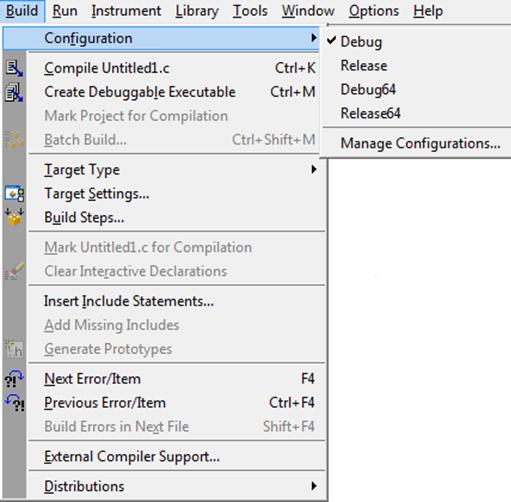
Figure 2. Setting Build Configuration
- Select Build»Target Type»Dynamic Link Library.
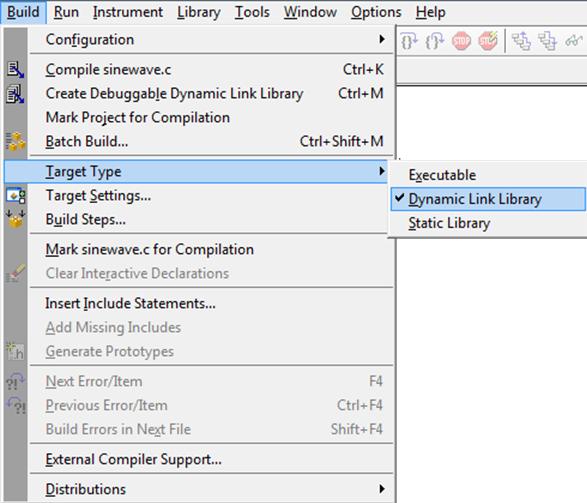
Figure 3. Setting Build Target Type
Select Build»Target Settings. In the Exports section, select Change»Include File and Marked Symbols. Make sure to choose both model.h and NI VERISTAND_API.h »OK»OK as shown in Figure 4.
Real-Time Modification
If you would like to make the DLL applicable for real-time operating systems, make sure to change the Run-time support field to Real-time only as shown in Figure 5. Note: the LabWindows/CVI Real-Time Module is required.
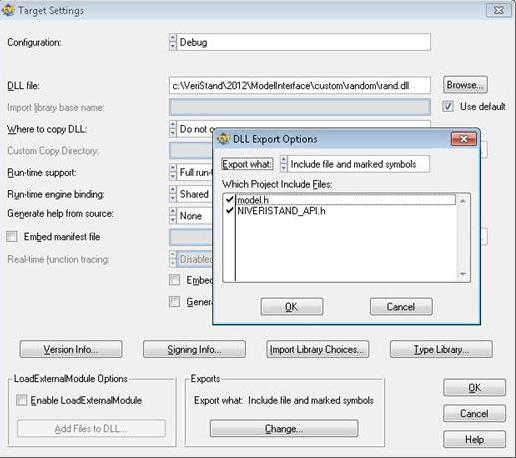
Figure 4. Windows OS Target Settings
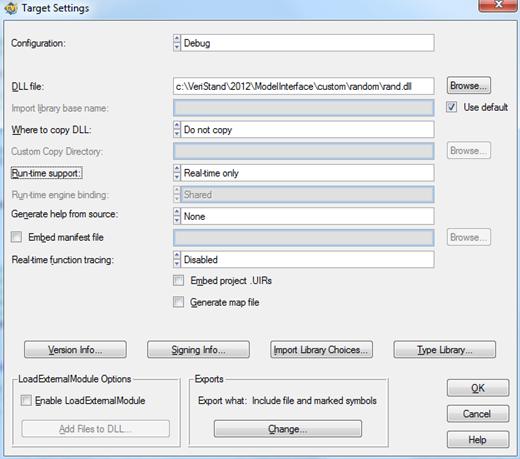
Figure 5. Real-Time OS Target Settings
-
Select Build»Create Debuggable Dynamic Link Library»OK.
You can ignore the following warning message because these symbols are generic across all four C code models provided in the attachment folder. Each one of these C code models only use some specific symbols that get exported with the DLL.
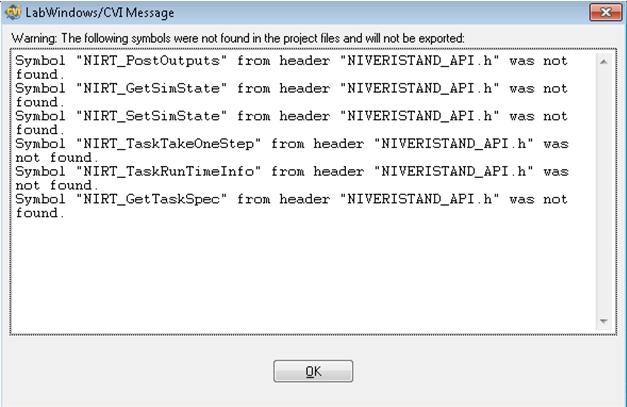
Figure 6. Exported Symbols Warning Message
At this point, you have your DLL created in LabWindows/CVI.
Adding and Configuring a LabWindows/CVI Model in NI VeriStand
-
Launch NI VeriStand and double-click on New NI VeriStand Project in the getting started window. Name your project in the Project Name field. Navigate to a folder where you want your NI VeriStand as the project to be saved in Project Root Folder. It is preferable to save the project in the same folder as LabWindows/CVI DLL.
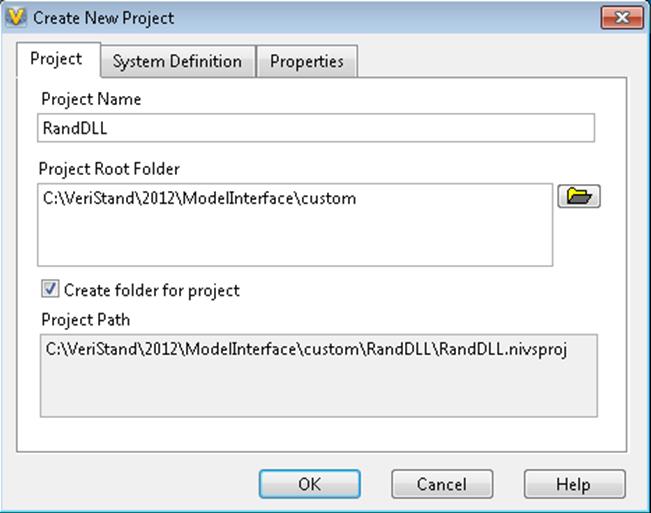
Figure 7. Creating a New Project in NI VeriStand
-
In the Project Explorer window, expand System Definition File; double-click on the .nivssdf file to open the System Explorer window. The System Definition file defines the functionality that is deployed to your real-time target.
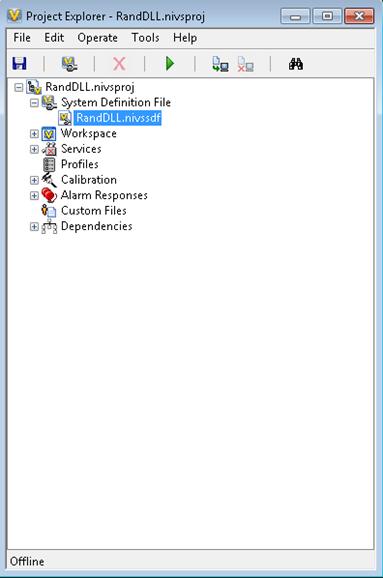
Figure 8. Project Explorer Window in NI VeriStand
-
Create your simulation model.
-
Expand Controller»Simulation Models»Models on the System Explorer window.
-
Select Add Simulation Model located at the top of the System Explorer window. Here you add the DLL you created in LabWindows/CVI.
-
In the General tab of Add Simulation Model window, select a name for your DLL in the Name section and browse to the DLL you created in the previous section.
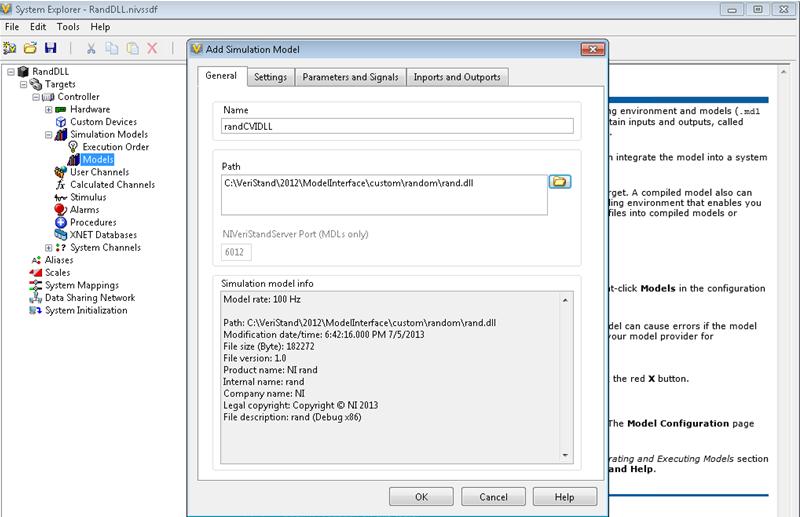
Figure 9. Building a Simulation Model
Click on the Settings tab and select Initial state paused.

Figure 10. Settings Tab of Add Simulation Model
Click on the Parameters and Signals tab and select Import all parameters and Import all signals. Leave all the other settings as default, or change them based on your specific application requirements.
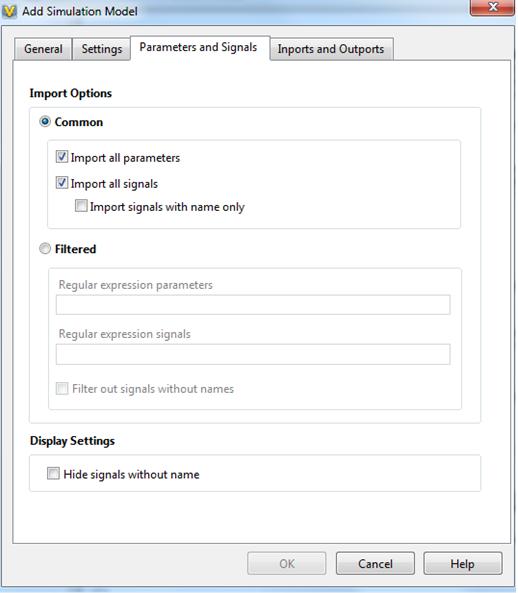
Figure 11. Parameters and Signals Tab of Add Simulation Model
Click OK on the Add Simulation Model.
You can review what inports, outports, signals, and parameters you have on the left side of the System Explorer window shown in Figure 12.
Real-Time Modification
If you are creating your simulation model for a real-time OS, you can make this change by clicking on Controller in the System Explorer window and choosing real-time OS, either PharLap or VxWorks shown in Figure 13.
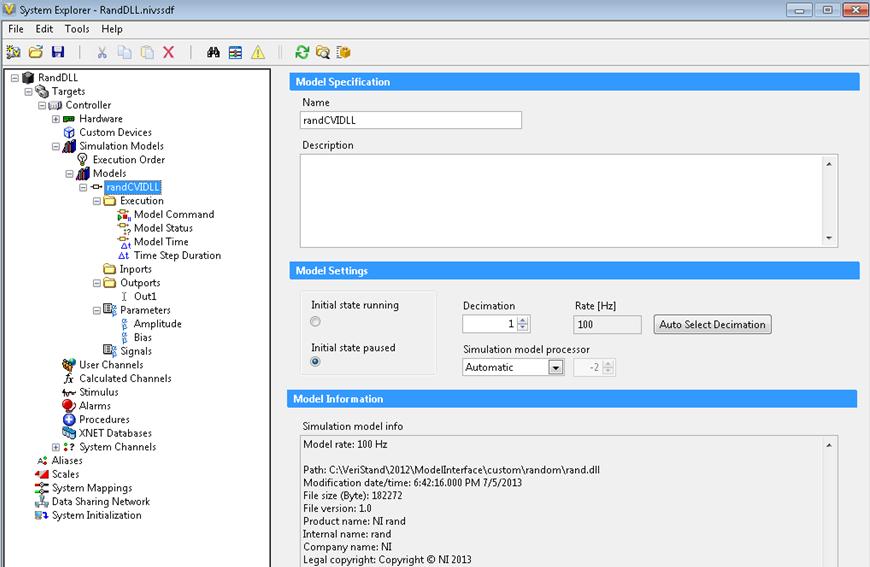
Figure 12. System Explorer Window at One Glance
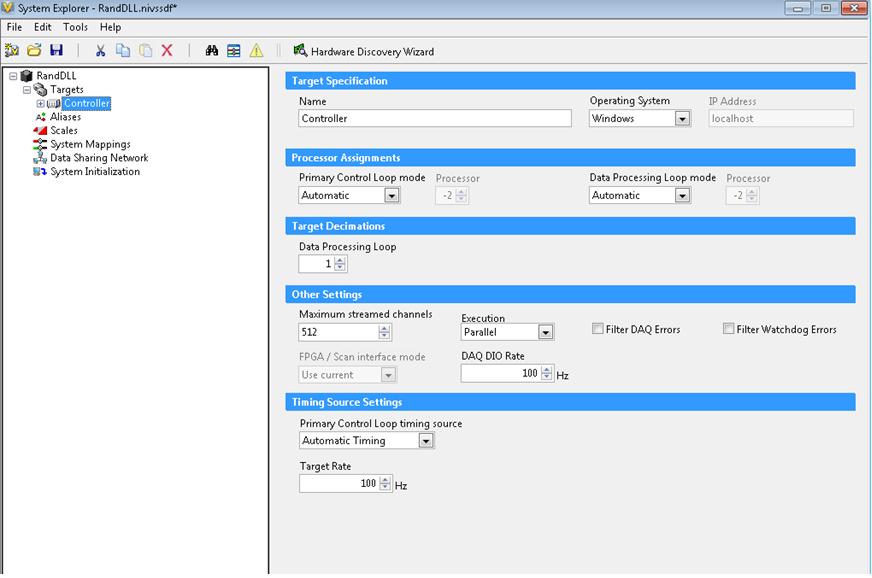
Figure 13. Choose a Different OS
-
Close the System Explorer window, and save the changes.
-
In the Project Explorer window, select Operate»Run. Once the System Definition is successfully deployed, workspace will automatically open where you can create a graphical use interface file for your application.
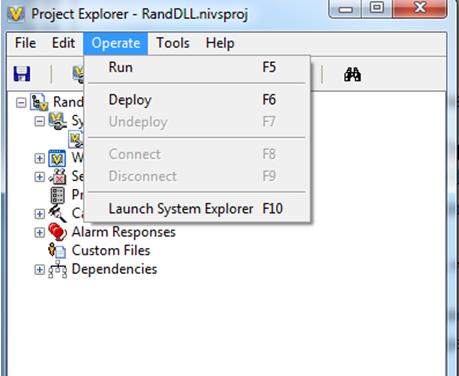
Figure 14. Deploying the System Definition
You may choose to create your own workspace or open the RandDLL NI VeriStand project in the attached zip file, which contains a simple prebuilt workspace.
Attach LabWindows/CVI to NI VeriStand for Debugging
-
In LabWindows/CVI, select Run»Attach to Process»NI VeriStand.exe»OK.
LabWindows/CVI remains attached to NI VeriStand.exe until the process exits or is terminated. Exiting LabWindows/CVI also terminates NI VeriStand.exe. You may see a message window that says most debugging features will be unavailable. Ignore this message as it means the application you are attaching to (NI VeriStand) was not built in LabWindows/CVI, which is true.
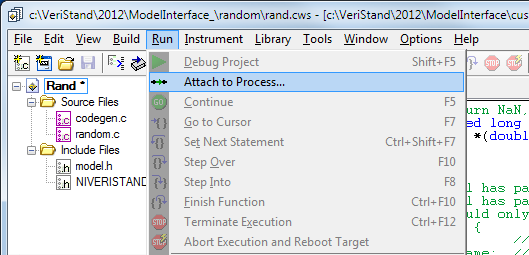
Figure 15. Attach the LabWindows/CVI Debugger to NI VeriStand
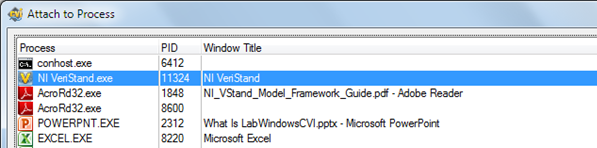
Figure 16. Attach LabWindows/CVI to an External Executable
-
You can also select Run»Detach from Process to terminate the debugging session.
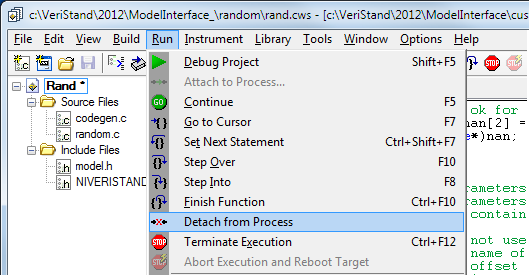
Figure 17. Detach From Process
Debugging Code in LabWindows/CVI
Now, you are ready to debug your code. Add breakpoints to random.c. You can use all LabWindows/CVI debugging features to test your C code model running in NI VeriStand.
LabWindows/CVI Debugging Tools
Conditional Breakpoints—With conditional breakpoints, you can specify when the execution stops based on a watch expression. It can be set by clicking Run»Edit Breakpoint or right-click the breakpoint in the source code window (see Figure 18).

Figure 18. Add Expression for Conditional Breakpoint
Unconditional Breakpoints—You can set the breakpoint at a specific line, and that’s where the execution stops. You can set the breakpoints by clicking on the left-hand side of a line. You can access all breakpoint settings as the following:
-
Click on Run to find Toggle, Disable, Edit Breakpoint debug tools.
-
Once your code reaches a breakpoint, use Continue, Go to Cursor, Set Next Statement, Step Over, Step Into, Finish Function, and Terminate Execution tools to better debug your code.
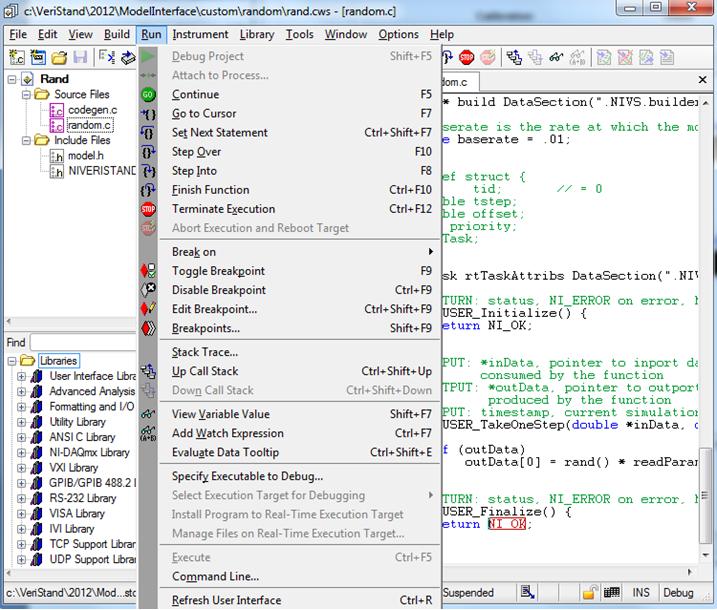
Figure 19. Debugging Options Available
Watch Window—Use this window to check how a variable or expression changes while stepping through the code. Access the window by selecting Window»Watch.
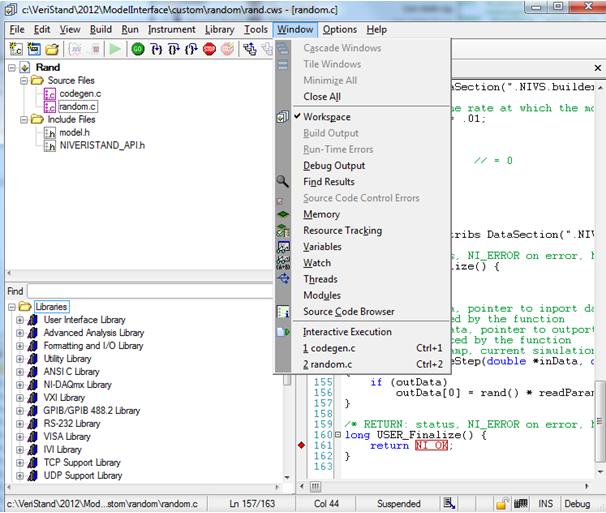
Figure 20. Accessing Watch and Variable Window
Variable Window—Another debugging tool that LabWindows/CVI offers is the Variable window. This feature shows the status and value of all variables in your code whenever your code has stopped execution at any point. Access this window by selecting Window»Variables.
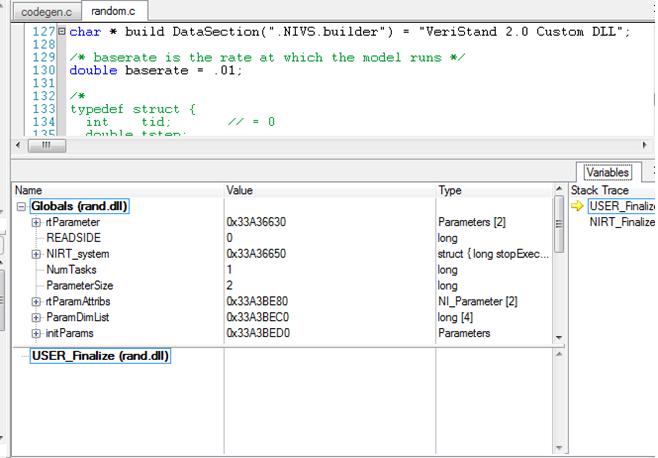
Figure 21. Variable Window
Resource Tracking—This window only tracks resources that you must explicitly free and that do not belong to other resources. For example, the Resource Tracking window does not track user interface controls because the controls are owned by panels and are freed when the panel is freed. It can track the standard LabWindows/CVI libraries and instrument drivers.
-
To set this feature, click Options»Build Options…
-
Choose Extended in the Debugging Options section
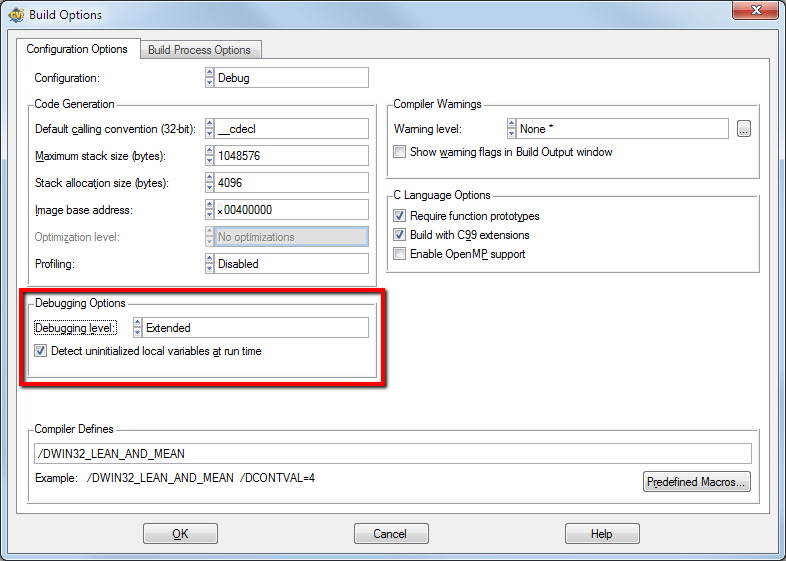
Figure 22. Configure Resource Tracking
The mark LabWindows is used under a license from Microsoft Corporation. Windows is a registered trademark of Microsoft Corporation in the United States and other countries.