Using the Ultiboard 3D View
To begin viewing a completed PCB design in Ultiboard, we can use a shipping example.
- Open Ultiboard - Start > All Programs > National Instruments > Circuit Design Suite 11.0 > Ultiboard
- Select File > Open Samples...
- Select Int4lRouted.ewprj
- Click on the Open button
- Select Tools > View 3D
The board will now become populated in the 3D view. Using your mouse you can completely rotate the design in order to see how the physical entity will eventually appear.
- Left-click and hold down the mouse anywhere in the 3D view, and move the mouse. The board will rotate and move according to the mouse movements.
- Using the scroll button on the mouse you can zoom-in or zoom-out of the 3D view.
Viewing the Design Height
We can now begin viewing important data about the board such as the height of components.
- Select View > Toolbars > View to see the View toolbar.
- Using the mouse scroll button zoom into an area of interest on the PCB design
- In the View toolbar select the show or hide height button (encircled in red in Figure 1)
- Using the left-mouse button click on a component of interest in the 3D view. Automatically a yellow arrow and a number will appear above the component. This data represents the height of that component from the top board layer in mils (encircled in red in Figure 2).
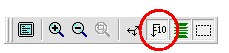
Figure 1. Show or Hide Height Toolbar Button
Figure 2. Component Height Display in the 3D View
The 3D Internal View
Ultiboard allows designers and engineers to also visualize the internal layers of a PCB. By expanding the inner layers of a board, again an engineer can gain better understanding about the various through-hole components, vias and copper that are defined within the board. This view is called an internal view.
To make it easier to view the various layers of the board in the internal view we want to make the board itself either transparent or translucent as we see the inner-workings of our PCB design.
- While still in the 3D view select View >> Design Toolbox. This will open the design toolbox on the left-hand side of the Ultiboard environment.
- In the Design Toolbox, select the Layers tab.
With the layers tab we can see all the various layers of information that combine to create our view of the PCB design. Each of these layers can be made transparent or translucent in order to make our view of the board specific to our needs and analysis.
- In this example we want to make the actual PCB board translucent. Click once in the check-box next to the word Board (as seen in Figure 4). You will notice that the box becomes greyed out. This represents a translucent view. If you click the check-box once more the box will become empty, and the board will become transparent.
In this translucent view we can see the inner copper layers of our design.
Figure 3. Layers Tab of the Design Toolbox with the Board Layer as Translucent
- To enable the 3D Internal View, we once again navigate to the View toolbar and click on the 3D Internal View Toolbar button (encircled in red in Figure 4).
- We can now again use our mouse to either zoom-in, zoom-out or rotate our board as we investigate the inner layers with the Internal view (as seen in Figure 5).
Figure 4. 3D Internal View Toolbar button
Figure 5. 3D Internal View