Prerequisites
- Make sure NI-VISA 4.2 or later is installed on your system.
- First install 1.3x.x COMSOFT driver
- Second install a DF PROFI II Slave and Master board in your PC-System.
- Reboot your computer System.
Hardware Installation
Install the board driver software via the Windows “New hardware”- dialog which should pop up automatically after the board is installed. Select the option to install the driver from the specified directory as shown in Figure 1.
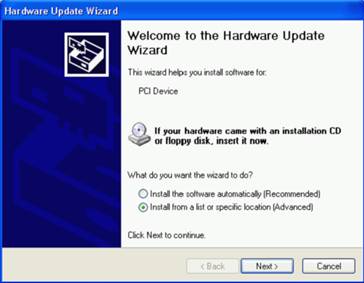
Figure 1: HW Update Wizard
Select the “Comsoft” installation directory for the driver software as shown in Figure 2. (C:\Program Files\Comsoft GmbH\Profibus VISA Driver\INF)
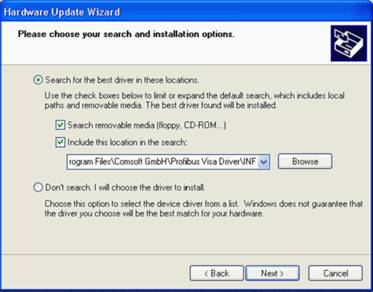
Figure 2: Select the “Comsoft” Installation directory
MAX Configuration
After Hardware and Software Installation open Measurement & Automation Explorer (MAX) and check for proper installation of the DF PROFI II boards as shown in Figure 3.
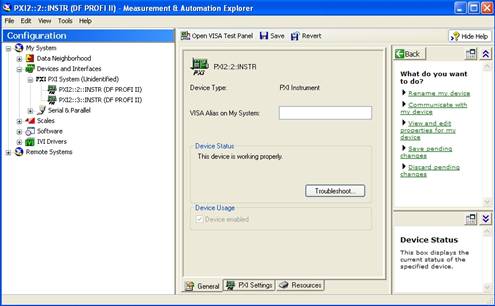
Figure 3: MAX Devices and Interfaces
Configure an Alias name for all your boards and save the new alias configuration as shown in Figure 4.

Figure 4: MAX Alias configuration
“Comsoft” PROFIBUS-DP configuration Tool
The PROFIBUS-DP configuration is carried out by the “Comsoft” PROFIBUS-DP configuration tool “Configurator II”.
PROFIBUS-DP Master Configuration
Start “Configurator II” from the Start >> Programs >> Comsoft GmbH >> Profibus Configurator >> Configurator II menu. From the Project Menu choose “New” to create a new bus configuration and drop a DF_PROFI 2 Master board to the configuration window as shown in Figure 5.
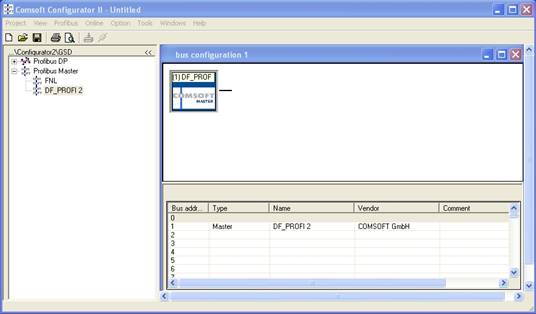
Figure 5: Configurator II Master Part
From the Online Menu choose “driver selection” and press “VISA-Config” to update the selection window as seen in Figure 6. Choose your Master board or Master Alias and press ok.

Figure 6: Configurator II Master Selection
Double-click the Master Icon and configure the master address, baud rate and Profile as shown in Figure 7.
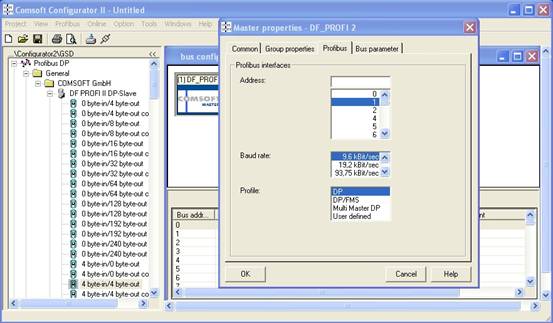
Figure 7: Configurator II Master properties
PROFIBUS- DF_PROFI II DP Slave Configuration
From the PROFIBUS DP >> General Folder drop a DF_PROFI II DP Slave board to the configuration window as shown in Figure 8.
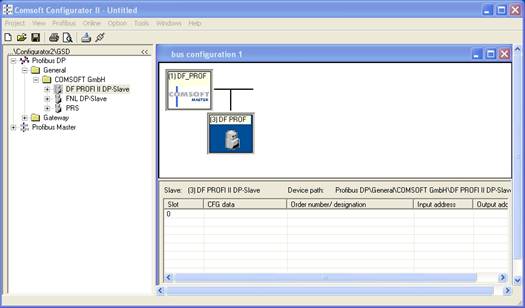
Figure 8: Configurator II Slave Part
Double-click the Slave Icon and configure the slave address to “3” as shown in Figure 9 and close the slave properties configuration window again.
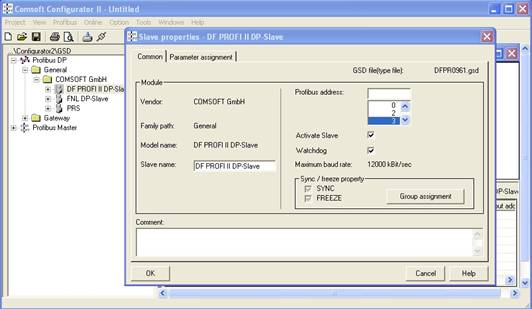
Figure 9: Configurator II Slave Properties
Frome the Slave parameter configuration table drag your slave memory configuration to Slot 0 as shown in Figure 10.
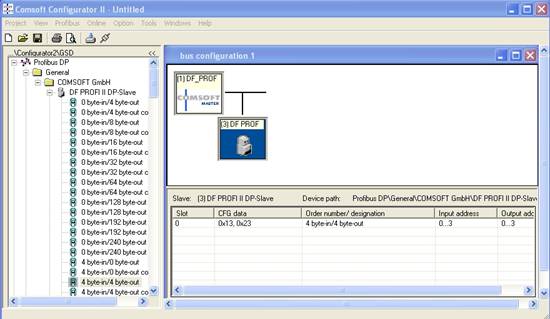
Figure 10: Configurator II Slave memory configuration
Press the Menu >> “Download” button. The “Project save” dialog appears as shown in Figure 11. Name your project and save it to the configurator projects folder. Wait until the download has finished successfully.
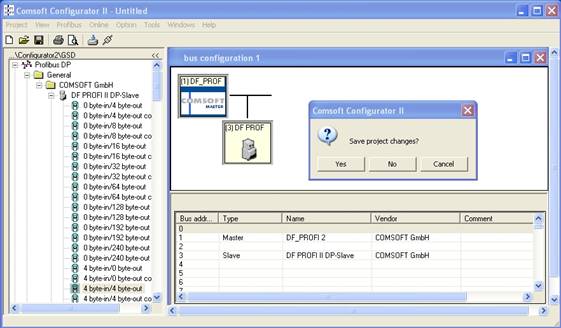
Figure 11: Configurator II configuration download
RT Considerations
Remote Software Installation
- On your Host, open MAX and find your remote target, as shown in Figure 12.
- On your remote RT target you need to install the “Comsoft” RT driver support by using the LV RT Software Wizard.
- Make sure the remote support for NI-VISA 4.2 or later is installed as well.
- Reboot your remote system.

Figure 12: Remote driver installation
Remote Software Configuration
- On your remote RT target go to the “Software” folder and left click to NI-VISA.
- On the right MAX Window go to VISA Options Tab and choose VISA Server >> Security.
- Under “Remote Address “ enter your Remote systems IP address or a wildcard, as shown in Figure 13, so it can be found from your Host.

Figure 13: Remote Server VISA Security
- On your remote RT target go to the “Devices and Interfaces” folder and configure a proper ALIAS name for your PROFIBUS device as shown in Figure 14 and save your settings.

Figure 14: Remote device ALIAS
HOST Software Configurations
- On your Host go to the “Software” folder and left click to NI-VISA.
- On the right MAX Window go to VISA Options Tab and choose General Settings >> Remote.
- Under “Remote Address “, check your Remote system, as shown in Figure 15, so it can be found from your Host automatically.

Figure 15: HOST VISA configuration