Creating a Project and Building a Source Distribution
You can use any VI as a Custom Workspace Tool in VeriStand as long as VeriStand has access to the appropriate dependencies. If you are using any VIs from any of LabVIEW’s modules, you will need to build a Source Distribution so VeriStand can run the VI. When VeriStand calls to run the VI, VeriStand will look for the dependencies and if they aren’t found then the VI will not run correctly. Creating a Source Distribution will create a local copy of the dependencies so that VeriStand can then call into them.
To allow the operator to interact with the tool, we need to place an invoke node on either side of our code to open and close the front panel. We can call these using a VI Server Reference.
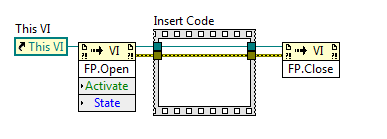
Fig 2. Invoke Nodes
Once you have coded your tool in LabVIEW, you can build it into a Source Distribution by referring this article .
There are a few settings we will need to select to ensure our tool functions properly and our code is conveniently organized. From the destinations page we want to select that our source distribution will be built into a LLB so it is easily portable. We can then move only the single .llb file to use our tool. We can also select the build path for the LLB here.
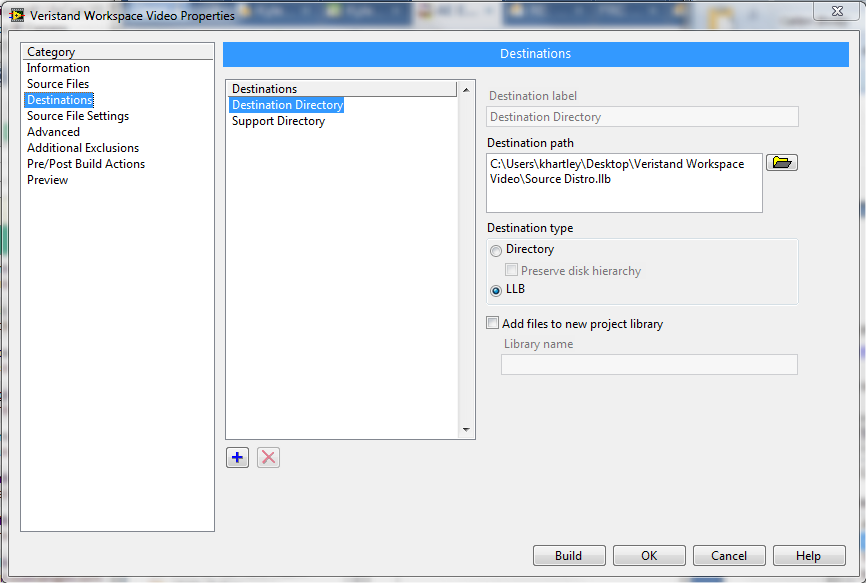
Fig 3. Destinations
From the Source File Settings page we can mark our main VI as top level in the LLB. This will make the main VI appear at the top in the LLB when we select the VI we want to run as a Custom Workspace Tool.
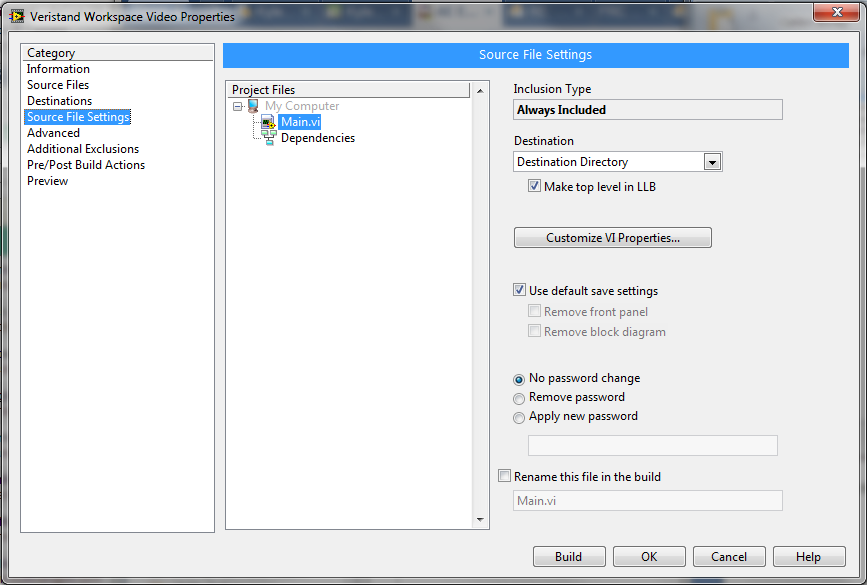
Fig 4. Source File Settings
Finally, we need to uncheck Exclude file from vi.lib, instr.lib, and user.lib if our Tool has any dependencies located in these directories. This will create a local copy to call from inside the LLB.

Fig 5. Additional Exclusions
Now we can build the source distribution and open it up from within VeriStand to use as a Custom Workspace Tool.
Adding the tool to the Workspace
To add a tool to our Workspace we need to first open the Tools Configuration Window by right-click Workspace within the VeriStand Project Explorer and click Configure Tools.
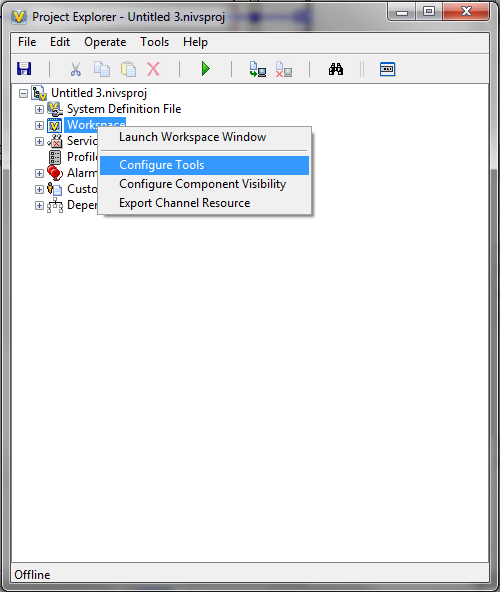
Fig 6. VeriStand Project Explorer
Second, we need to create a new item in the menu items by clicking the New Item button in the bottom left corner of the window. Give the tool a name as it will appear in the menu and select the Custom VI Tool Function from the drop down box. Use the browse button to find the path to your source distribution to select the VI that we will use for our custom tool.
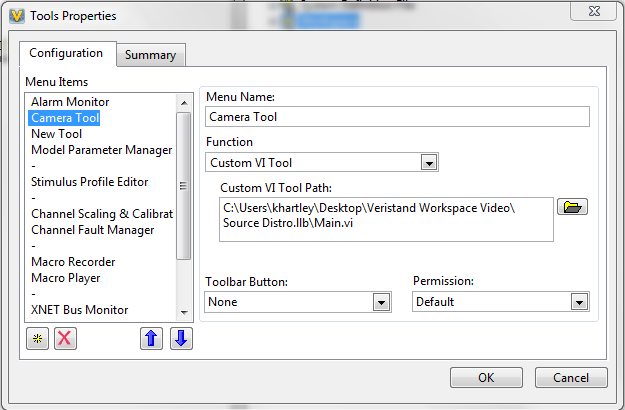
Fig 7. Workspace Tool Configuration Window
When you launch your Workspace you should now be able to select your Custom Workspace Tool to run from the Tools menu.
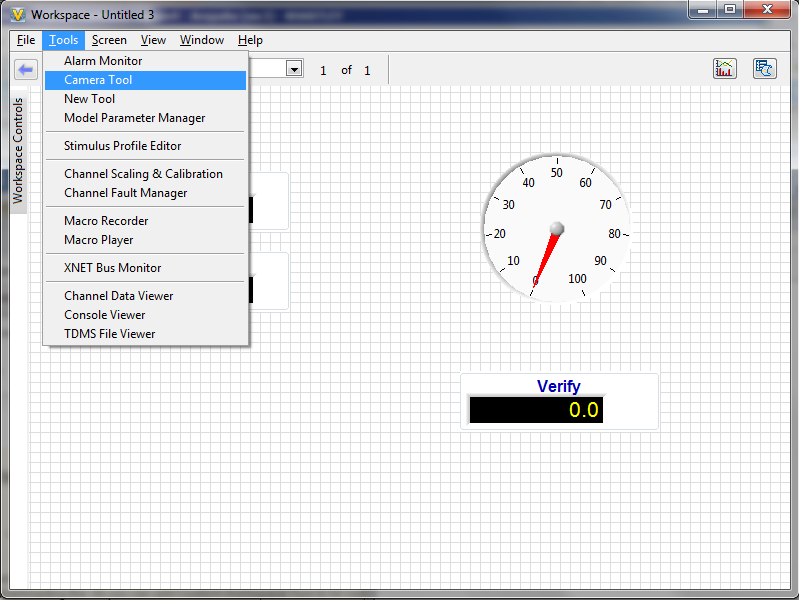
Fig 8. Calling the Custom Tool
For another example we have allows you to select cameras that have been configured in the Measurement and Automation (MAX) software by using the IMAQdx software in LabVIEW.