The implementations for current and voltage measurements are slightly different and require different adapters for the NI 9218 as described below:
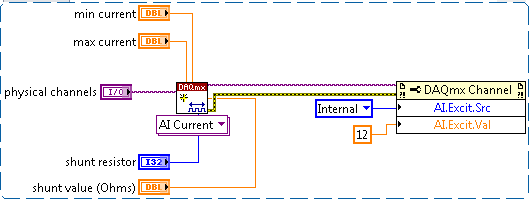
- Current Measurement with a Powered Sensor
To perform a current measurement you must use the NI 9983D/L/F Current Shunt Adapter and enable the DAQmx Channel Property Nodes AI.Excit.Src and AI.Excit.Val as shown below:
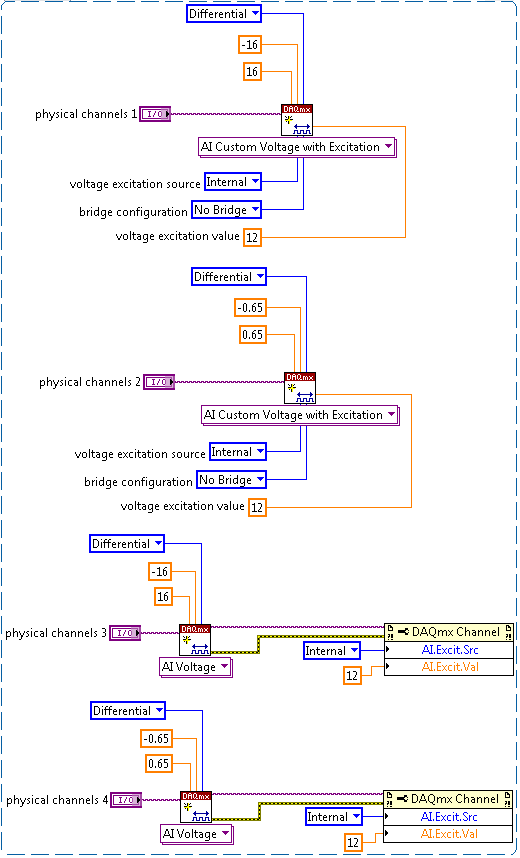
- Voltage Measurements with a Powered Sensor
1. To perform a voltage measurement with internal excitation you must select the +/-65 mV or +/-16 V measurement range/mode and use the NI 9982D Screw Terminal Adapter.
2. You have the option of utilizing the DAQmx Create Channel VI as AI Custom Voltage with Excitation, or a property node in conjunction with the DAQmx Create Channel VI as AI Voltage, as shown below:
3. (Optional) To get a V/V measurement, the AI Custom Voltage with Excitation channel has an input called use excitation for scaling, which has to be set to True, and the bridge configuration set to Full Bridge (or your desired configuration), otherwise, this property won't have any effect. The channel configuration will look similar to this:
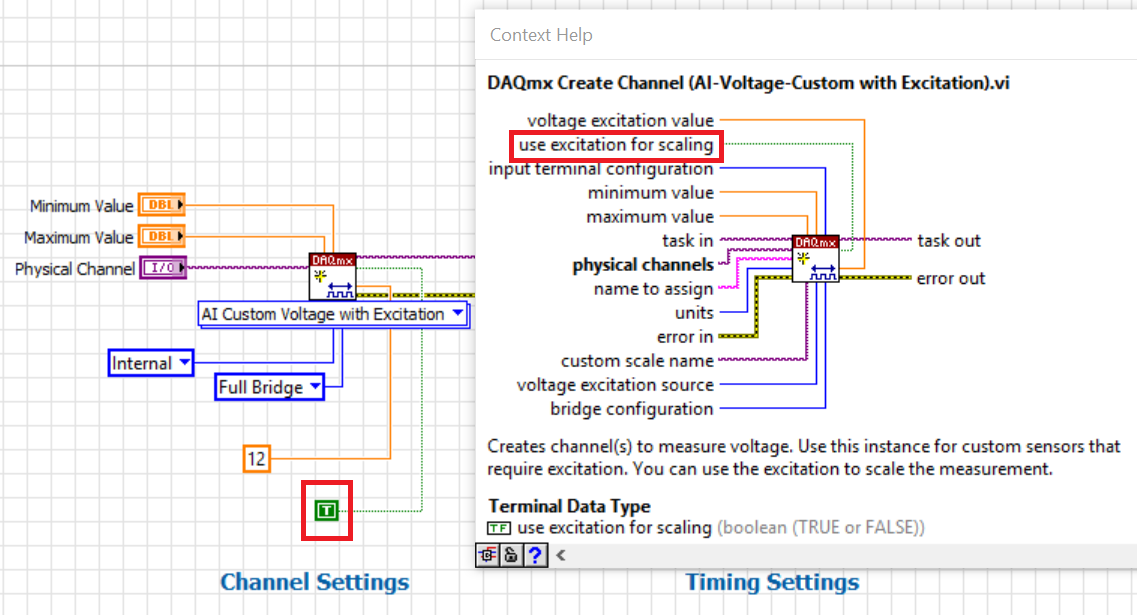
Note: When this property is used, the range (Maximum Value and Minimum Value) will be in V/V. For example, instead of using a range of ±16V, you will have to divide it by the excitation voltage and use 16V/12V = ±1.333V/V as the range.