Complete the following steps to change the SSL certificate for the System Web Server and Application Web Server:
1. Navigate to
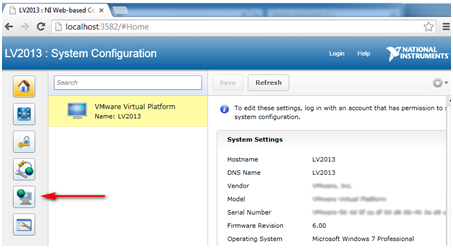
localhost:3582 to access the NI Web-based Configuration & Monitoring Utility.
Note: For LabVIEW versions prior to 2013, navigate to
localhost:3580.
2. Click the
Web Server Configuration icon on the left navigation panel.
3.Click the
Web Servers tab.
4. Select the
SSL (HTTPS) Enabled checkbox and click the
Apply button.
Note: You may have to restart your computer before the change takes effect.
5. Click the
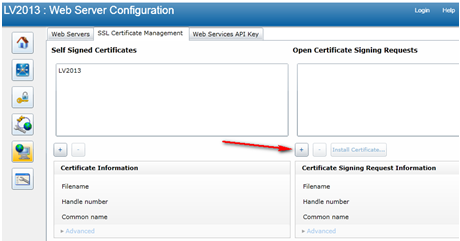
SSL Certificate Management tab.
6. Click the
Generate a new certificate signing request button under the
Open Certificate Signing Requests column.
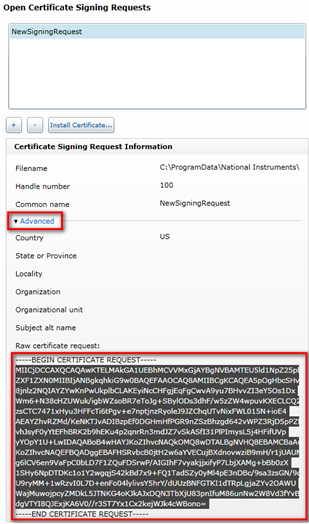
7. Complete the fields on the
New signing request dialog box. In the
Common name field, enter the IP address of the local host or a fully qualified domain name that can be resolved by the Domain Name System. Each CSR contains a randomly generated 1024-bit RSA key and uses the signature algorithm "SHA1 with RSAEncryption". The following are the default values of each field (the
Subject alt name follows a strict syntax which can be looked up in the link in the related link section):
| Common name | NewSigningRequest |
| Country | US |
| State or Province | TX |
| Locality | Austin |
| Organization | NI |
| Organizational unit | <Blank> |
| Subject alt name | <Blank> |
8. Select
NewSigningRequest in the
open Certificate Signing Requests listbox. Click
Advanced and highlight the text between
-----BEGIN CERTIFICATE REQUEST----- and
-----END CERTIFICATE REQUEST-----.
9. Complete one of the following steps to sign the Certificate Signing Request (CSR):
- Send the CSR to your IT department or PKI service provider to be signed by the certificate authority (CA).
- Sign the CSR with a self-generated CA certificate using OpenSSL (a useful method for test or lab environments). Complete the following steps to sign the CSR with a self-generated CA certificate:
- Create a text file called
mydevice.csr on your desktop. - Paste the certificate request you copied in step 8 into
mydevice.csr. - Download and install a binary distribution of OpenSSL.
- Enter the following commands to generate an RSA self-signed certificate:
openssl x509 -req -in mydevice.csr -out mydevice.crt -CA testcacert.pem - Cakey privkey.pem -Cacreateserialopenssl genrsa -out privkey.pem 1024
10. Click the
Install Certificate button in the WIF and navigate to the CA certificate you obtained in step 9.
Note: The CA certificate name must match the CSR name.
11. Click the
Web Servers tab and select
NewSigningCertificate from the
Certificate File pull-down menu.