This content is not available in your preferred language.

The content is shown in another available language. Your browser may include features that can help translate the text.

Adding EtherCAT Device to LabVIEW Project Disables NI-DAQmx cRIO Modules

Updated Dec 18, 2023

Reported In

Hardware

  • cRIO-9040
  • cRIO-9041
  • cRIO-9042
  • cRIO-9043
  • cRIO-9045
  • cRIO-9046
  • cRIO-9047
  • cRIO-9048
  • cRIO-9049
  • NI-9144
  • NI-9145

Driver

  • NI-DAQmx
  • NI-Industrial Communications for EtherCAT

Issue Details

We have a LabVIEW project using a NI-DAQmx cRIO-904x that has two Ethernet ports. We want to use this device as EtherCAT master, therefore installed NI-Industrial Communications for EtherCAT on it.

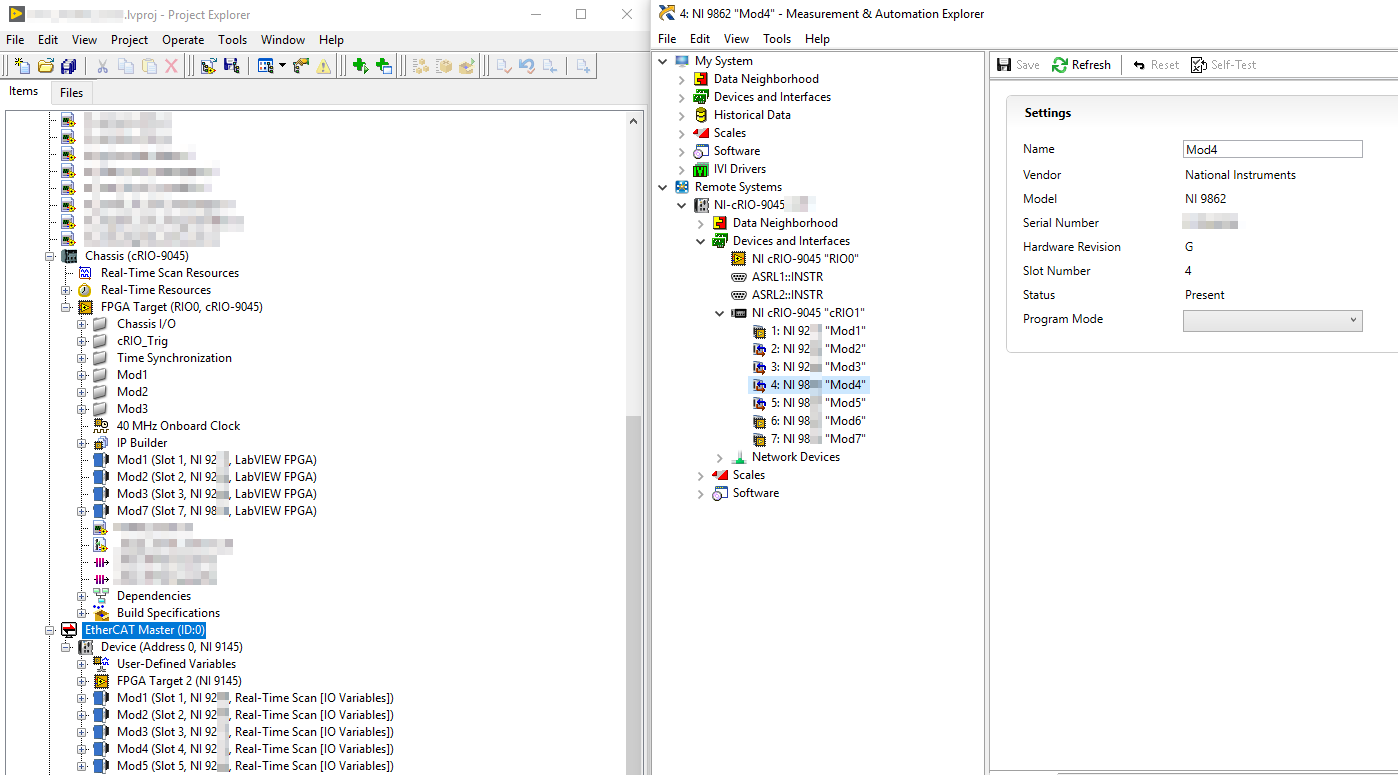
Adding an NI-914x EtherCAT CompactRIO chassis to our LabVIEW project renders the modules in the cRIO-904x unusable. They simply stop working. It happens right after adding the EtherCAT device and using "deploy" in the LabVIEW project. How to fix this?
Solution

This is a Known Issue in the NI-DAQmx device driver version 17.6 and 18.0. Find more information on this issue here: Deploying an EtherCAT Master Changes the Programming Modes on cRIO-904x to Real-Time Scan (ID 706379).

Basically, the modules' Program Mode needs to be set again. This can be done either manually in NI Measurement & Automation Explorer (NI MAX), or programmatically using LabVIEW code.
  • To reset the Program Mode manually:
    1. Open NI MAX
    2. Navigate to Remote Systems » <your cRIO controller> » Devices and Interfaces » <your cRIO chassis>
    3. For every module present, click its entry on the left panel, then go to the right panel, and select a Program Mode. Click Save after selecting it.
 
  • To reset the Program Mode programmatically, please find the information given in the Solution section of this article: How Do I Set the Module Programming Modes On My CompactRIO? . VIs demonstrating the procedure are attached to the linked article. Find attached an example for setting the Active Mode from a 904x cRIO Master having DAQmx modules (code provided as is).

Additional Information

Another possible issue could be a disabled distributed clock on the slave device. To enable it, find the EtherCAT device in your LabVIEW project, right-click it and click Properties. Then navigate to EtherCAT:Advanced:Distributed Clock, check Enable distributed clock, and click OK:
Products may include a surcharge. Surcharge is calculated during checkout for U.S. customers. Learn more

Was this information helpful?

Yes

No