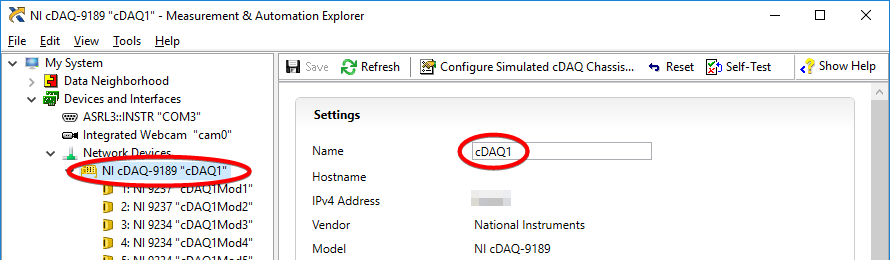
As NI Measurement & Automation Explorer (MAX) shows the device, it is installed correctly and is ready to be used with LabVIEW.
An easy way to use the device in LabVIEW is utilizing an example of LabVIEW's Example Finder. Follow these steps to do so:
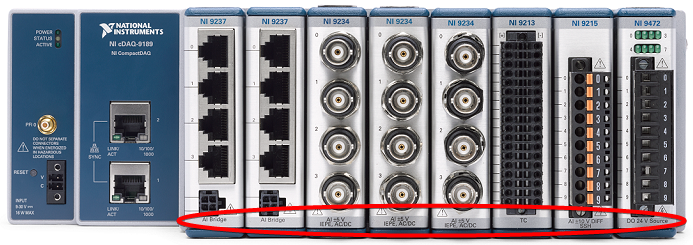
- Determine which hardware module type(s) are installed in the DAQ device. Typically there will be at least one Analog Input, Analog Output, Digital Input, or Digital Output module. They are marked "AI", "AO", "DI", or "DO" at their front's bottom:
- Locate the cDAQ in NI MAX, and note its name. A newly installed device typically has a name like "cDAQ1":
- Open LabVIEW.
- Go to "Help » Find Examples..." to open the Example Finder.
- Navigate to an example that matches one of the module's types from step 1 above, e.g. Task » Hardware Input and Output » DAQmx » Analog Input » Voltage - Finite Input.vi. Other suited examples are (... » Analog Output » Voltage - Finite Output.vi, ... » Digital Input » Digital - Finite Input.vi, or ... » Digital Output » Digital - Finite Output.vi).
- Open that example VI.
- On the VI's Front Panel, you'll see the Channel Settings section top left. Open the corresponding drop down menu.
- You should see the channels with the device's name from step 2 here. You might have to click "Browse...".

- You can now execute the example VI to perform the input or output task specified by the example VI you chose.