Solution
One simple way to transfer your project file and its contents is to use a zip file, which will compress them to save disk space:
1. Open your project file (.lvproj) and right-click on
Build Specifications.
2. From the menu, select
New»Zip File and left click on this as shown in the image above. A pop-up window should appear called
My Zip File Properties.
3. On the left, there are four options in the Category box. Zip information will be the default category displayed first and you can use this to assign a name to your build specification using the Build Specification Name box. For example, the image above shows the name as My Zip File. You can also choose the location on disk to where this will be saved in the Destination field, as well as adding comments in the Comments field.

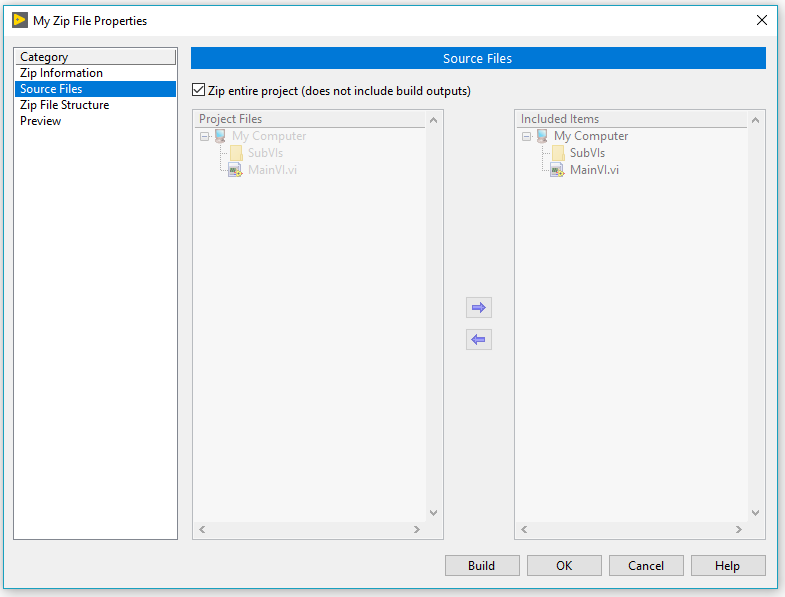
If you select Source Files from the category field on the left it will look like image above. By checking the Zip entire project (does not include build outputs), you will add all the files in your project excluding the build specifications and their outputs. By deselecting this option, you can manually add the files from the Project Files column on the left to the Included Items on the right. You can add/remove a file by selecting it with a left click and then left clicking the blue arrow in the direction you'd like to send it.
Zip File Structure allows you to modify the folder structure and the way you'd like to display these when unzipped.
By selecting Generate Preview under the Preview Category, you can generate a snapshot of the file hierarchy inside the .zip before it creates it.
4. Click on the Build button to the bottom right to start the build process now and generate the *.zip file. If you want to save the Build Specification to build later on, click Ok.

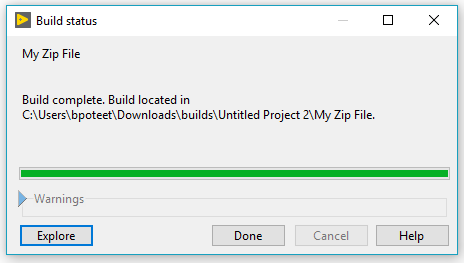
Another window will pop-up when you click Build with a green progress bar. Upon Completion, clicking on the Explore button will open up the folder location containing your .zip file.